How to add WooCommerce to WordPress using a hidden development area

Adding a WooCommerce storefront to your existing WordPress website can be a very profitable move. An e-commerce area lets you sell products or services directly to visitors, and when set up properly it can practically run itself. However, you’ll need to think carefully about exactly how you add WooCommerce to WordPress without affecting your live site.
For best results, you’ll want to develop your new store privately, and only make it available to customers once it’s completely ready to go.
Most people do this by creating a separate staging site, adding WooCommerce, and then overwriting the main site when it's ready to launch. This causes various problems, such as version control issues and potential loss of data when you need to make changes to the live site. Fortunately, there's an easier way.
In this quick tutorial, we’ll explain how to add WooCommerce to WordPress seamlessly. You'll use the WooCommerce Private Store plugin to create a hidden development area. It's like adding a 'coming soon' page to WooCommerce or putting your store in maintenance mode, while the rest of your website remains public.
When your site goes live, you'll deactivate the private store plugin and your WooCommerce store will instantly become available on your existing website. You won't have to worry about version control or staging sites, and it just takes a few minutes to set up.
Let’s get to work!
Why you should use a hidden development area to add WooCommerce to WordPress
Many people start up a blog or a small business site, only to later decide to add in a storefront. Selling products and services through your website does take a little work, but the benefits are more than worth it.
WordPress doesn’t offer a lot of e-commerce specific functionality, so you’ll need a dedicated tool for setting up your new shop. We highly recommend WooCommerce:
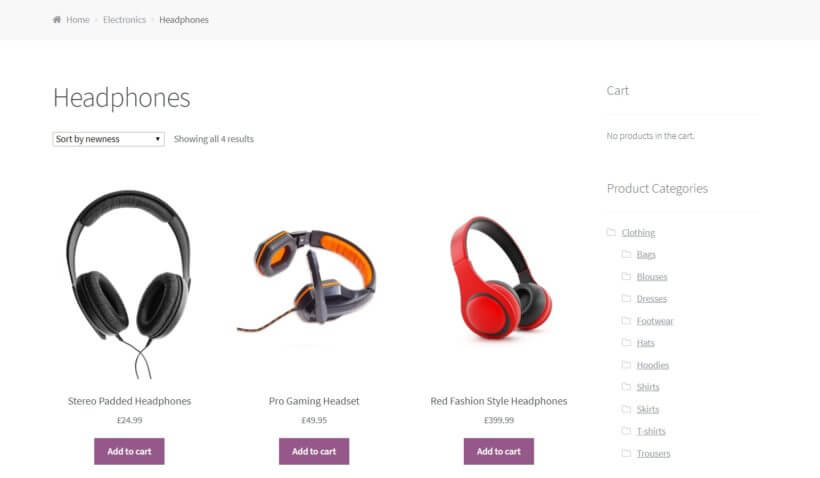
The free WooCommerce plugin adds a fully-featured store to your website, without disrupting any of your existing pages or content. No matter how established your site is, setting up an integrated WooCommerce shop is quick and painless.
However, you will want to spend a little time working on your store before making it live – creating key pages, uploading products, and so on. You'll want to add menu links to your store pages, and icons linking to the cart and checkout. What’s more, you won’t want this work-in-progress to be publicly available. Instead, you’ll want visitors to continue seeing the original website until the new store is designed and ready.
The easy way to add WooCommerce to WordPress
There are a few ways you can handle this. For instance, you can set up a separate staging site that’s a carbon copy of your live website, add WooCommerce to WordPress, and then merge your changes. Unfortunately, this is a time-consuming, complex process that’s fraught with the potential for errors.
Clearly, you need a better solution. That’s where WooCommerce Private Store comes into the picture:
This plugin has a number of useful applications. Its primary use is enabling you to set up a private storefront, where users have to log in before they can view its contents. For example, some people use it to create a private members-only club. However, it also lets you temporarily hide your new WooCommerce store while it’s being developed. Then, you can easily make the shop publicly available when you’re done setting it up.
This is a much simpler and more temporary solution than creating a full staging site and then copying it over your live site. To illustrate, let’s take a look at how the process works from start to finish.
How to add WooCommerce to WordPress using a hidden development area (in 4 steps)
The following steps will show you how to set up a hidden WooCommerce store on your live site. You'll also learn how to make it visible only when you’re ready to do so. All you’ll need to get started is a WordPress site, and the WooCommerce Private Store plugin.
Step 1: Add WooCommerce to WordPress
The first thing you’ll need to do is add WooCommerce to WordPress. You won’t actually be setting up your store yet – after all, you’ll want to be sure it’s hidden first. However, WooCommerce will need to be installed before you configure your hidden development area.
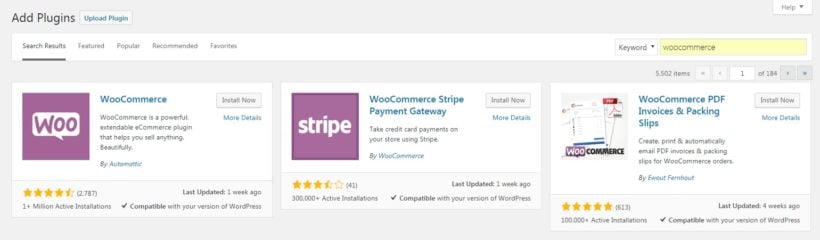
Fortunately, WooCommerce is a free plugin that’s simple to set up. Log into your WordPress dashboard, and navigate to Plugins > Add New. Use the search bar to find 'WooCommerce', and click on the button labeled Install Now:
After a few moments, another button will appear, this one labeled Activate:
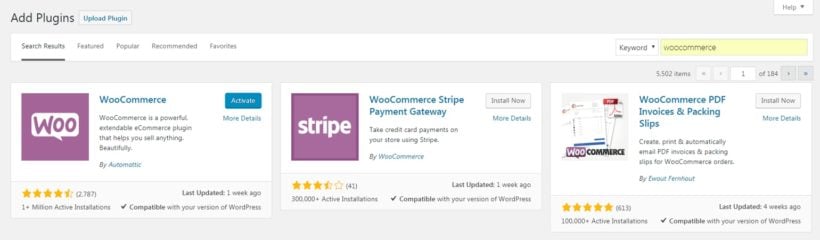
Select that one as well, and WooCommerce will be ready to go on your site. At this point, you’ll be able to start setting up your shop and adding products. Before you do that, however, it’s important to make sure your fledgling store is safely locked away.
Step 2: Set up your hidden development area
If you haven't done so yet, go ahead and purchase the WooCommerce Private Store plugin. You’ll be provided with a zipped file containing everything the plugin needs to work, which you’ll need to install on your site.
After that, navigate to WooCommerce > Settings in your dashboard. Select the Private Store tab:
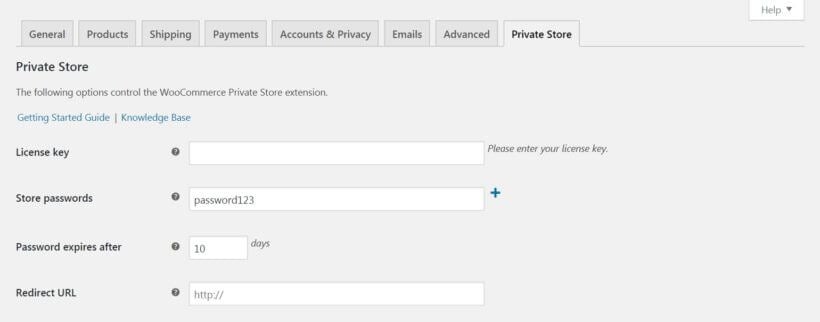
Enter the license key you were given when you bought the plugin. Then, save your changes. This will fully activate WooCommerce Private Store, making it ready to use.
The best part is that this is all you need to do. Once the plugin has been activated using a valid license key, it will automatically hide WooCommerce from public view. This means that all pages, features, and products associated with WooCommerce won’t be available on the front end. If anyone does try to view those areas, all they’ll see is a login form:

You can customize the login form on the plugin settings page. However, it's not very important because it's unlikely that anyone will see it anyway. All the WooCommerce-related pages are hidden from public view, so the only way someone would ever see the login form is if they guessed the URL of one of these pages.
Show the WooCommerce hidden development area to logged in users or specific roles
Of course, you want logged in administrators to be able to access the hidden development area. That's how you'll develop and test your WooCommerce store, while keeping it hidden from other users.
There are two ways to do this. Use the first option if your website isn't set up to allow normal visitors to create accounts. That's how most non-WooCommerce websites work. However, if you let people create accounts for other purposes - such as blog commenting or membership plugins - then use option 2 instead.
- Option 1 - Tick the 'Logged In Users' box on the plugin settings page, then select the 'administrator' from the user roles option that appears underneath. This will automatically unlock the store for all logged in administrators, while leaving it hidden from guests and other user roles.
- Option 2 - Leave the 'Logged In Users' box unticked on the plugin settings page, and enter 1 password which will unlock the store.
Once administrators have unlocked the store using either of these methods, they will be able to see the full WooCommerce store. This includes viewing menu links to the store pages in the front end, and viewing those pages. They can also add products to the cart and test the checkout process. This lets you and your development team work on the new WooCommerce area while it remains hidden from everyone else.
Step 3: Create your WooCommerce store
Now that you’ve made WooCommerce inaccessible to visitors, it’s time to set up your store:
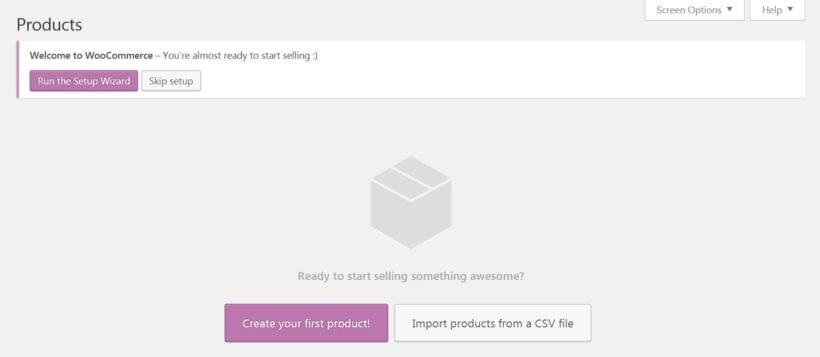
We won’t go through that entire process here, since there’s plenty of information elsewhere that can help you out. Still, let’s summarize the basic steps involved in getting your WooCommerce store ready to go:
- Go through the WooCommerce setup wizard. In just a few screens, you’ll be able to set up your store’s basic features and enter crucial information about pricing, shipping, and more.
- Configure your store’s settings. While the WooCommerce wizard covers the most crucial options, there are a lot of other settings you may want to customize to better suit your needs.
- Add each of your products or services to the store. This can be done in the Products tab, which offers lots of options to fully customize your offerings.
We recommend taking your time with this process. Check out each product and store page on the front end, and walk through the buying and checkout stages as though you were a customer. You’ll want to ensure that your store looks and acts exactly the way you want it to before you make it live.
Step 4: Make your WooCommerce store visible to the public
When you’re confident that your store is ready to launch, you’ll need to make it visible to the public. Fortunately, this is the easiest part of the entire process.
All you need to do is deactivate the WooCommerce Private Store plugin. To do that, go to the main 'Plugins' list in the WordPress admin, and click to Deactivate WooCommerce Private Store.
This will automatically unhide your hidden development area and make your store available for all to see. At this point, you can uninstall the plugin if you like. Alternately, you can keep it deactivated on your site, in case you need it in the future. (For example, you might want to temporarily hide your WooCommerce store while making changes or updates.)
Conclusion
If you want to build a positive reputation online, your website should always look professional and fully-functional. This means that if you need to make large-scale changes, you’ll want to keep your development work hidden from public view. That includes keeping your in-progress store private while you add WooCommerce to WordPress.
As we’ve demonstrated, the process of doing this is remarkably simple when you use WooCommerce Private Store. It's much quicker than installing WooCommerce on a separate site and merging with the live site, and avoids all the problems.
To recap, here are the four steps you’ll want to follow:
- Add WooCommerce to WordPress.
- Set up your hidden development area.
- Create your WooCommerce store.
- Make your WooCommerce store visible to the public.
Do you have any questions about how to add WooCommerce to WordPress? Ask us anything in the comments section below!
Image credit: pxhere.
6 Comments
I am searching on google how to setup Woocommerce on WordPress and I find your post. And after reading your content, hopefully, now we can setup Woocommerce on WordPress easily. Thank you!
Hi, Devid. Thanks for your comment. We're glad to hear that you find this guide helpful in setting up WooCommerce on WordPress. Should you be interested in any of our professional, high-quality, and lovingly handcrafted plugins for WordPress and WooCommerce, please feel free to reach out! Have a great day.
Thanks for guiding us with these tips. i can easily setup my Woocommerce store by these guidelines.
Hi, Donatello. Thanks for your comment. I'm glad this was helpful to you for setting up WooCommerce in WordPress privately, protected from public view until you're ready to launch and go public.
Hi I wonder if you can advise me? I am currently transferring html sites to wordpress using Divi. I have the sites set up dev. sites that will replace the old sites when ready. I am confused as to whether the woo commerce store links and set up will work properly when the site is set live and what is the best way to proceed? Thank you for your advise.
Hi, Michelle. Thanks for asking and sorry for the late reply. To ensure that links and the set up get changed when you migrate from your WordPress development/staging sites to live, I suggest using WordPress migration plugins such as All-in-One WP Migration or Duplicator. Additionally, should any of the links still be pointing to your staging location rather then live/production, you can also use the Better Search Replace plugin to run a search/replace on the database for everything to work correctly. Finally, your web hosting provider should also be have good advice about this, as you'll be running everything under their setup/config. Thanks!