2. Bulk Variations settings page
The WooCommerce Bulk Variations plugin settings page (WooCommerce → Settings → Products → Bulk variations) lets you display variations in a quick buying grid. You can also use it to edit variations in bulk.
This article explains how to use the plugin settings page to control the appearance and content of the variations grid. These options will set the defaults for all your variations grids. You can override these for each individual product.
You can also configure the main settings in the plugin setup wizard, which opens when you first activate the plugin and can be relaunched from the settings page.
License key
Enter your license key here. This is essential for the plugin to work.
Grid options
Use the variations grid for all products with 1 or 2 variation attributes
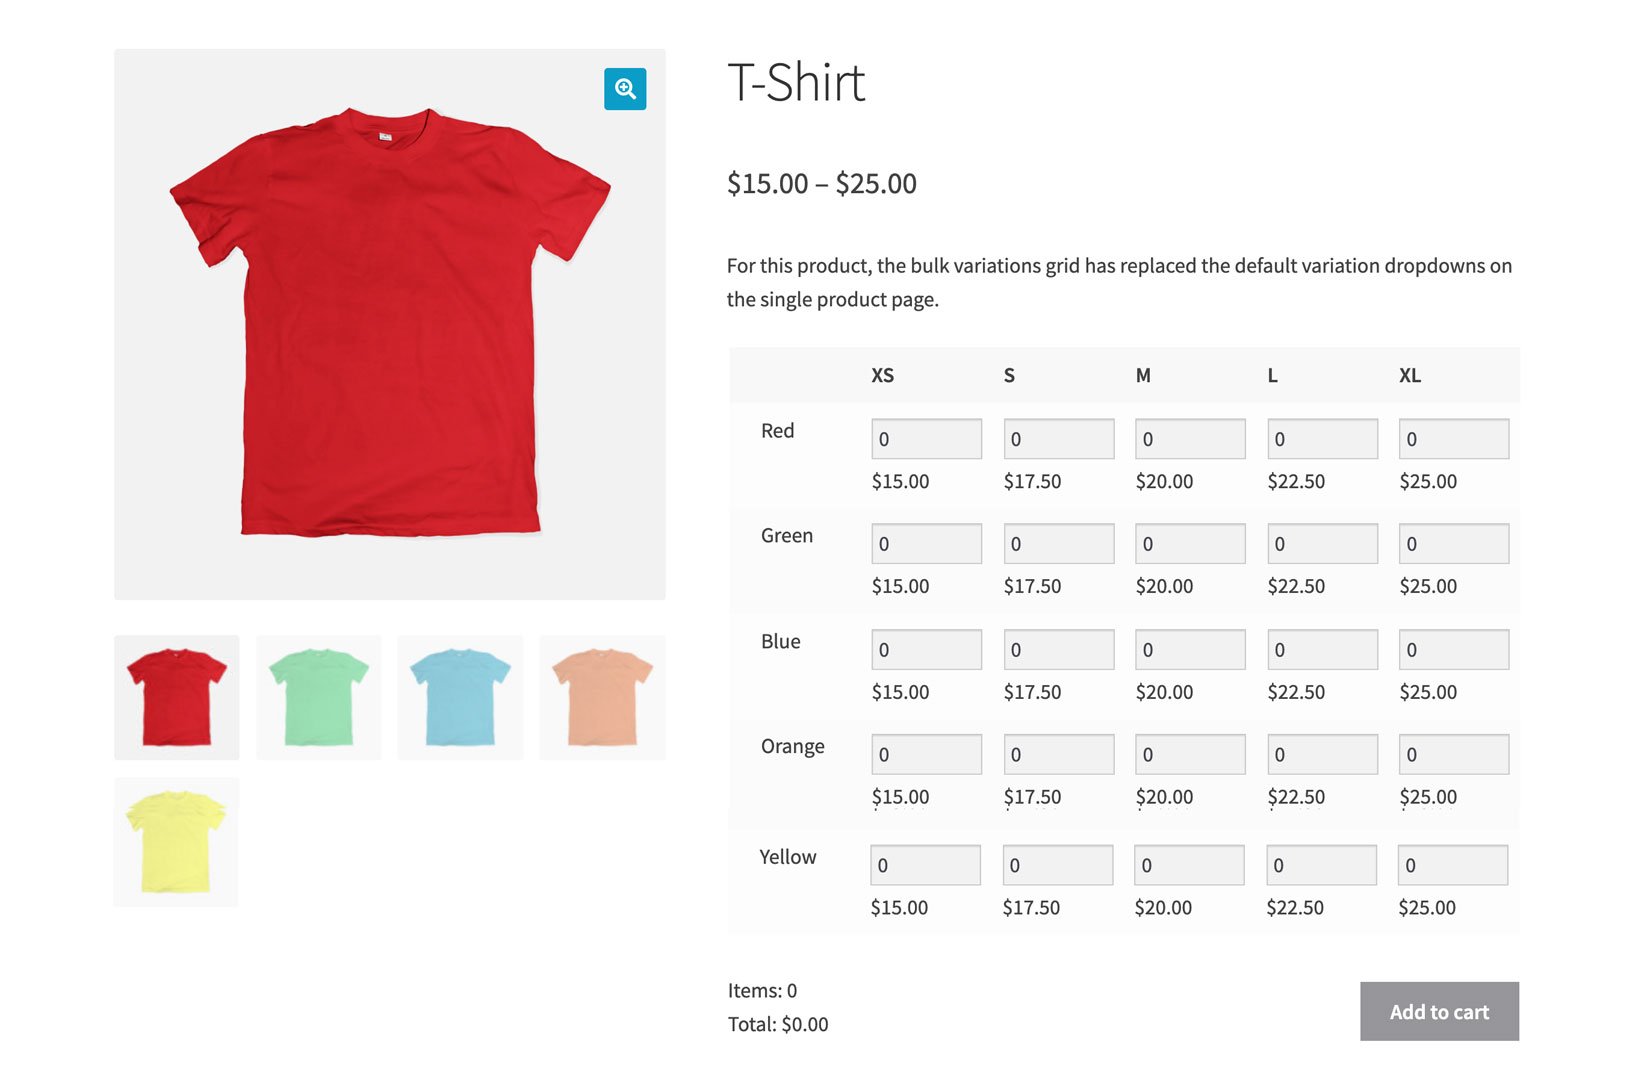
Activating this option will globally enable the variations grid for all products that have 1 or 2 attributes which are used for variations (e.g. color and size).
The grid will appear instead of the usual dropdowns, with the add to cart button underneath. If you don't want the grid to appear here, then you can manually add the variation grid to other locations on the single product page. Please see the article on creating variation grids.
Use the variations grid for all products with 3 or more variation attributes
Activating this option will globally enable the variations grid for all products that have 3 or more attributes which are used for variations (e.g. color, size, and sleeve length).
Display the variations grid without quantity boxes or add to cart button
This option transforms the bulk variations grid into a read-only price matrix for your variations. It removes the quantity boxes and add to cart button, and simply displays the variations with prices.
Display stock information in the variations grid
Enable this to display the stock for each variation underneath the price.
Display description in the variations grid
Enable this to display the variation description underneath the stock information.
Hide prices if all variations have the same price
By default, the variations grid will display the price of each variation underneath its quantity box. You may not want this if all your variations are the same size.
Enable this option to remove the prices from the variations grid for products where all the variations are the same price. Prices will continue to appear for your other products as usual.
Variation images
Use the dropdown to enable/disable images in the bulk variations grid, and to choose where they appear. The options are:
- Do not show any images - The variation grid is created without images.
- Show horizontally - The images appear as columns along the top row of the grid.
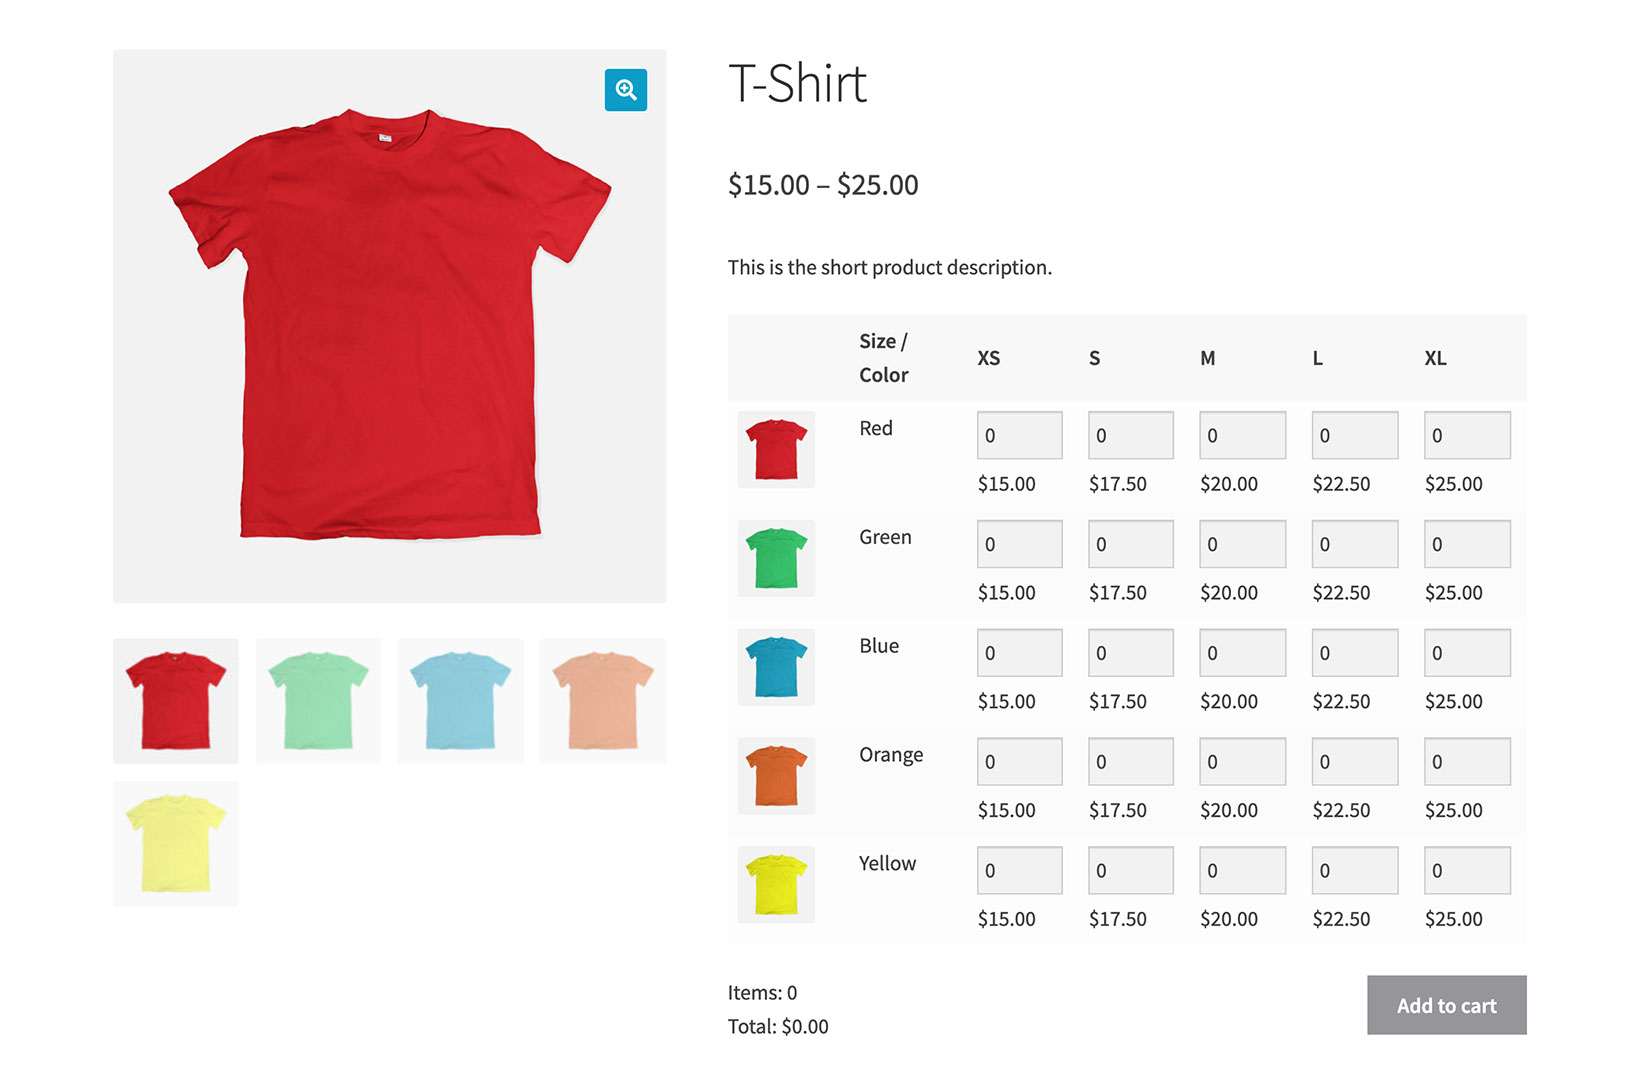
- Show vertically - The images appear as rows along the left hand column of the grid.
-

- No images
-

- Vertical images
-

- Horizontal images
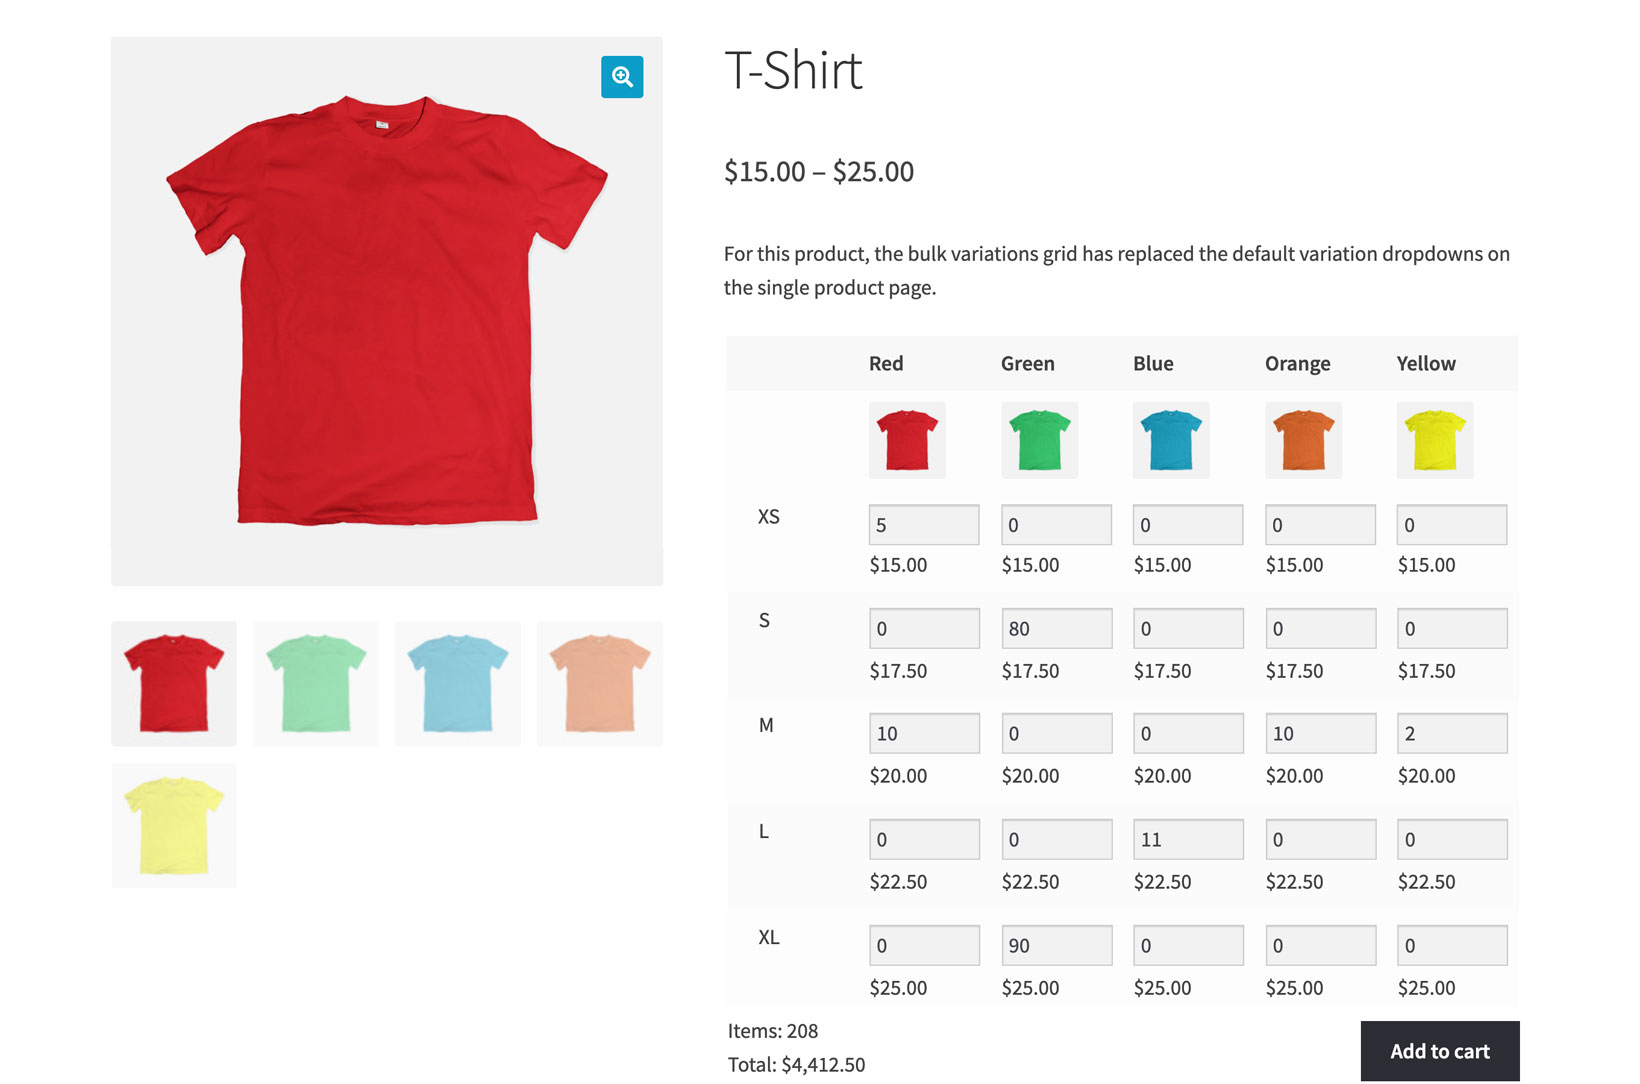
If enabled, then an image will be displayed for variations that have one. If a variation does not have an image, then the main product image will appear instead.
Tip: If you need to add images for more than one variation at once, then you can save time with the bulk editing feature.
Show variation images in product gallery
Enable this option if you want all your variation images to appear in the image gallery on the product page.
This option is disabled by default.
Open variation images in a lightbox
By default, if a customer clicks on a variation image in the grid, then the image will replace the main image on the product page. If you prefer, then you can enable this option to open the images in a lightbox when clicked.
This option is only visible when 'Display an image for each variation' is enabled.
Default attributes
Use these dropdowns to select which global attribute will be used for the rows and columns of the variations grid.
For example, if you select 'size' as the default horizontal attribute and 'color' as the default vertical attribute then all products which have 'size' and 'color' attributes will display the size options as columns and the color options as rows.
When this option is set as "Automatically select the best attributes", the plugin will use the attribute with the lowest number of terms for the columns (horizontal) and the other for the rows (vertical). You can also set the first attribute to be always displayed horizontally and the second attribute vertically or vice versa. These automatic layouts will be used regardless of whether a product includes global or custom attributes.
Notes:
- The two select boxes list only the global attributes that you create in Products → Attributes. If the products in your store require product-specific attributes, then you can only choose one of the automatic selection: the selected choice for the default attributes will still work and adapt to the custom attributes of each product.
- The automatic selection determines the best choice of attribute depending on the terms that are added to each product to create variations. For example, a "Color" attribute might have 8 global terms (red, blue, orange, green, yellow, white, black and gray) but if only 3 of them are used for variations, that is the number the plugin will use to choose the best attribute for the columns.
Single variation attribute
Use this option to select a layout for any variable products which only have one attribute which is used for variations. There are two options:
- Display horizontally - this lists the variations horizontally on the same row, with each variation in a separate column.
- Display vertically - this lists each variation vertically, on a separate row of the grid.
FAQ
How do the global settings relate to the per-product settings?
The options on the plugin settings page apply to all products that can have variation grids, except where you have set the options individually for specific products.
When you create a new product, it inherits all the options from the global settings page. You can then override these for each individual product. Once you have overridden the global settings for an individual product, any future changes that you make to the global settings will not affect that specific product. Global changes will only affect existing products where you have not overridden the global settings.
Creating variation grids
Once you’ve chosen your default settings, it’s time to start creating variation grids.