Posts table columns
Posts Table Pro gives you full control over the data displayed in the table. You can choose which columns to include in each table, as well as edit or hide the column headers.
How to add and edit columns
You can manage your table columns as follows:
- Add Table - A column option appears when you use the table builder to create a new table (Post Tables → Add New).
- Edit Table - The column option is available when you edit a table (Post Tables → Edit).
- Settings Page - You can set default columns on the settings page (Post Tables → Settings). These will be used for all new tables, and you can override the defaults for each individual table.
- Shortcode - Available as a
columnsshortcode option so that you can configure columns directly in the[posts_table]or[posts_table_template id=""]shortcode (examples below)
Available columns
You can choose as many columns as you want and in any order. You must separate each column with a comma. It doesn’t matter if there are spaces before or after the comma, but there must not be any spaces before or after the = sign.
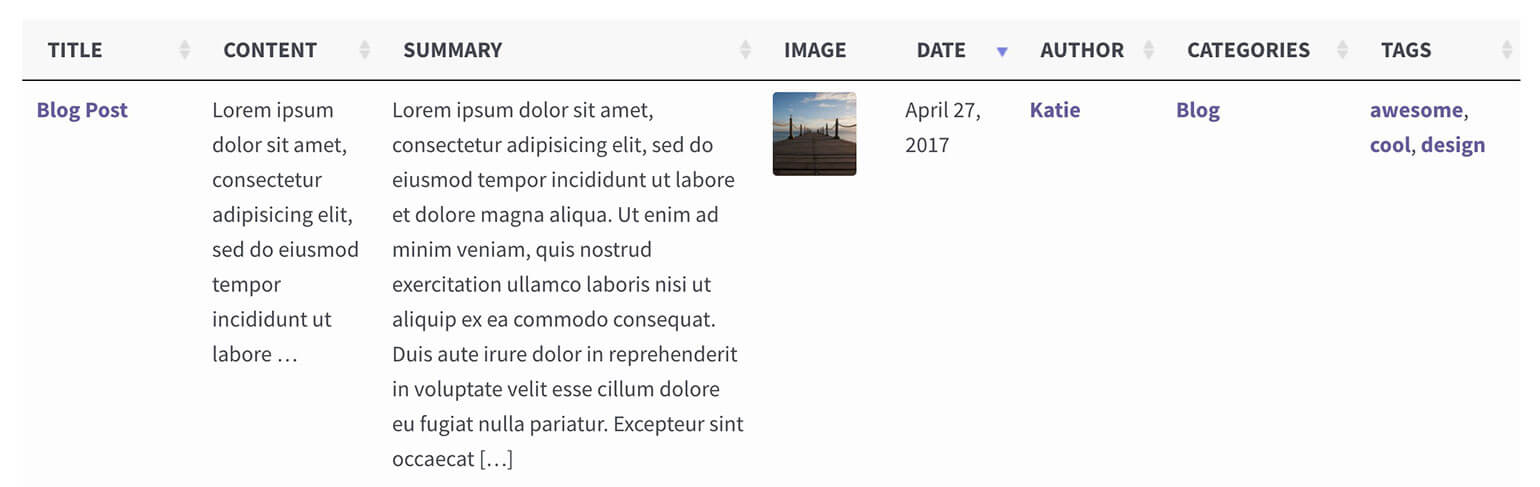
Here’s an example of a shortcode to display blog posts with columns for title, date, post author, excerpt and button:
[posts_table columns="title,date,author,excerpt,button"]
- ID - Displays the post ID, which is a unique number used internally by WordPress for each post.
- Title - The main post title.
- Content - Shows the post content but will be truncated to 15 words. You can modify this length by setting the Content length option.
- Excerpt - Shows the post excerpt (or a dynamically generated excerpt based on the main content if there is no excerpt). It will be truncated to 55 words (the WordPress default) but themes and plugins sometimes override this value. To have precise control over the length, you can set the Excerpt length option.
- Image - Displays the featured image (i.e. the post thumbnail) for the post or page (see Image size option to set a custom size).
- Date - Displays the date that the post was published.
- Date modified - Displays the date that the post was last updated.
- Author - Displays the post author’s display name.
- Categories and tags - These columns only apply to standard WordPress posts posts only (not custom post types) and will display the categories or tags for each post (comma-separated if there are more than one).
- Status - Shows the status of the post (e.g. draft, pending, publish, etc).
- Button - Displays a button linking to the single post page. If you're using Posts Table Pro with the Page Links To plugin, which lets you replace the single post page with another URL, then this will work with the button column. For example, this is useful if you're creating a resource library and want to add 'Download' buttons to the table. You can change the button text using the Button text option.
Column shortcode options
Use the columns option to set columns directly in the [posts_table] or [posts_table_template id=""] shortcode.
The available columns are: id, title, content, excerpt, image, date, date_modified, author, categories, tags, status, button, or any custom field or taxonomy. These column names are case sensitive and should always be lower case. (If you're using custom column headings then these can be any case.)
Examples:
[posts_table columns="title,excerpt,button,tax:company"]-
[posts_table_template id="1" columns="title,excerpt,button"]
Custom field columns
Custom fields are a good way to include other types of content in the table. You can use them to store links, buttons, icons, shortcodes from other plugins, etc.
If you’re adding shortcodes to your custom fields, you will need to set shortcodes to true.
Tip: Use the free Easy Post Types and Fields plugin to create custom fields.
Using the table builder
The method for adding custom field columns depends on how you created the custom fields.
Custom fields created using the ACF or Easy Post Types plugins
If you created the custom field using either the free Easy Post Types and Fields plugin, ACF or Advanced Custom Fields Pro then they will appear in the list of columns for you to select. For example, you have an ACF field called "Reference" then a "Reference" column will appear in the list of available columns. You can then add this to the table, just like any other column.
Custom fields created using any other method
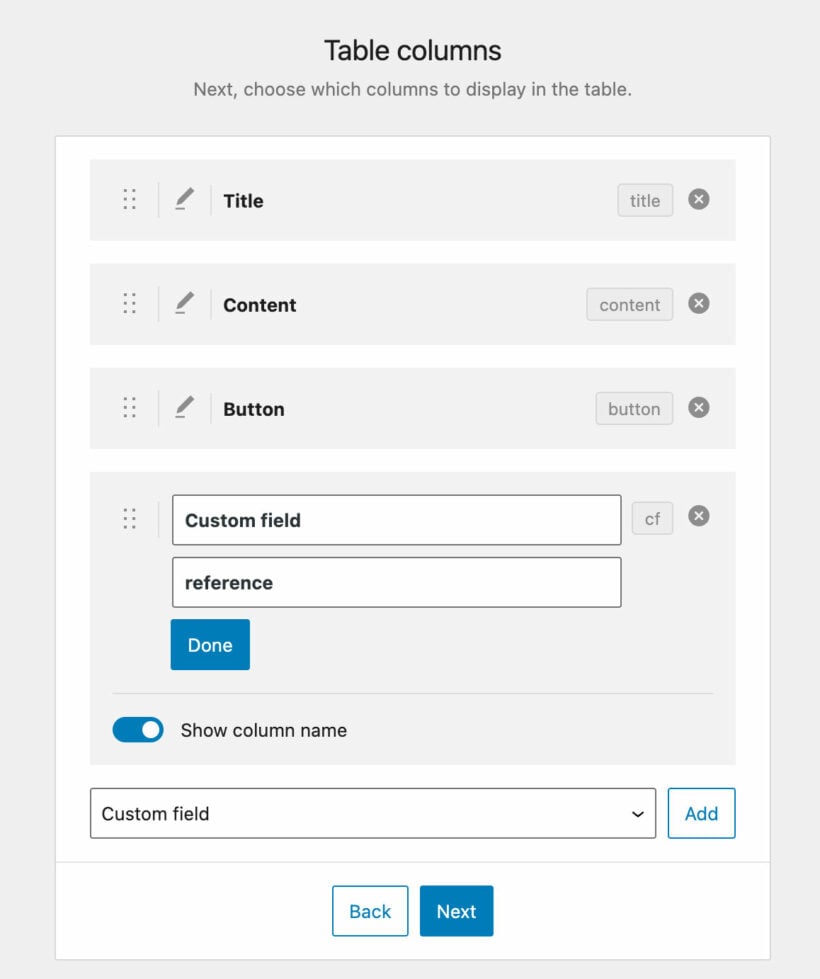
If your custom field was created using any other method - for example, using another plugin or programmatically - then you need to add it as a column manually:
- Select 'Custom field' from the list of available columns on the 'Table columns' page of the table builder.
- Add the custom field name, e.g. "reference" if the custom field is called "reference".
Using a shortcode
When you add custom field columns directly in the [posts_table] or [posts_table_template id=""] shortcode, you must add cf: before the custom field name to tell the plugin that it is a custom field. The correct format is: cf:<field name>.
Here’s an example adding two custom fields – my_field1 and my_field2:
[posts_table columns="title,content,cf:my_field1,cf:my_field2"]
Custom fields created using the Toolset plugin
If you're using Toolset to create your custom fields, then you need slightly different syntax to display them in the table.
Toolset adds wpcf- to the start of the custom field name, so if you create a custom field called 'link' (for example) then the correct syntax will be wpcf-link. This means that if you want to create a table with columns for name and a custom field called 'link' then you would need to add it as follows:
[posts_table columns="name,cf:wpcf-link"]
ACF repeater fields
If you're using Advanced Custom Fields Pro repeater fields, you can create a column using the name of the parent repeater field. This column will list the content of all the repeater fields for that post, separated by commas. It is not possible to display repeater sub-fields as separate columns in the table.
ACF group fields
Please see our separate article on how to display sub-fields which are part of an ACF group field.
Custom taxonomy columns
Custom taxonomies are a good way to add extra ways to group and filter your posts, similar to categories and tags. You can display them as columns in the table.
Tip: If you haven't created taxonomies yet then you can easily do this with the free Easy Post Types and Fields plugin.
For taxonomies (other than post categories and tags), use the format tax:<taxonomy slug>. So, for example, to display for a custom taxonomy with the slug document_type, you would use:
[posts_table columns="title,content,tax:document_type"]
You can find the taxonomy slug by going to the WordPress admin and finding the main page which lists those taxonomies. For example, WooCommerce product categories are edited under the Products → Categories menu. On that page, the URL at the top of the screen shows “…edit-tags.php?taxonomy=product_cat….”. The ‘product_cat’ bit after the equals is the taxonomy slug you need to use.
Using the table builder
On the 'Table columns' page of the table builder, the custom taxonomies for your selected post type will appear in the list of available columns. For example, if your post type has a 'Company' taxonomy then this will appear as a possible column. Simply select a taxonomy from the dropdown to add it as a column.
Using a shortcode
When you add custom field columns directly in the [posts_table] or [posts_table_template id=""] shortcode, you must add tax: before the taxonomy name to tell the plugin that it is a custom taxonomy. The correct format is: tax:<taxonomy_slug>.
Here’s an example adding two custom taxonomies – company and team:
[posts_table columns="title,content,tax:company,tax:team"]
Author column
The Author column displays the name of the WordPress user who created the post. If you're creating an author column and need more flexibility - for example because you are creating a publications database and want to add the publication author - then you should use a different type of column instead. For example:
- You could use the categories or tags column and rename it to 'Author'.
- You could create a custom taxonomy for 'Author'.
Creating custom columns programmatically
Developer can use custom columns to display data programmatically which is not available as one of the standard table columns.
Choosing your own column headings
You can change the wording of your column headings, or hide them completely.
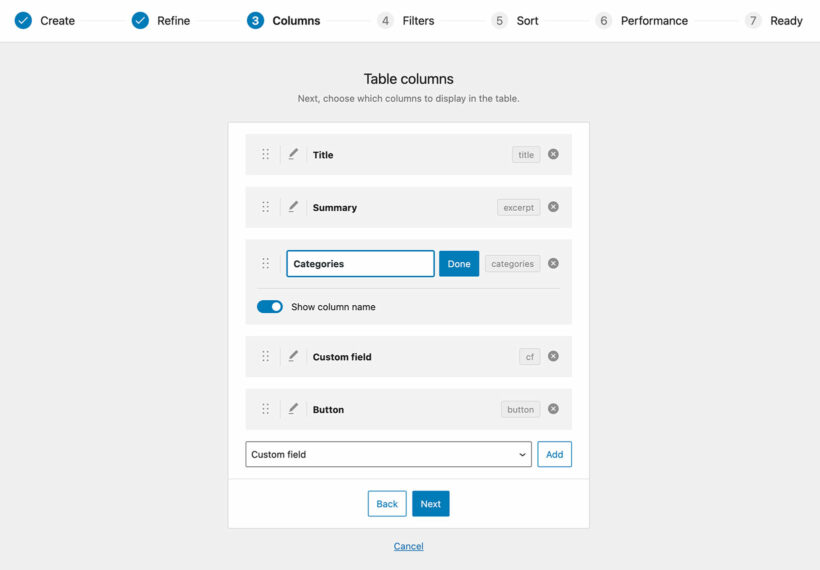
Using the table builder
To edit a column header in the table builder, click the pencil icon next to the column. Change the column name to whatever you like, or deactivate the 'Show column name' toggle to remove the column name completely.
Using a shortcode
You can set custom column headings by adding a : (colon) after the column name and then entering your custom wording. Moreover, you can use this method to change the wording and/or capitalization of column names.
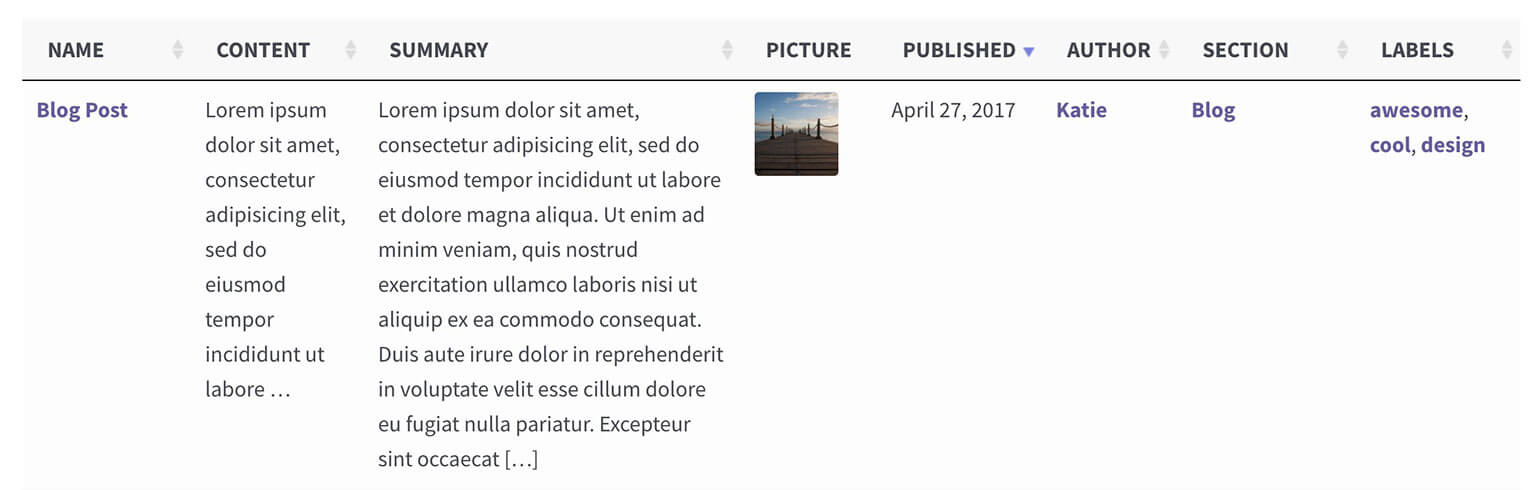
For example, the default heading for the title column is "Title", but you can change it to "MY HEADING" as follows:
[posts_table columns="title:MY HEADING,date,author,content"]
Here’s a more complex example which sets the title column heading to “Property Description”, the date column to “Added On”, a custom taxonomy to “Type” and a custom field to “Sale Price (£)”:
[posts_table post_type=property columns="title:Property Description,date:Added On,tax:listing_cat:Type,cf:valuation:Sale Price (£)"]
Note: In the above example, the taxonomy and custom field columns now have two colons – one to define the taxonomy (or custom field) name, and the other to set the column heading. This is perfectly fine as long as you use the correct syntax. For these column types, everything after the second colon will be used as the custom heading, including the space between the 2 words.
Removing a column heading in the shortcode
To remove a column heading completely, use the keyword blank after the colon. For example: [posts_table columns="title:blank,content,categories"]
When you do this, the column names will be removed and only the sort arrows will be hidden. If you want to hide the header row completely then you can do this using custom CSS.
How to hide a column
You can easily hide columns simply by removing them from the list of columns in the table. This will remove the column from the table.
If you wish to hide a column on specific devices only (e.g. mobiles or tablets), please see the column_breakpoints option which allows you to do this.