If you run a WooCommerce-powered online store, the standard purchasing user flow involves taking customers through a multi-page process to purchase products. Now there's a better way.
The usual WooCommerce process goes something like this: customers add products to their cart, click through to the cart page, then click through to the checkout page to add their billing and shipping details and make their payment.
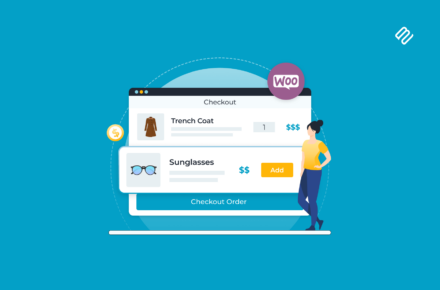
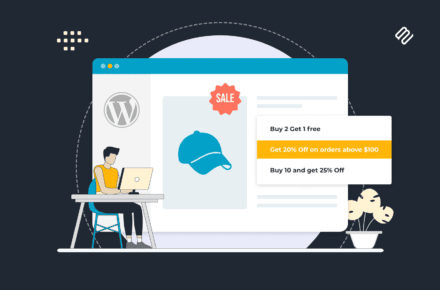
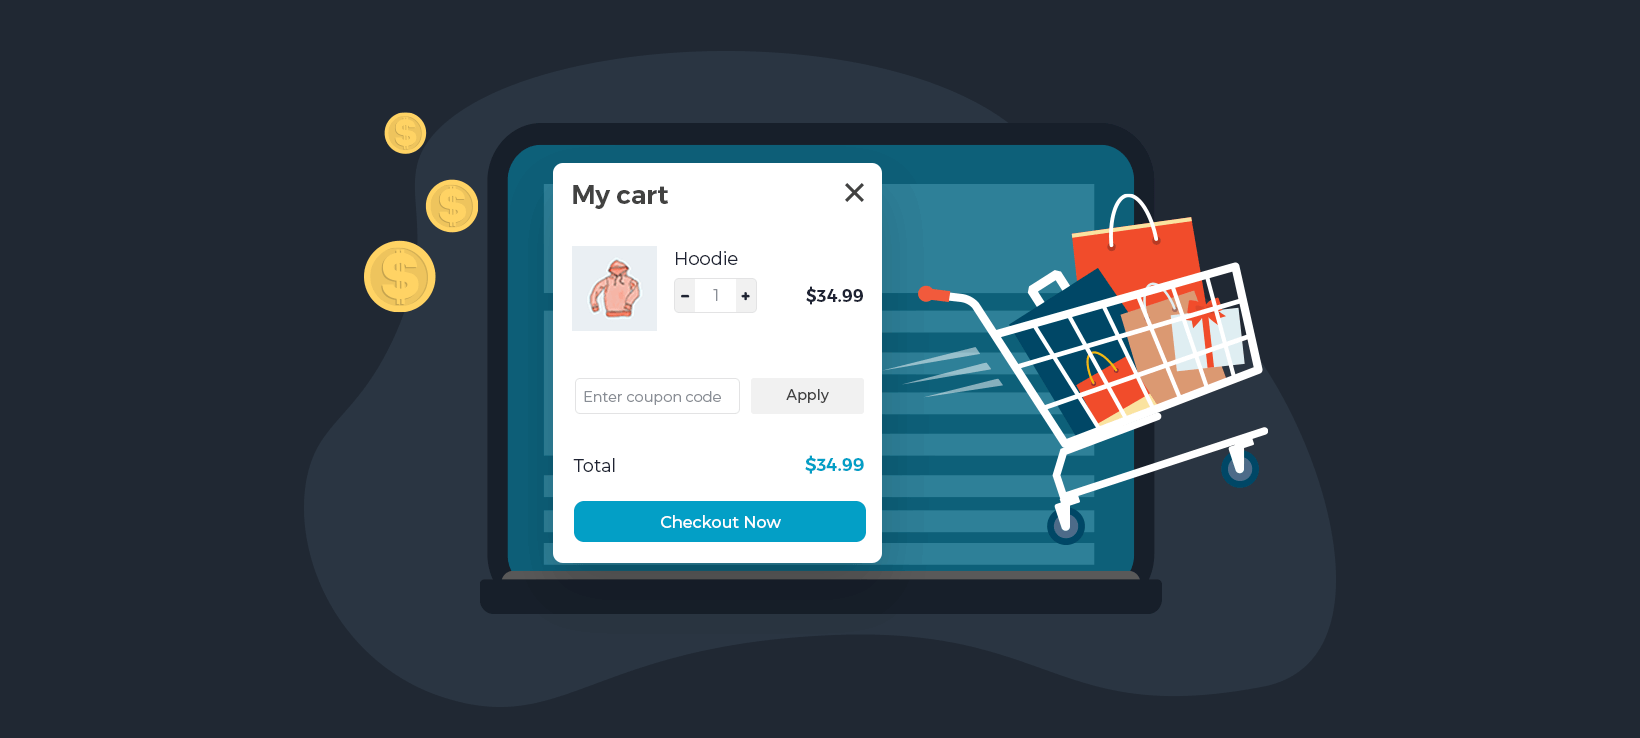
The problem with this multi-page process is that you can lose sales by wasting the customer’s time. One way to improve your sales and conversions is by displaying the cart and checkout in a popup WooCommerce mini cart. That way, customers can complete their purchases and place their orders all on one page.
In this tutorial, I’ll show you how to use the WooCommerce Fast Cart plugin to add a popup floating cart. This keeps the entire buying process on one page.
Why a WooCommerce mini cart can increase your sales
According to the Baymard Institute, 18% of US online shoppers have abandoned an order solely due to a “too long / complicated checkout process”.
Having a WooCommerce mini cart on your online store is a great way to increase sales and boost conversions. Here are some of the main benefits of adding a WooCommerce side cart to your store:
Speeding up shopping user flows. A WooCommerce floating cart speeds up the shopping process for customers. Customers don’t have to go through multiple pages to view their cart and place their order.
Improving user experience. By allowing customers to choose products and purchase from a single screen, you can improve the overall user experience your online store delivers.
Websites that sell one product at a time. A WooCommerce minicart is perfect for websites that sell one product at a time. It allows you to deliver a No cart - buy as you go experience where customers buy one product at a time. Customers can buy multiple products in a fast cart if they’d like. But, if you set it up to automatically open when a product is added to the cart then it provides an easy way to quickly buy one product at a time. You can even disable the cart and open the checkout in a popup as soon as products are added, creating a true 'WooCommerce buy now' experience.
A WooCommerce minicart plugin is a great way to enhance your online store whatever types of products you sell.
Why WooCommerce Fast Cart is the best minicart plugin
If you’re looking for a professional mini cart plugin for your online store then WooCommerce Fast Cart has you covered. WooCommerce Fast Cart has several unique features that other mini cart plugins on the market don’t have.
Most WooCommerce mini cart plugins just add a basic popup side cart without actually removing the original or and checkout pages. This means that you’re essentially only speeding up shopping for customers who choose to click on the WooCommerce floating cart icon.
While you can certainly do this with WooCommerce Fast Cart, it has options to actually replace the default WooCommerce cart and checkout pages so that all customers use the fast cart. This way, you can speed up the purchasing flow for all of your customers.
Additionally, most of the WooCommerce cart plugins out there just display the cart in a popup window with a button that links to the standard checkout page. While this is still possible with the WooCommerce Fast Cart plugin, it also lets you display the full WooCommerce checkout experience directly in the popup.
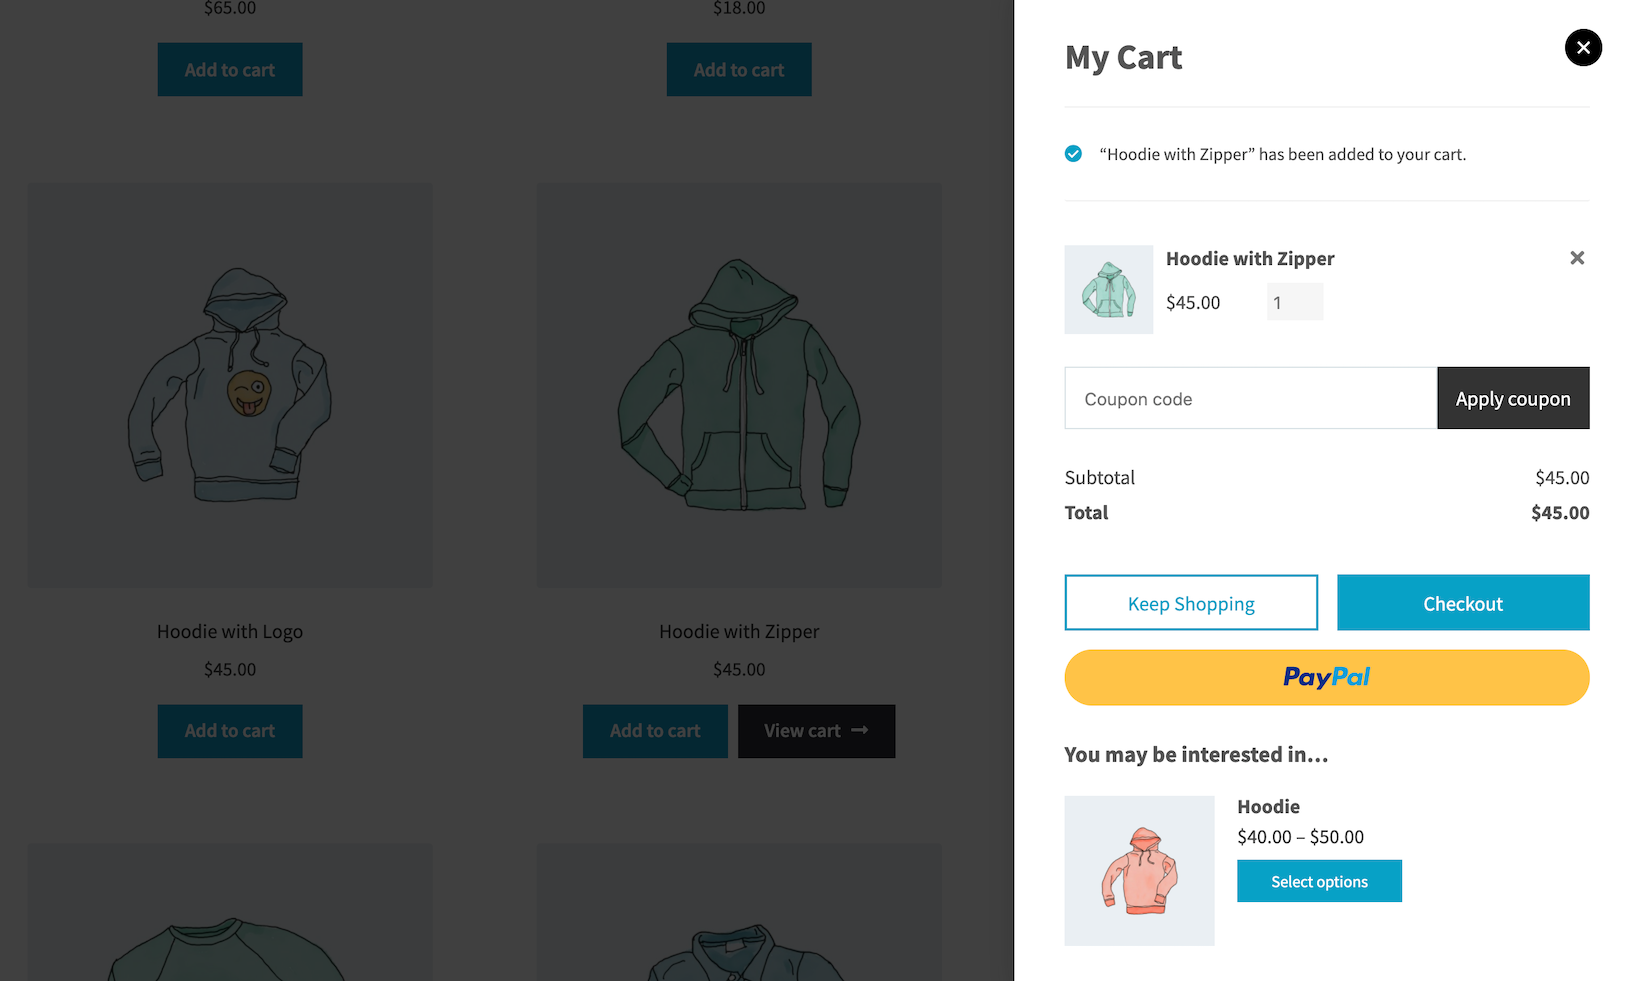
It’s also worth mentioning that most WooCommerce shopping cart plugins have one layout option which is typically a narrow cart on the right-hand side of the page. WooCommerce Fast Cart, on the other hand, has a central popup for stores that want a larger popup cart as well as a cart tray on the right-hand side of the page.
How to set up a WooCommerce mini cart
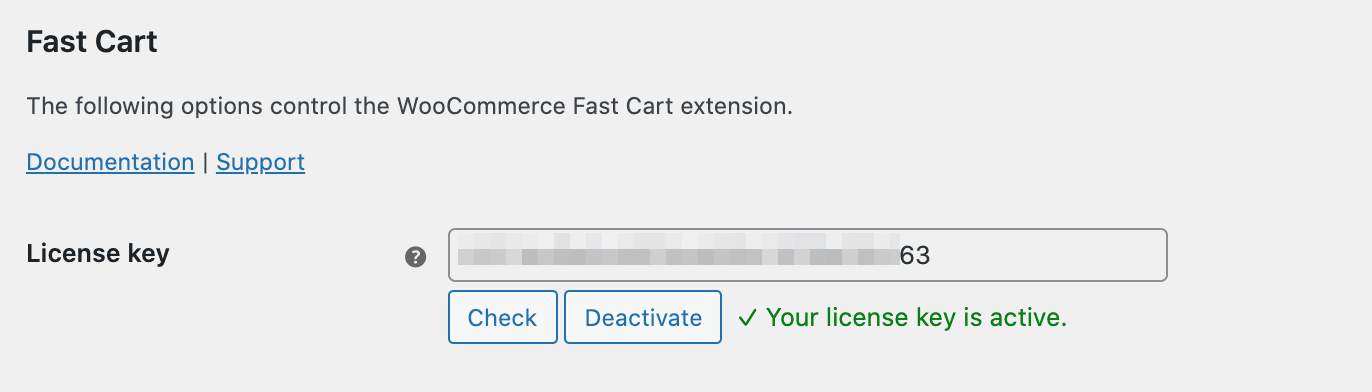
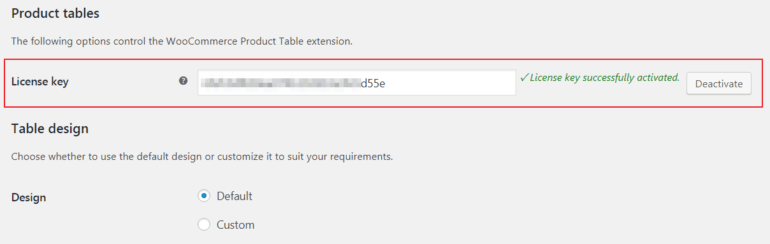
Get the WooCommerce Fast Cart plugin to get started. You’ll receive the plugin files and license key in a confirmation email. Install and activate the plugin on your WordPress website.
Next, head over to WooCommerce → Extensions from the WordPress admin panel to activate the plugin’s license key.
From the same screen, you can configure the plugin’s settings.
To enable the floating cart icon, tick the checkbox next to the Floating cart icon option. You can also set the position of the WooCommerce floating cart icon using the Position option.
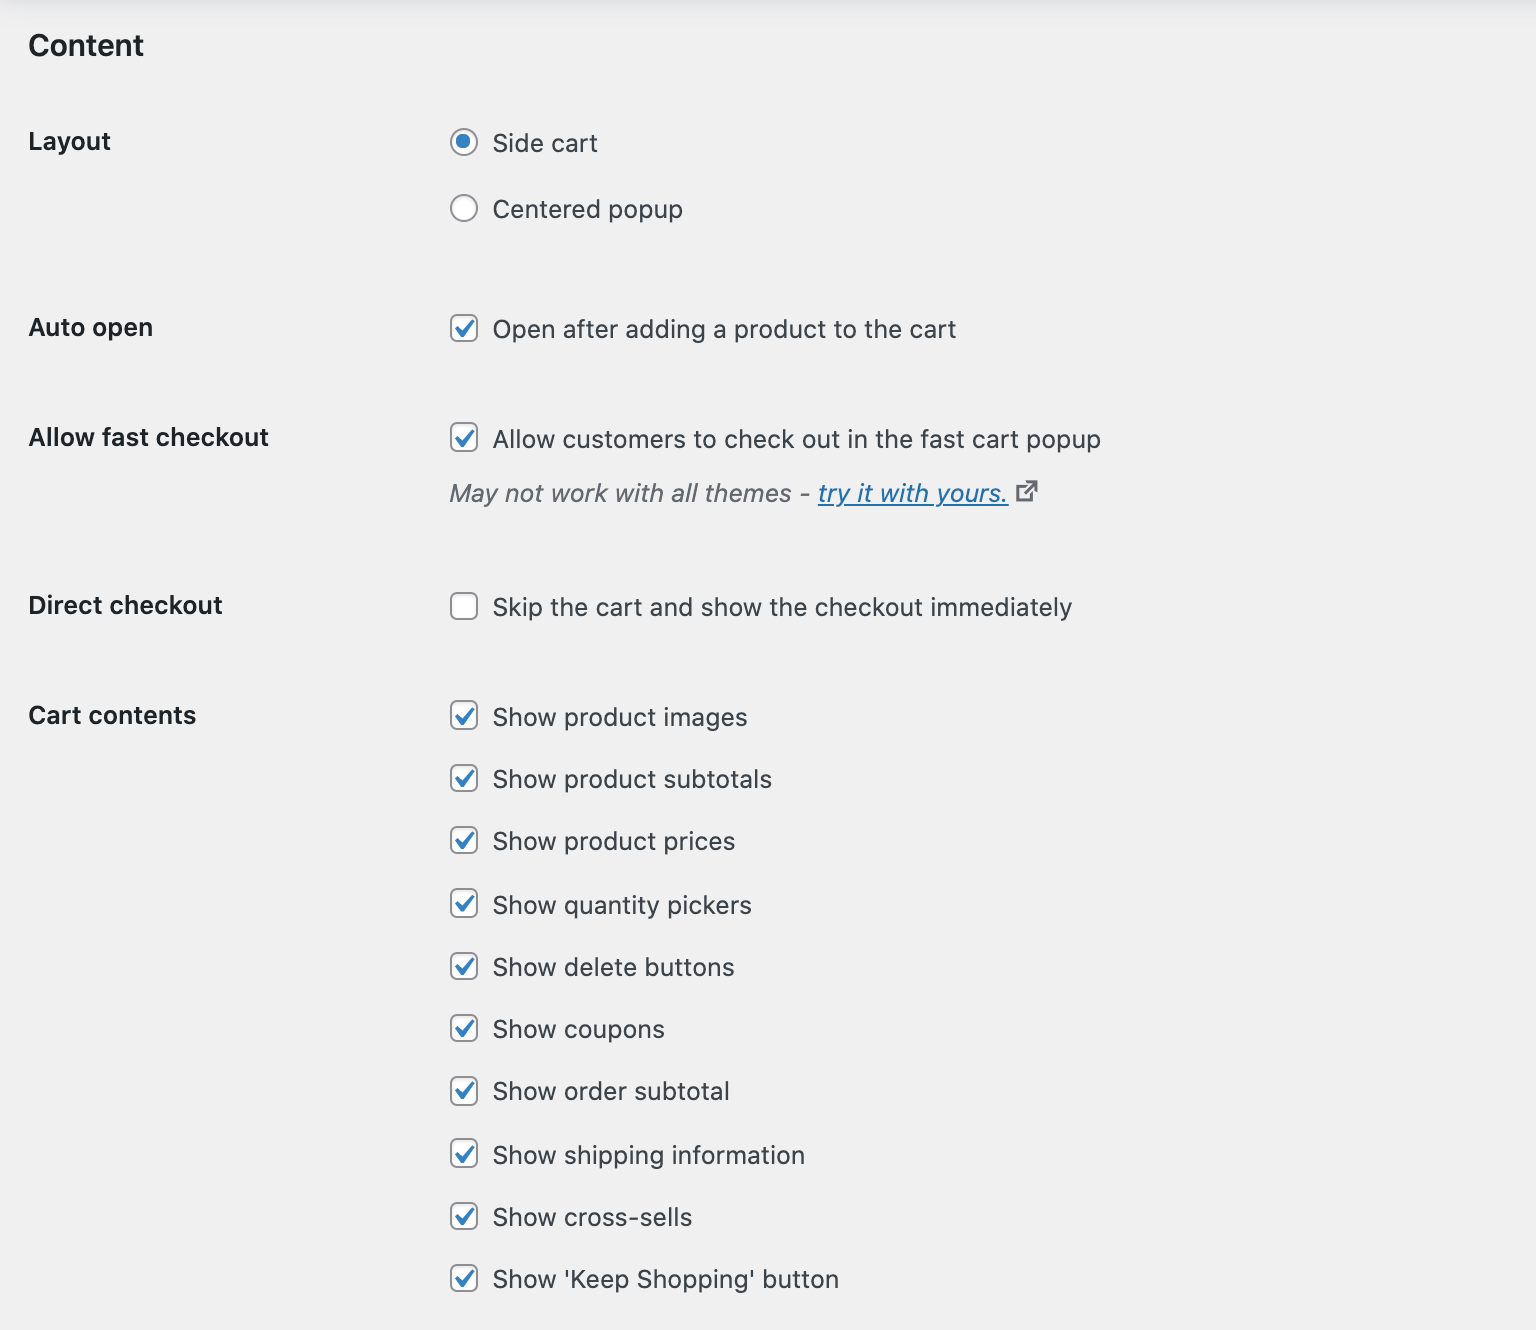
Scroll down to the Auto open section to decide when to open the WooCommerce mini cart. You can choose to auto-open it whenever products are added, or replace the default Cart page with the mini cart.
The WooCommerce Fast Cart plugin also lets you choose the layout of your mini cart. You can select either Side cart or Centered popup.
If you want customers to check out in the fast cart popup, tick the Allow fast checkout checkbox. You can also choose to show or hide the direct checkout option.
Next, use the Cart contents option to choose what to show in the WooCommerce minicart. You can choose to include product images, subtotals, prices, quantity pickers, delete buttons, coupons, 'Keep Shopping' button and cross-sells.
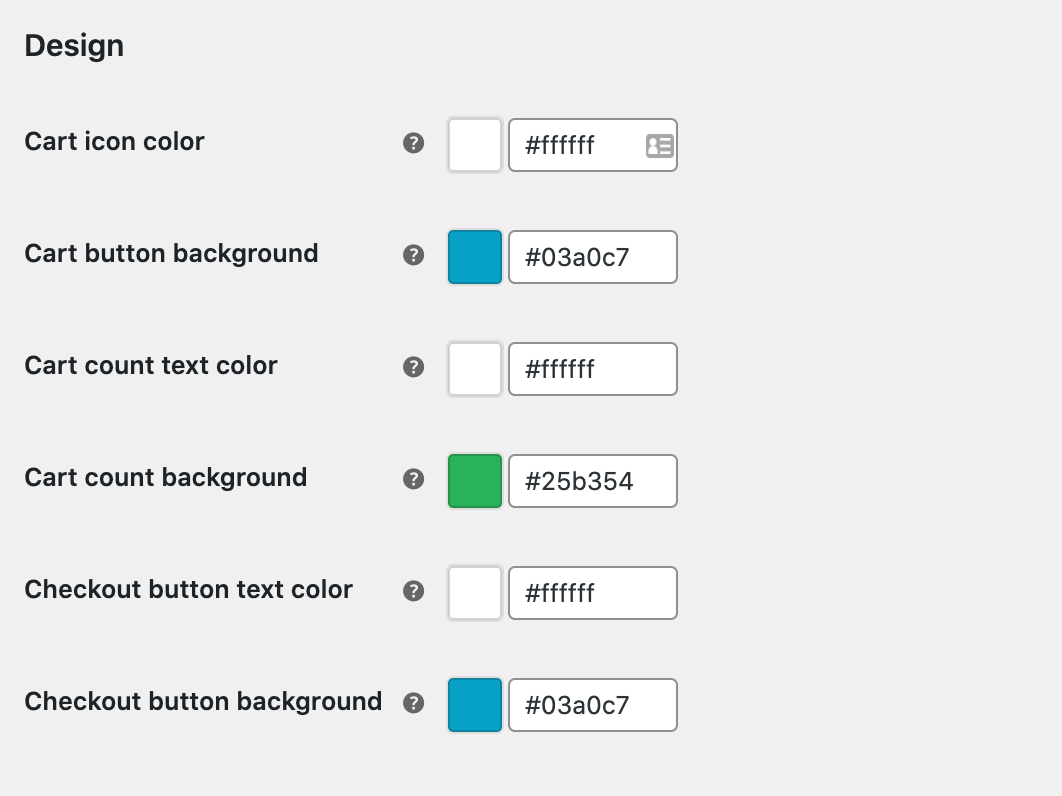
Finally, you can design and style the WooCommerce mini cart to match your theme and brand colors.
Once you’re done configuring the plugin settings, click the Save changes button to continue.
More ways to speed up shopping
You can really increase your conversion rates by reducing the number of pages that customers have to visit in order to make a purchase.
So far, we’ve looked at how WooCommerce Fast Cart can speed up the cart and checkout part of the process. But what about adding products to the cart in the first place?
Depending on the types of products you sell, these plugins will speed up the earlier parts of the customer’s buying journey.
WooCommerce Quick View Pro - perfect for all types of products
The WooCommerce Quick View Pro plugin is perfect for all types of products. It speeds up shopping by displaying extra product data and purchasing options. This way, customers can view product details, select variations, set quantities, and add the product to their cart – without having to visit the single product page.
Customers can simply open a quick view lightbox, choose quantities and variations, and add to the cart. The lightbox then closes and they can either immediately use WooCommerce Fast Cart to complete their purchase or continue adding more products to their cart. In this way, WooCommerce Quick View Pro with the Fast Cart plugin can help you increase your online store’s average order value.
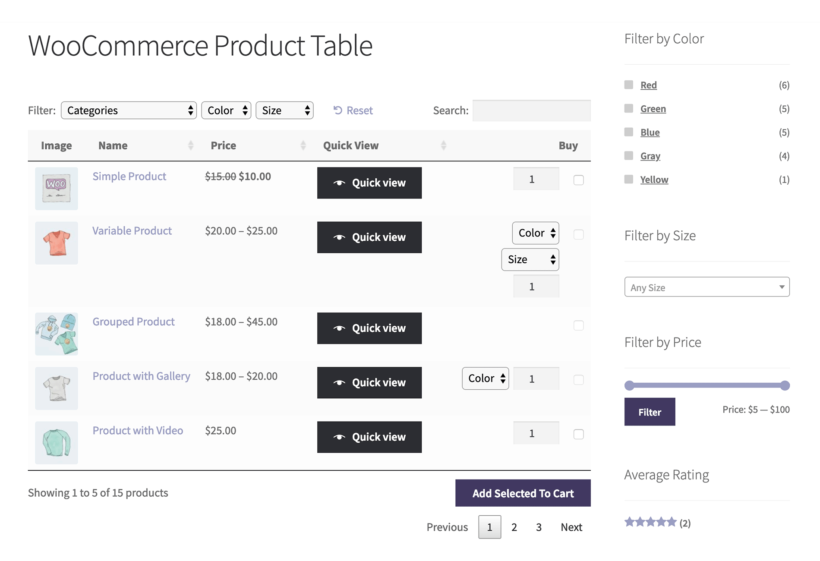
WooCommerce Product Table - perfect for stores with lots of products
The WooCommerce Product Table plugin lets you list products in a quick, one-page order form layout. This way, customers can quickly tick all the products they want, choose quantities and variations, and add everything to the cart in a single click. Once that’s done, they can use WooCommerce Fast Cart to quickly complete the purchasing process.
The WooCommerce Product Table plugin is perfect for online stores that sell lots of products like wholesale stores or grocery stores.
WooCommerce Bulk Variations - perfect for variable products with many variations
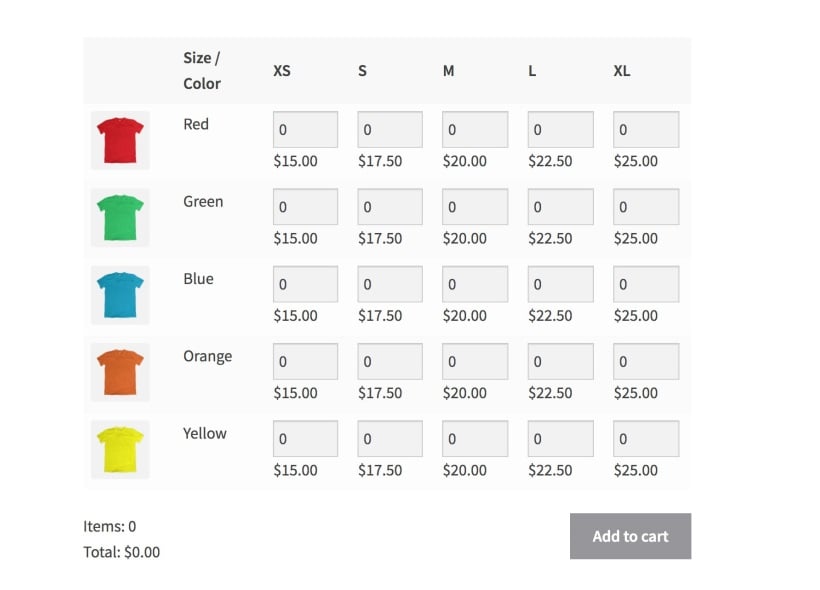
With the WooCommerce Bulk Variations plugin, customers can buy variable products faster. The plugin speeds up the purchasing user flow by letting customers select quantities for all the variations they want to buy from a single page instead of having to add each combination to the cart individually.
So, if you sell t-shirts in a variety of different colors and sizes, customers can place their order from a single screen without having to refresh the page for each variation they’d like to purchase.
Used alone or in combination, the above-mentioned plugins really speed up shopping for customers. They speed up product selection and adding products to the cart. You can pair them up with the WooCommerce Fast Cart plugin to speed up the final stages of the buying process.
Together, this is the perfect way to create a super-streamlined user experience and potentially increase your average order value.
Where to get the WooCommerce mini cart plugin
Now that you know how to speed up the shopping process for customers, it’s time to get the WooCommerce Fast Cart plugin.
Easy to use - no technical skills or knowledge needed.
Speeds up the purchasing process on your online store.
Increases conversions and sales.
100% flexible and customizable.
Love it or your money back!
Follow the steps in this tutorial to speed up the purchasing process, increase sales and conversions, and boost your store’s average order value.
Ready to start speeding up the shopping user flows on your store? Get the WooCommerce Fast Cart plugin today.
Improving your online store’s interface and user flow is one of the easiest ways to increase conversions. Think of it this way: when a customer lands on your site, you want them to be able to find the products they’re looking for as quickly as possible. Right?
With a WooCommerce product lightbox plugin, you can make it easier for visitors to learn more about your products, select available options, and add them to their shopping cart. You can do just that – and much more – with the WooCommerce Quick View Pro plugin! It’s the easiest way to let customers open product images, galleries, details, and purchasing options in a WooCommerce image lightbox view.
In this article, I’ll show you exactly how to use a WooCommerce product lightbox plugin to implement quick view functionality in your WooCommerce store. I’ll also explain how you can take things a step further and display products in a table layout. By the time you’re done reading this article, you’ll have a clear idea of how to let shoppers open products in a WooCommerce image lightbox quick view box.
Let’s get started!
Why you need a WooCommerce product lightbox plugin
If you have a WooCommerce store then normally, the only way to learn more about each product is to visit an individual page for that product. Having a WooCommerce product lightbox plugin installed on your online store gives you the option to:
Let customers open WooCommerce product image popups (including galleries) and product details in a lightbox.
Allow customers to select available product options and add products to their cart.
The quick view WooCommerce image lightbox settings can be configured to display information like:
The product image.
Full product gallery (if available).
Short product description.
Product variations and attributes.
Quantity picker.
Add to Cart buttons.
Additional product information including price, reviews, categories, tags, and SKU.
Now that we have a clear understanding of why you might want to use a WooCommerce product lightbox plugin on your online store, let’s take a look at how the WooCommerce Quick View Pro plugin lets you do just that.
Introducing the WooCommerce Quick View Pro plugin
WooCommerce Quick View Pro is a product lightbox plugin that makes it easy to add quick view functionality to any Woo-powered store.
You can use it to add Quick View buttons directly to your main shop page or category pages. The plugin also integrates seamlessly with WooCommerce Product Table for products that are best presented in a table layout – more on this later.
With the WooCommerce Quick View Pro plugin, you’re able to:
Let customers open products in a lightboxWhen a customer clicks on the product or Quick View button, it will launch a quick view lightbox containing the WooCommerce product image popup. Customers can then hover over the image for a smooth zoom effect.
Show the entire product gallery in the lightboxYou can also choose to display the entire product gallery in the lightbox. Customers can slide between different images in the gallery and view them with an image zoom effect.
Display product details and purchase options in a lightbox The plugin also gives online store owners the option to display product details (such as product description, price, and reviews) in the quick view lightbox along with purchase options (such as quantity picker and Add to Cart button).
WC Quick View Pro acts as a WordPress lightbox plugin allowing customers to open products in a lightbox.
For more ideas on how to use a WooCommerce product lightbox plugin on your own online store, be sure to check out some example use cases!
How to create a WooCommerce product lightbox using WooCommerce Quick View Pro
In this section, I’ll show you how you can use the WooCommerce Quick View Pro plugin to let customers:
Open images (including the full photo gallery) in a product lightbox.
View product details and purchasing options in a lightbox.
For the purpose of this step-by-step tutorial, I’ll assume you already have a Woo-powered ecommerce stores with some products added to it.
Step #1: Install and activate WooCommerce Quick View Pro
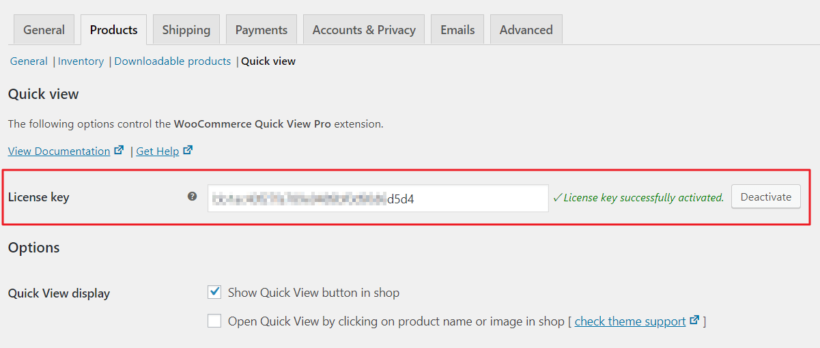
The first thing you need to do is get the WooCommerce Quick View Pro plugin and install and activate it on your WP website. Once that’s done, you need to activate the plugin license key through WooCommerce lightbox settings. Here’s how:
Head over to WooCommerce -> Settings -> Products -> Quick view from the admin panel and find the License key option.
Enter your license key (that you received in the email upon purchase) and click the Save changes button to proceed.
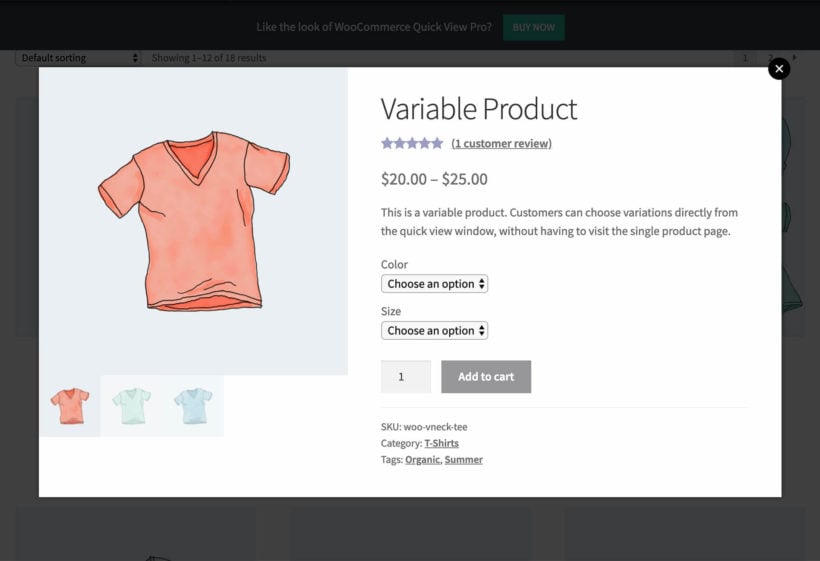
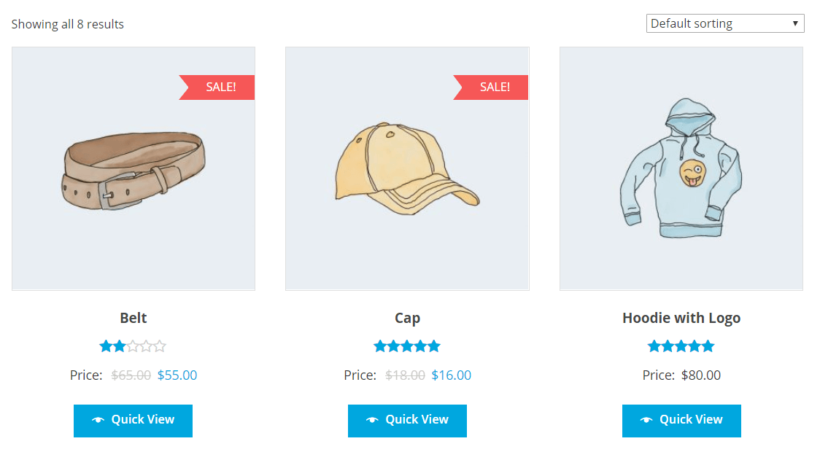
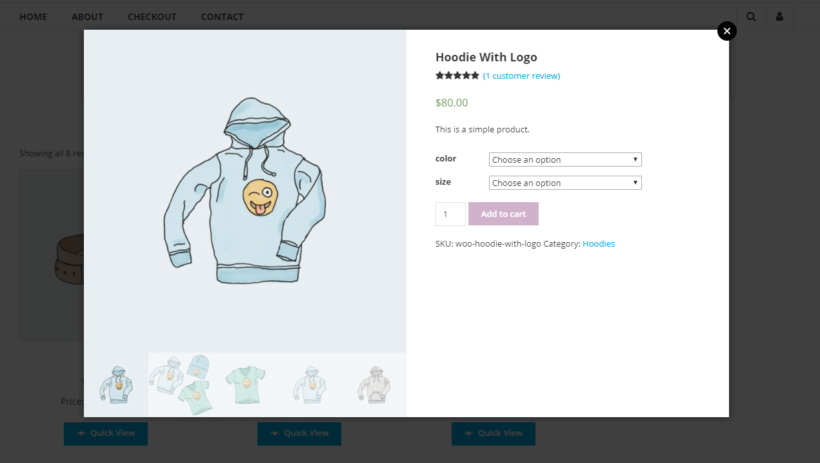
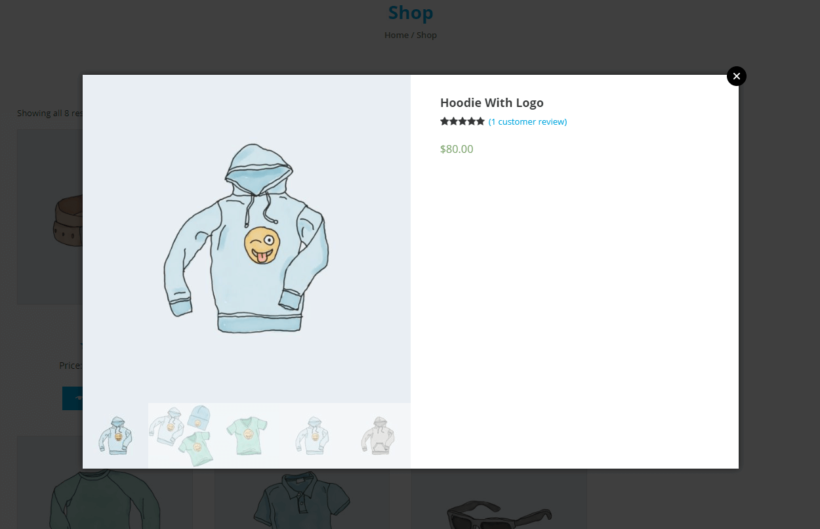
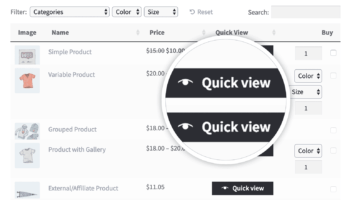
By default, the plugin adds Quick View buttons to the main shop page and category pages on your online store. Here’s an example of what it looks like:
You’ll notice that the WooCommerce lightbox plugin displays the product’s description, image gallery, price, reviews, and metadata in the lightbox view.
Next, I’ll show you how to customize what is displayed in the WooCommerce product lightbox.
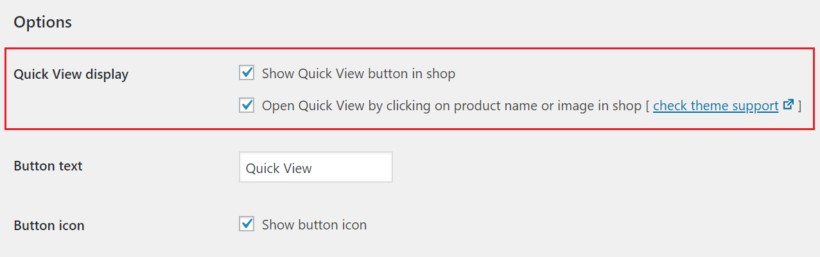
Step #2: Choose how customers open the WooCommerce product lightbox
Navigate to WooCommerce -> Settings -> Products -> Quick view from the WP dashboard and scroll down till you reach the Options section.
You can choose to lets customers open the WooCommerce product lightbox by:
Using the Quick View button that’s positioned directly under each product.
Clicking on the product’s name or WooCommerce product image popup.
If you decide to go with the first option (i.e. using the Quick View button), you can also change the button text and turn the button icon on or off.
Pro tip: By default, clicking on the product’s name or image will direct customers to the single product page. If you’d like to disable this option, make sure the Open from product name/image checkbox is ticked.
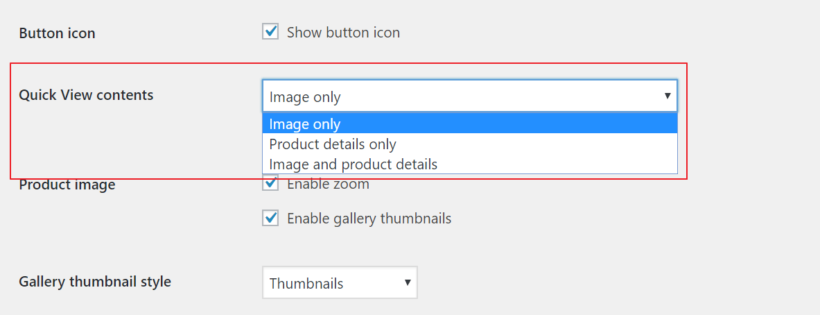
Step #3: Display the product image (and full product gallery) in the product lightbox
The WooCommerce Quick View Pro plugin lets you choose what information you’d like to display in the product lightbox. First, I’ll show you how the controls for displaying the product image (along with the full WooCommerce product gallery lightbox) in the WooCommerce product lightbox.
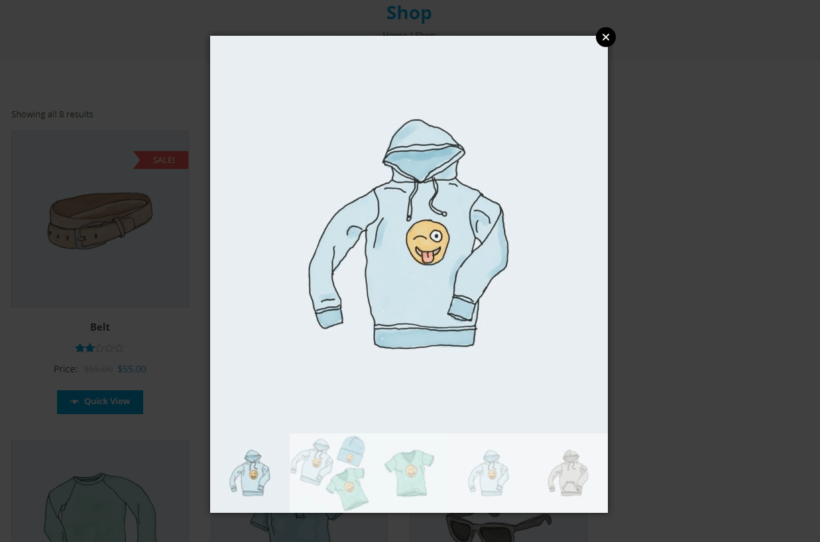
Start off by using the Quick View contents option to decide whether you want the image only, product details only, or both image and product details to appear in the product lightbox.
If you decide to go with Image only, your WooCommerce product lightbox might look something like this:
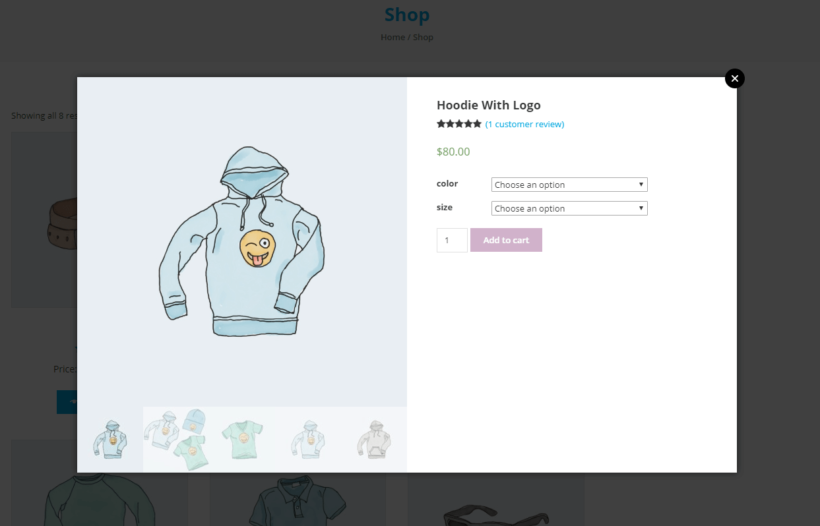
However, if you’d like to display both images (with full WooCommerce product gallery ligthbox) and product details, make sure to select the Image and product details option from the dropdown menu.
Step #4: Choose which product details to display in the WooCommerce product lightbox
If you decided to go with the Image and product details option in Step #3, you can use the Product details option to select which product details appear in the quick view lightbox. The available options you can pick from include:
For example, if you wanted to display only the reviews and prices for your products, your WooCommerce product lightbox might look something like this:
And if you wanted to allow customers to be able to add products to their cart directly from the quick view lightbox, you would select the Show add to cart button option. It would look something like this:
Use WooCommerce Quick View Pro with product tables
The WooCommerce Quick View Pro plugin integrates seamlessly with WooCommerce Product Table. This makes it possible for you to list products in an interactive table layout complete with Quick View buttons.
Whenever a customer browses through your product listings, they’ll be able to open up the product image (and full WooCommerce product gallery lightbox) in a WooCommerce product lightbox directly from the table.
Depending on your configuration WooCommerce lightbox settings, customers can open the product lightbox by clicking on the Quick View buttons or by clicking on the product name (or image).
When both plugins are installed and activated, you’ll see a Quick View Pro option added to the WooCommerce Product Table settings screen. By ticking the Product links checkbox, all of the product links that appear in your table layout will open the product lightbox instead of directing customers to single product pages.
What this means is that customers can:
Click on the product name (or image) or Quick View buttons to open the product lightbox.
View product details – such as reviews, price, and metadata – in the lightbox without having to navigate to the single product page.
Add products to their cart directly from the product lightbox.
The WooCommerce lightbox plugin replaces links to the single product page with product lightboxes. As a result, customers can get information directly from the table. This is much better than having to navigate to a single product page.
Where to get the plugin
Adding WooCommerce product lightbox views to your online store is a great way to let customers:
view product images and galleries,
product details, and
purchase options
... without requiring them to visit the single product page.
With WooCommerce Quick View Pro, you’re able to add this functionality to your main shop page and category pages simply by installing the WooCommerce lightbox plugin. And if you’ve created product lists using WooCommerce Product Table, you can add flexible product quick view boxes to the table in just a few minutes.
Do you have any questions about how to use a WooCommerce product lightbox plugin with your online store? We’re happy to help so let us know in the comments below!
WooCommerce is an incredibly powerful and flexible e-commerce platform. You can use it to create just about any type of online store and offer all kinds of online shopping experiences. You can even use it to create a WooCommerce mix and match products website.
Whether you’d like to start selling custom gift hampers, assorted donuts, and pastries, or bespoke food boxes, WooCommerce makes it incredibly easy to get started.
Paired with the right plugins, WooCommerce is the perfect solution for selling bespoke mix and match products and taking customized orders. After ensuring compatibility and setting everything up, your customers will have the ability to place personalized orders on your online store. They can view items in a user-friendly, catalog-like list, choose options and tick the items they’d like to add to their order and place their customized order. All from a one-page WooCommerce order form.
In this article, we’ll cover everything you need to know about WooCommerce mix and match products. You'll learn how to add products in WooCommerce, as well as how enabling customers to personalize their orders can benefit your online shop and how people are utilizing this feature. We’ll also step through a quick tutorial to help you create your own WooCommerce mix and match online store using the WooCommerce Product Table plugin.
Let’s get started!
Some examples of WooCommerce mix and match products
Mix and match products work by allowing customers to select individual products they’d like to purchase and add them to a gift hamper, product box, or bundle items. Let’s take a look at some of the most popular types of WooCommerce mix and match products that you can sell with WooCommerce.
Example #1: Pizza, sandwich, and salads
Customizable food items such as pizzas, sandwiches, and salads are often sold using a mix and match system. For instance, a WooCommerce-based restaurant that allows customers to place orders online usually allows customers to choose toppings and filings to put together their own meals. This is just one of many mix and match products examples, where WooCommerce can be utilized to offer personalized and customizable options to customers, such as selecting ingredients for their pizza, sandwich, or salad.
Your WooCommerce mix and match products offering may vary slightly depending on what you're selling. However, the core concept remains the same. Essentially, you allow your customers to build their own meals. For instance, if you were selling pizzas then you’d let customers choose their base, sauce, toppings, and dips. They mix and match the pizza options to create their own customized pizza - all using WordPress and WooCommerce.
Example #2: Gift hampers and product boxes
Buying a hamper as a gift is always more special when you can select the individual items you’d like to add to it. Whether you’re selling face and body products, wines and candles, decadent chocolate, corporate gifts, or gourmet products, you can create a personal gift experience by letting customers mix and match their own selection of items.
Learning how to add products in WooCommerce opens up several avenues for offering WooCommerce mix and match products on your online store. Some companies, for instance, sell custom meat or vegetable boxes to customers on a subscription basis. With WooCommerce, you can easily offer this option on your online store, in addition to selling custom meat or vegetable boxes on a subscription basis and other mix and match products examples. Keep reading to learn how to do this and more.
How do customers mix and match products in WooCommerce?
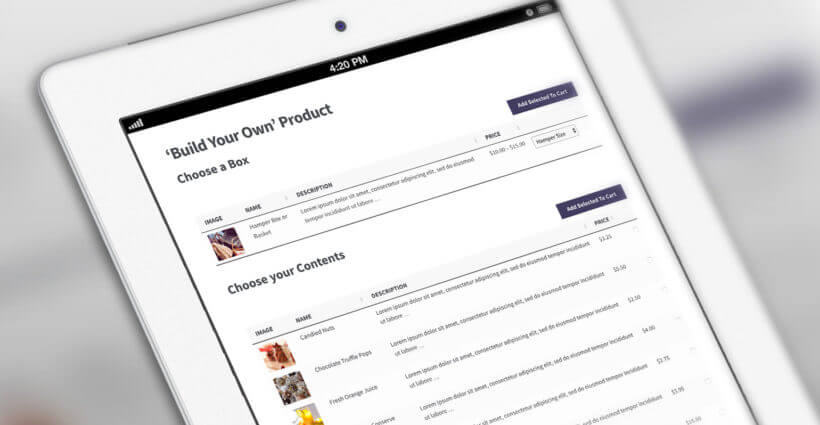
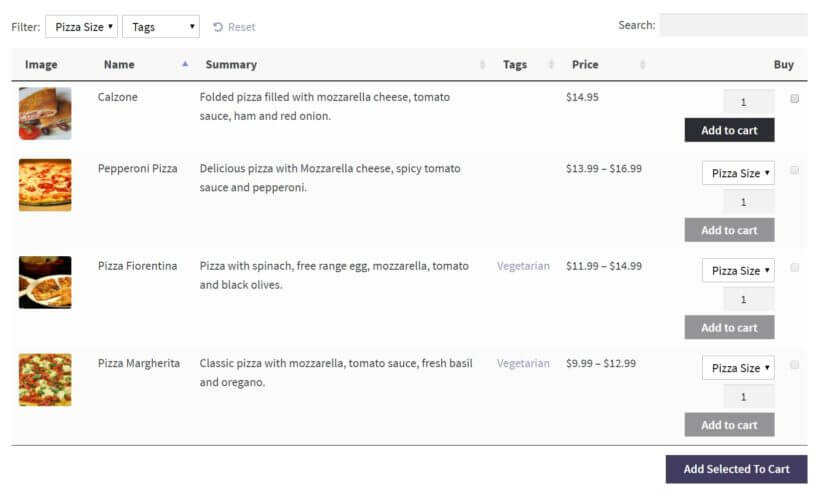
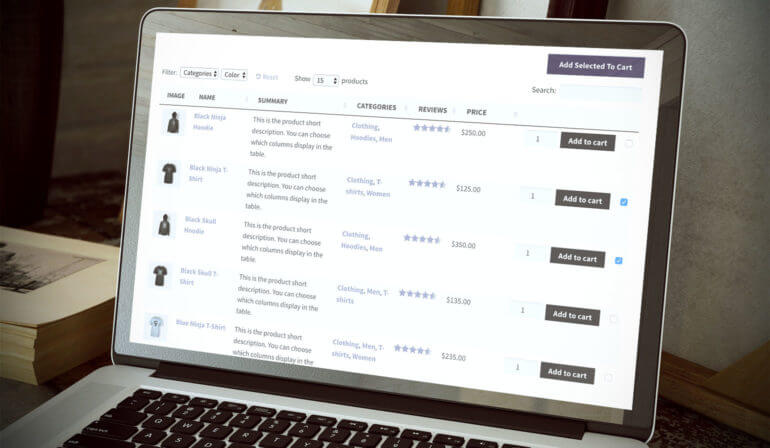
Create WooCommerce mix and match products order forms to let customers build their own customized product boxes. It will look something like this:
This is how the WooCommerce mix and match products system works:
You have a page on your online store where you list all of the products (and variations or other options) that customers can choose from Generally, the products are divided into several categories, each listed separately on the mix and match page. The categories should be based on how the customer would actually put together their mix and match product box.
The customer chooses items to create their own unique mix and match products box Standalone items appear on individual rows of a table, whereas mutually exclusive items appear as dropdown lists within a single row of the table. The customer simply ticks a checkbox next to each item they’d like to add to their mix and match product box.
Once they’ve picked out all of the items they’d like to purchase, they click the Add Selected to Cart button This adds all the selected items to the WooCommerce shopping cart.
The customer views their cart and can make changes to it, if necessary Once they’re happy with the order, they can proceed to the Woo checkout page and make a payment.
As the store owner, you’ll receive an email with the order details You can then build the customer's mix and match product box, add the products they selected to it, and ship it to them.
Which WordPress plugins will I need?
Under the hood, the mix and match products system uses WordPress to power your overall ecommerce website. It requires a free WooCommerce plugin to create products and manage the checkout process. You'll also need the WooCommerce Product Table plugin to list your inventory in a table layout on the mix and match product order form.
Next, I'll tell you how to set up your WooCommerce mix and match plugin. But first, let's look at a real-life case study of a website with this exact setup.
Case studies - How other WooCommerce websites sell mix and match products
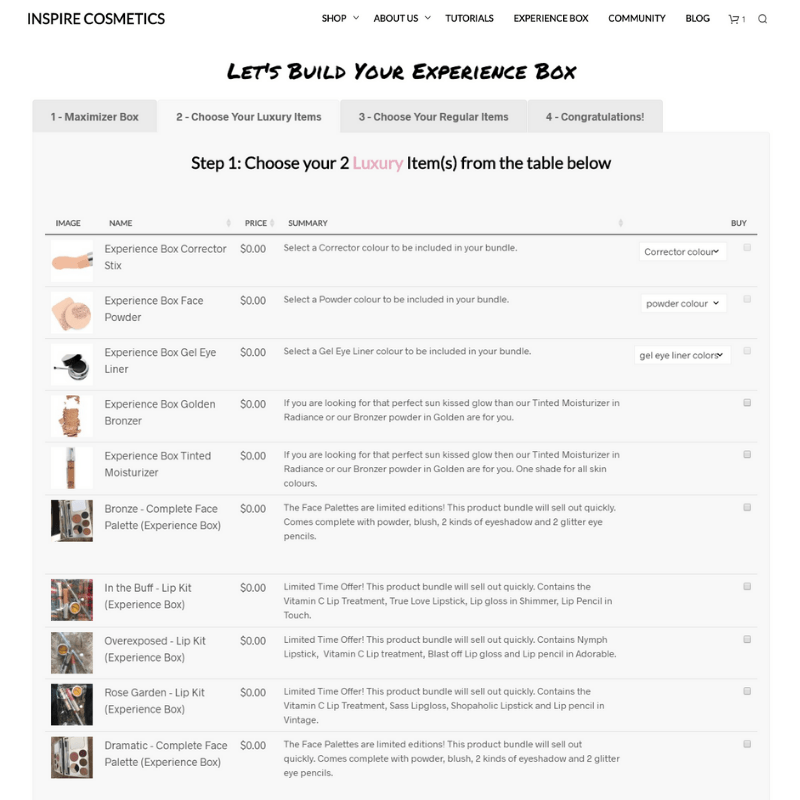
Inspire Cosmetics - mix and match cosmetics boxes
Inspire Cosmetics - selling mix and match cosmetics boxes
Inspire Cosmetics has created a multi-step process for ordering mix and match make-up and cosmetics boxes.
They used the Beaver Builder WordPress page builder plugin to create a series of four connected pages in tabbed layout options. Each tab contains a separate list of WooCommerce mix and match products, created using the WooCommerce Product Table plugin.
This makes it quick and easy for customers to choose a box, select the contents and place their order in WooCommerce.
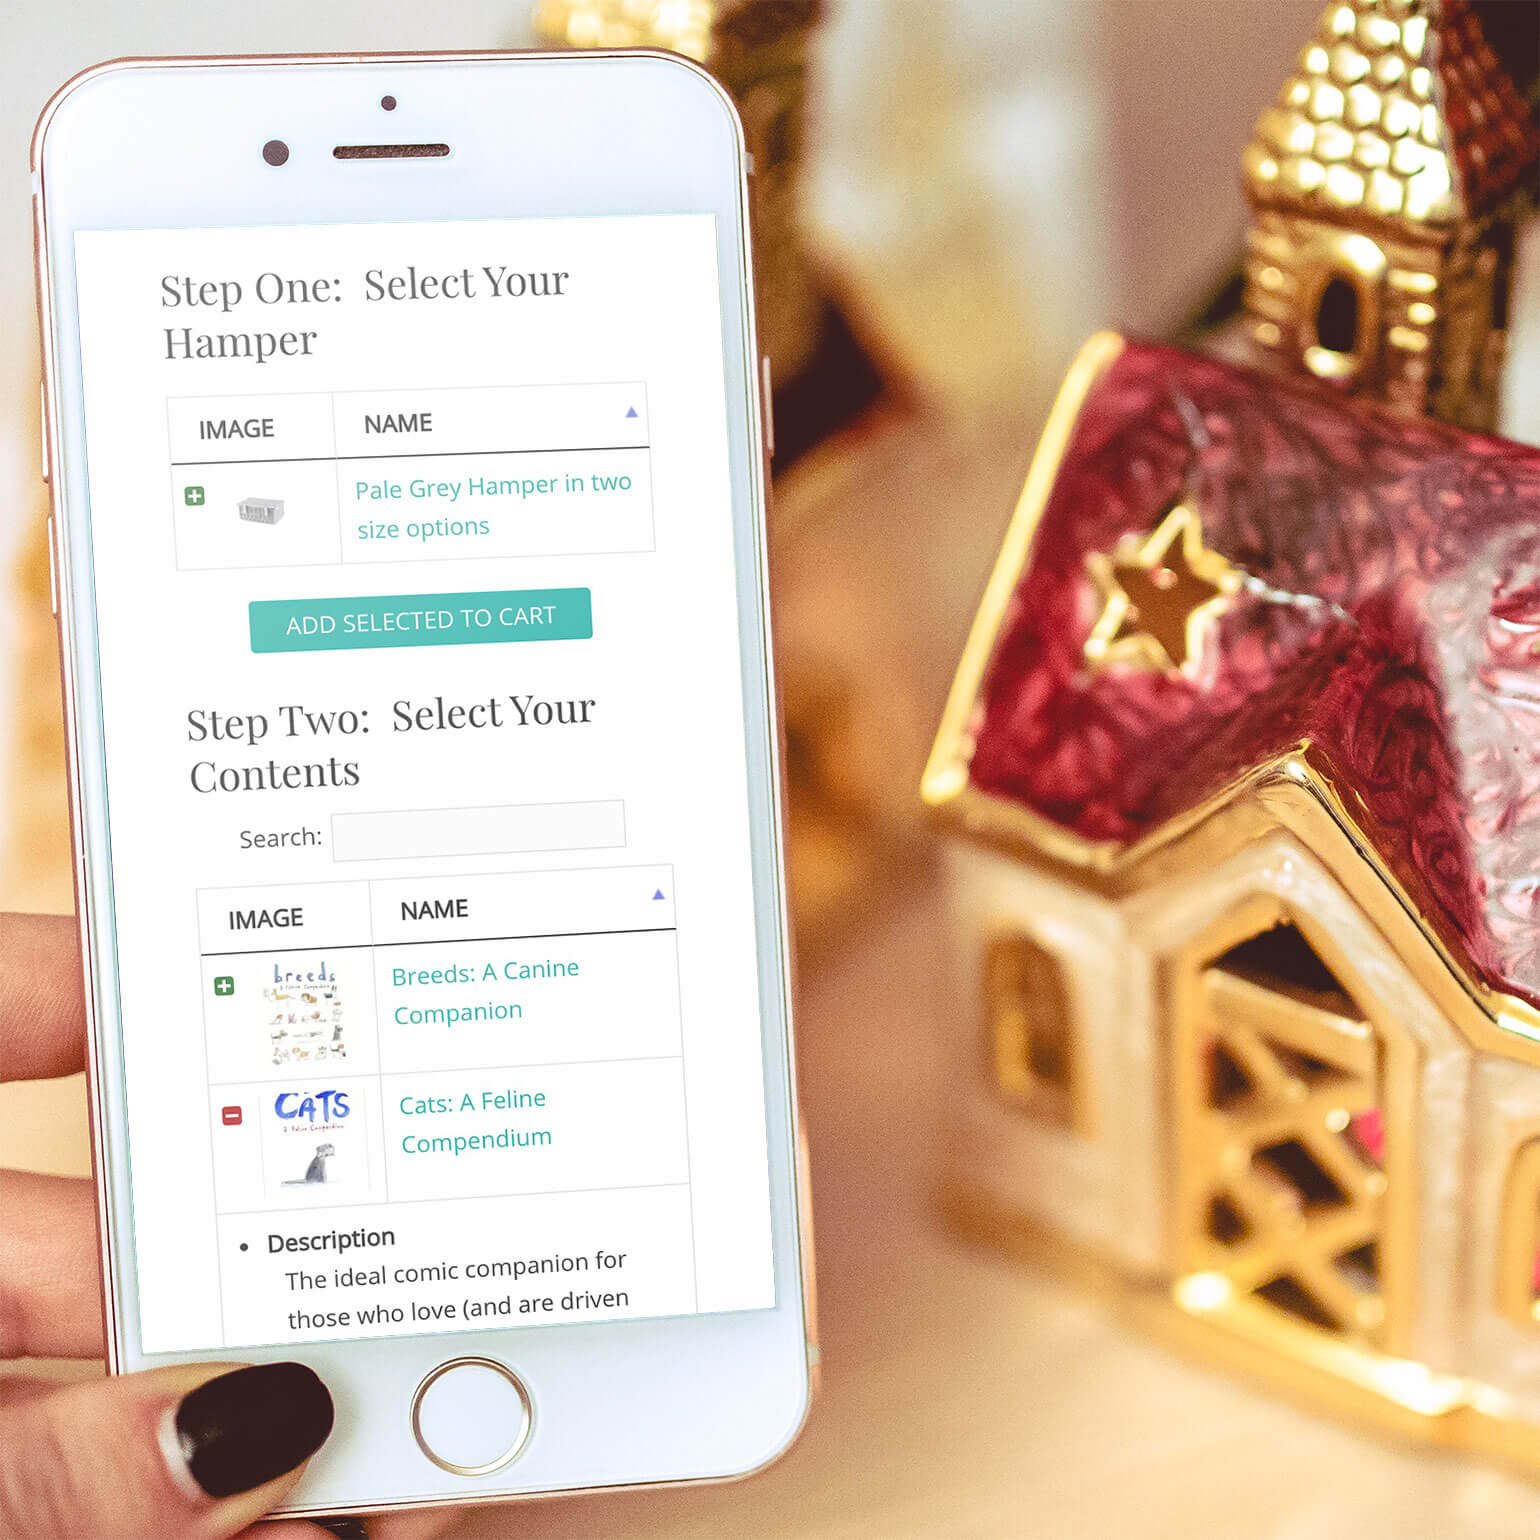
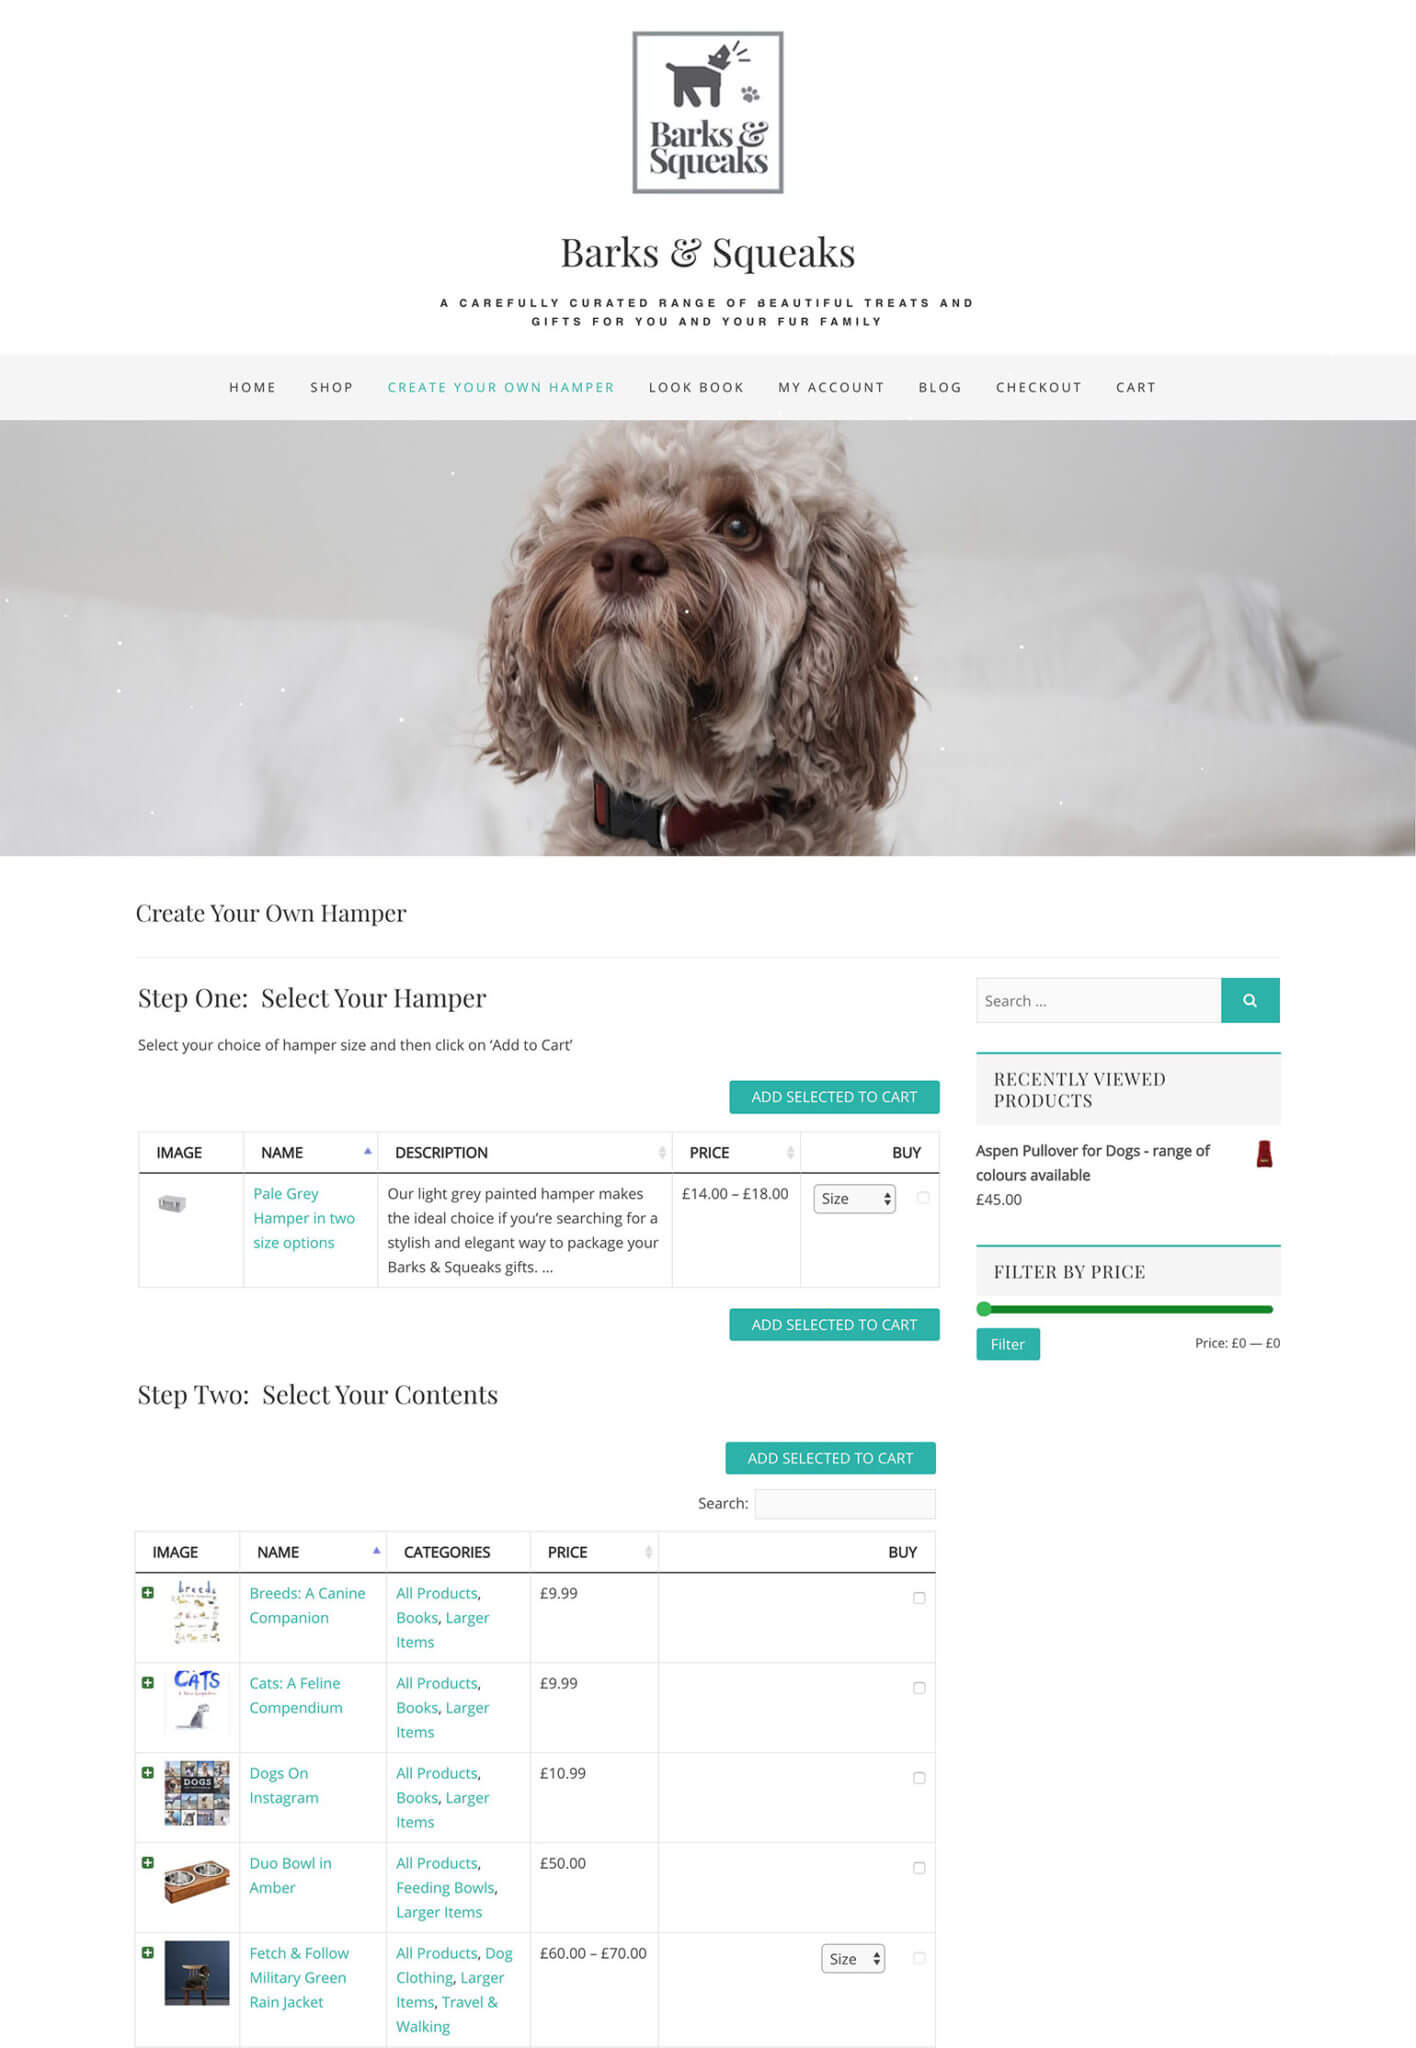
Barks & Squeaks - selling mix and match pet hampers
Barks & Squeaks use WooCommerce and WooCommerce Product Table to sell mix and match gift hampers for pets.
They list the items from each category on a single page. The customer chooses their box options first, then scrolls down to mix and match the contents.
Now you've learned all about how a WooCommerce mix and match plugin works. Next, I'll tell you how to set it up on your own WordPress website! Keep reading and we'll get started straight away.
How to create a WooCommerce mix and match products website
Letting customers put together their own product bundles using a product configurator can help you increase sales and make the customer feel special.
This tutorial assumes you already have WooCommerce installed on your WP website. If not, check out the fantastic guide on how to create a WooCommerce online store. When you're ready, continue this tutorial to transform it into a WooCommerce mix and match product configurator.
Here's a video on how to set it all up. You can also read our detailed written instructions below.
Step 1: Create the mix and match product categories
First, figure out how you’d like to design the mix and match products' user flow. Decide which categories you’d like to divide the WooCommerce mix and match ordering system into.
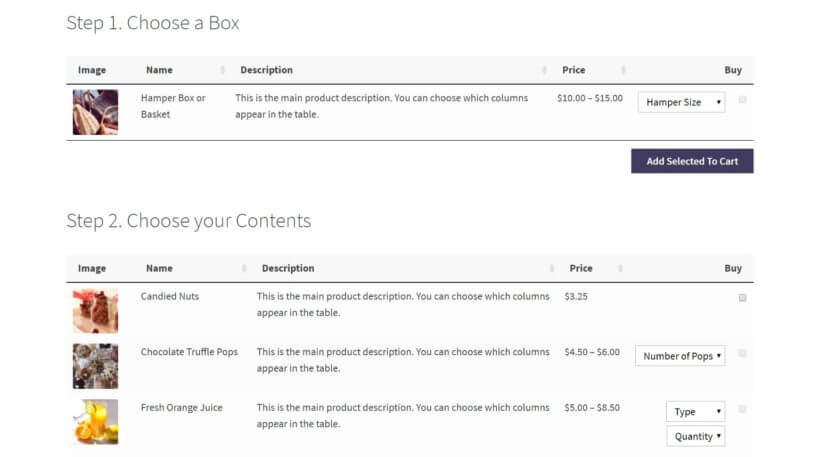
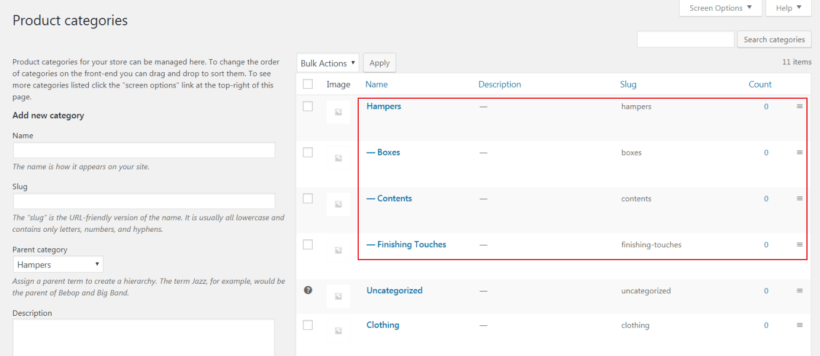
For example, if you wanted to let customers build their own gift hampers, you might consider creating a category for the box (or hamper), the contents, and wrapping and filling:
It’s a good idea to create a logical category structure that takes the customer on a journey and helps them put together their WooCommerce mix and match product in an intuitive and user-friendly way. In the above example, customers would order using a three-step process:
Select a box or hamper.
Choose the items they’d like to add to the box or hamper.
Configure padding and wrapping options.
This way, your customers can mix and match their own bespoke gift hampers and personalized product boxes.
Once you’ve settled on which categories you’d like to create, head over to Products -> Categories and create as many as you need.
Step 2: Plan out products and add them to your online store
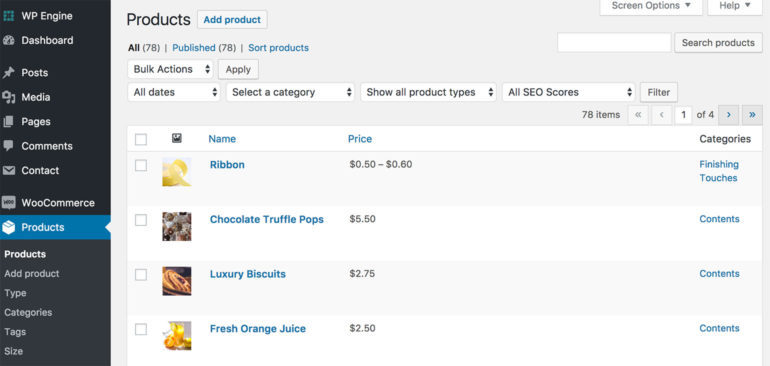
Next, we’ll add the individual items we want to sell to our WC online store. The items that customers can mix and match to build their product box should be added as WooCommerce products.
Following our example, here are some of the WooCommerce products you might add under each mix and match category:
Box/Hamper
Hamper
Box
Contents
Candied Nuts
Luxury Biscuits
Decadent Chocolates
Red Wine Bottle
White Wine Bottle
Packaging
Gift Wrap
Ribbon
Straw Filling
First, jot down all of the products you’d like to sell. Categorize them under one of the categories you created in the previous step. Once that’s done, you need to decide whether you’d like to create each item on your list as an individual product or group it into variations.
To decide whether a particular product needs to have variations, consider whether the customer would have to make an either/or choice. In the example outlined above, the customer would have to pick either the hamper or the box. Whereas in the second stage, they’d simply be asked to select all of the items they’d like to add to their product box (or gift hamper).
Add products and/or variations based on these principles:
For 'or' choices where the customer can only choose one option, create a WooCommerce variable product. Add each option as a variation.
For 'and' choices where the customer can choose multiple options, create a standalone WooCommerce product for each item.
Tip: If you want to add multi-select options to individual products, keep reading to learn how.
Step 3. Add products to WooCommerce
Once you’ve planned out your products, add them to your WooCommerce store by following these steps:
Navigate to Products -> Add New from the admin panel.
Enter the WooCommerce mix and match the product’s details such as product title, description, and featured images.
Assign categories and tags.
From the Product Data section, choose a product type based on the format you’ve decided:
Simple Product. For standalone products that customers can add to their mix and match product bundles without variations, select the Simple Product.
Variable Product. Select Variable Product for all mutually exclusive items that customers can personalize before adding to their shopping carts. Follow these instructions to add variable products.
Click the Publish button.
Follow these steps to add all of your products to your online store.
Step 4: Create a mix and match products page
Now we're getting to the fun part! This is where your WooCommerce mix and match products configurator comes to life.
By now we’ve added all of the products to our WooCommerce store and categorized them. Next, we'll list everything in a mix and match products order form. By doing so, customers will be able to mix and match products and build custom gift boxes.
How to set it up
Purchase the WooCommerce Product Table plugin and install it on your WordPress website. You’ll receive a confirmation email with installation instructions and a plugin license key.
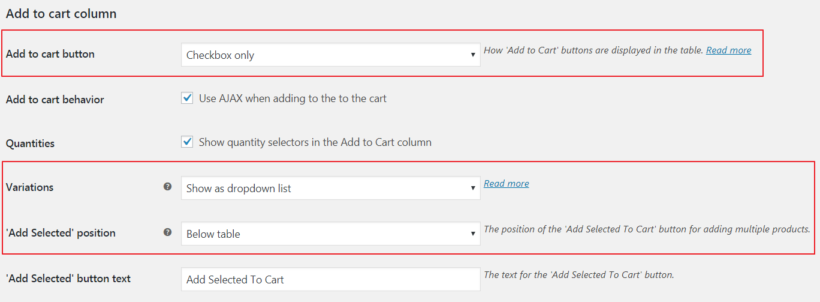
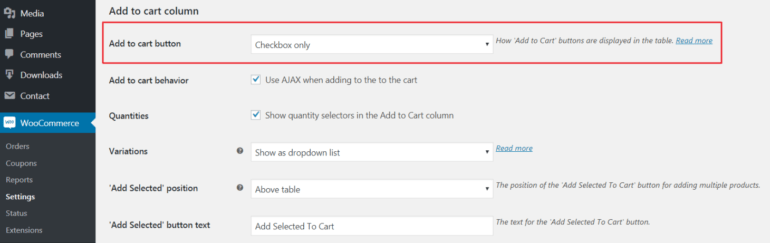
Head over to WooCommerce -> Settings -> Products -> Product Tables. Configure the following settings in the Add to cart column section:
Set the Add to cart button option to Checkbox only.
Set the Variations option to Show as a dropdown list.
Choose the Below table next to the ‘Add Selected’ position
Go to Pages -> Add New to create a new page where we’ll list the WooCommerce mix and match products. Add any text that will appear above the order form, such as instructions or information about the ordering process.
Divide the page into sub-headings. Each sub-heading will be based on the categories you created in Step 1. Following our example, the sub-headings might be Step 1 - Choose a Box, Step 2 - Choose your Contents, and Step 3 - Choose the Finishing Touches.
Finally, add the following shortcode under each sub-heading: [product_table category="toppings"]. Replace toppings with the slug of the corresponding category. You can get the category slug from the Products > Categories.
Tip: Use the other settings and the Product Table knowledge base to further customize your WooCommerce mix and match products order forms. For example, you can choose which columns to include in the product list.
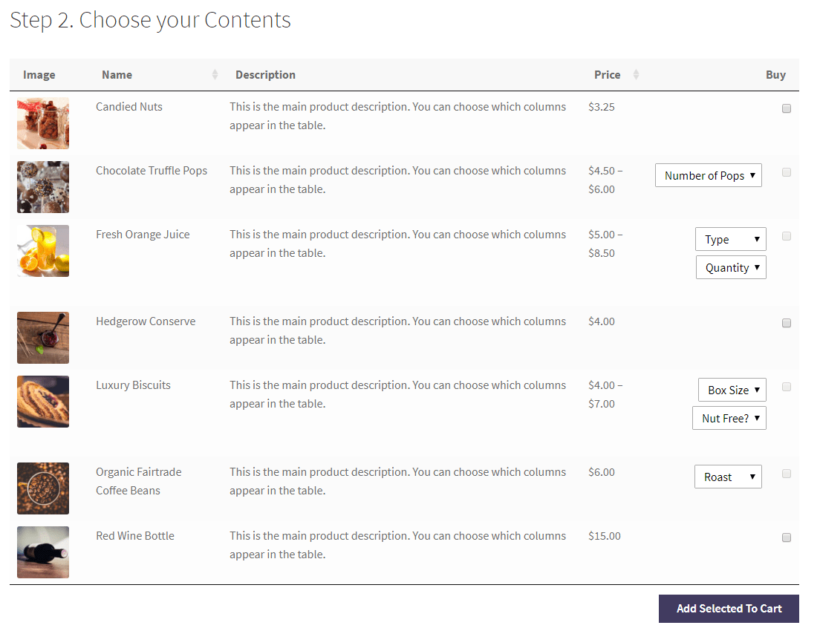
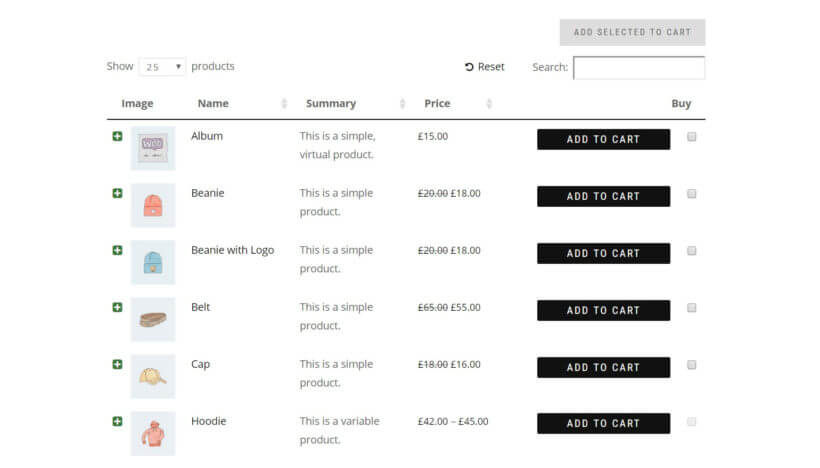
That’s it! Now hit the Publish button and preview your page on the storefront. It should look something like this:
Bonus tip #1 - Add extra mix and match product options
Product add-ons appear in the add to cart column of the mix and match product configurator.
So far, you've learned how to use variations to add a choice of options for each mix and match products. This is fine for most WooCommerce mix and match configurators. However, variations aren't suitable if customers need to be able to select more than one option at a time.
Fortunately, you can easily do this with the WooCommerce Product Options plugin. This fantastic WooCommerce extension makes it easy to add extra options to your mix and match products. For example, you can add multi-select checkboxes to each product. You can even add text boxes where the customer can enter a personalized message.
Bonus tip #2 - Too many options? Add quick view lightboxes
Some WooCommerce mix and match products websites end up with a large number of variations or options for each product. For example, look at the Pizza Fiorentina product in the screenshot above. This product has 2 rows of product add-ons, which isn't a huge number of options - and it's already taking up a fair amount of vertical space. As a result, you can easily imagine what would happen if you tried to list several dozen options per product!
The solution is to remove the add to cart column from your mix and match products table, and replace it with quick view buttons. You can do this by adding the WooCommerce Quick View Pro WordPress plugin.
Customers click on the quick view buttons to view more product information and purchase options in a lightbox window.
There are lots of benefits from using quick view to sell WooCommerce mix and match products:
You can choose what information to include in the lightbox. For example, you may wish to show the full gallery of product images. Or you may wish to hide the images and just show extra product data or add to cart options. Alternatively, you can have both! Either way, there's no limit to the number of variations and options that you can offer in the lightbox.
Customers remain on the product table at all times and don't have to visit a separate page to purchase each better. That's why quick view is better than using the single product page to sell mix and match products.
WooCommerce Quick View Pro also supports other methods of selling mix and match products such as grouped products, Composite products, and Product Bundles. List the products in a table, and customers can create custom product bundles from within the quick view lightbox.
Bonus tip #3 - Sell mix and match product subscriptions
Most mix and match WooCommerce products configurators sell products on a one-off basis, with a single payment.
If you prefer, you can create mix and match product box subscriptions. The instructions are the same as above, but you need to add the YITH WooCommerce Subscriptions plugin to take repeat payments.
WooCommerce Subscriptions make it easy to accept free trials and regular payments for each product. You can choose whether to offer a free trial and whether customers will be billed weekly, monthly, or whatever frequency you like.
Bonus tip #4 - Restrict how many mix and match items the customer will order
So far, you've learned how to sell mix and match products by setting a fixed regular price for each product or variation. The total order cost is the sum of all the products that the customer selects and adds to their cart.
Some WooCommerce mix and match websites prefer to set a fixed cost for the entire product box. If you do this, then you'll need to add a product price for the box itself and set the price of the contents products as $0.00. (You can easily hide the item pricing column of the tables listing the box contents.)
If you do this, then you'll want to restrict the number of products that the customer can order. You can easily do this with the WooCommerce Quantity Manager plugin. Its plugin lets you create a minimum and maximum quantity rules. The rules prevent customers from ordering the wrong amount - essential for selling fixed price mix and match products in WooCommerce.
For example, you might set a minimum and maximum quantity of 1 for the box itself. You would then add a maximum quantity or value for the 'box contents' category. This controls how many items can be added to the box.
Bonus tip #5 - Sell mix and match packages with quantity-based discounts
Perhaps you want to sell WooCommerce mix and match products with a choice of packages, with discounts based on the number of products ordered. This is a good way to give discounts based on the number of photos purchased, without having to restrict the number of products that each person can buy.
To do this, use the WooCommerce Discount Manager plugin to dynamically change the price based on the number of products in the cart.
Next, you need to display the information in the frontend in a format that will encourage people to buy more:
At the top of the page, add information about the different packages and prices.
Underneath, use WooCommerce Product Table to list your mix and match products.
Customers can choose as many photos as they like and they will automatically be charged the correct price for their package.
Where to get the plugins
Letting customers mix and match products to create personalized product boxes and gift hampers is a great way to deliver an exceptional customer experience. And the best part is that it’s incredibly easy to do with the WooCommerce, WooCommerce Product Table, and Quick View WordPress plugins.
Now you know how to create your own WooCommerce mix and match product order form. Hopefully, you’re in a good position to take things further.
How do you use mix and match products in your WooCommerce store? We’d love to hear from you so let us know by commenting below!
If you want to improve the shopping experience on your WooCommerce website and increase sales, then you need to make it easier to purchase products. Customers are likely to buy more if you let them add multiple products to the cart from one page.
Here’s how it works: the customer simply ticks a checkbox to select each product they’d like to buy. Next, they click an Add Selected to Cart button to add everything at once. Finally, they head over to the checkout page.
In this article, we’ll show you how you can use the WooCommerce Product Table plugin to allow your customers to select multiple products and add them to the cart from a single page. Before we begin, let’s quickly take a look at how your Woo store can benefit from this.
Why you should let customers add multiple products to the cart from one page
If you’ve been using WordPress and WooCommerce for some time, you probably already know that the default layouts and user flows are very limited. There's no built-in way for customers to add multiple products to the shopping cart at once.
At best, your Woo product listing pages include an Add to Cart button for individual products. If a customer wants to buy more than one product, they’ll have to click a separate Add to Cart button to add each product to their cart.
What’s worse is that they have to visit the single product page of each product they want to purchase. This might be to get more information, set quantities, or configure product variations.
We needed a plugin to be able to add multiple products to a cart at once. After looking around we weren't able to find much other plugins other than yours.
With the WooCommerce Product Table plugin, you can improve your customer’s shopping experience by creating smooth one-page ordering. Instead of navigating to single product pages, your customers can shop directly from the product table view.
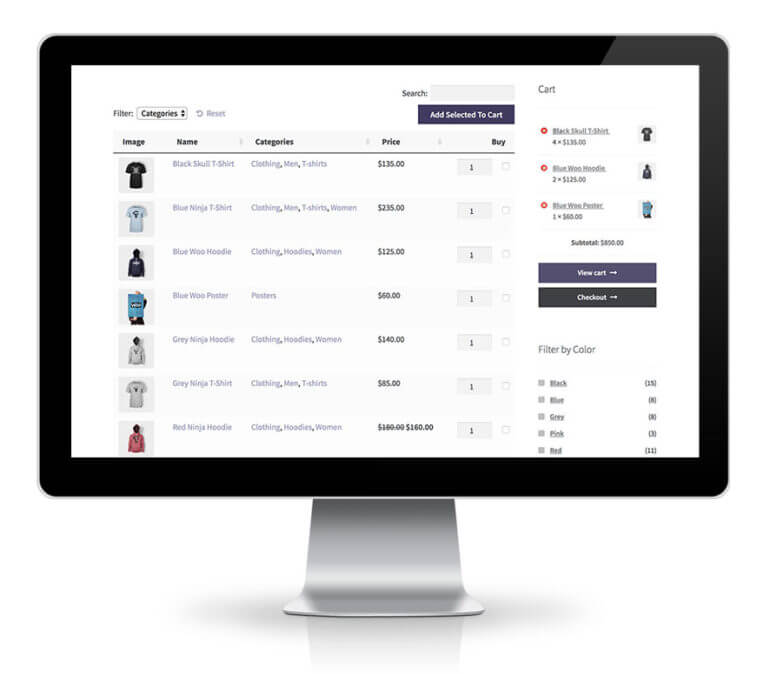
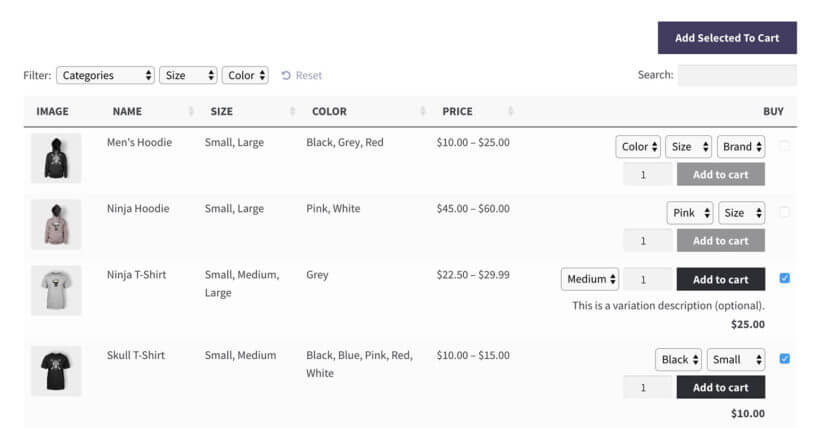
WooCommerce Product Table lets you add multi-select checkboxes alongside (or in place of) the Add to Cart buttons in the product table view. Customers will be able to tick the checkboxes next to the products they’d like to buy and select multiple products. They can choose their quantities and product variations directly from the table layout. Finally, they can click a single Add Selected to Cart button. This will add multiple products to the cart at once.
I was looking for a way for people to buy multiple things on one page, one-stop shopping.
By allowing customers to quickly select products, you can speed up shopping user flows on your online store. As a result, you’ll effectively be improving your online sales and conversion rates.
Which businesses can benefit from letting customers add multiple products to the cart from a single page?
How do you know if your WooCommerce online store will benefit from offering customers quick buying options? The first thing you need to do is analyze your customers’ buying habits. Ask yourself if it makes sense to buy multiple products from your online store at a time.
A click - click - click method of adding items to the users cart is what we needed.
Although multi-select checkboxes certainly have their benefits, not every business can benefit from them. For instance, if you’re selling large furniture, customers are likely to buy one (or maybe two) items at a time. However, there are plenty of products that lend themselves to multiple ordering, and this is where WooCommerce Product Table comes in.
Examples of products that customers typically buy more than one at a time
If you’re selling small, low-cost products or products that are meant to be used together then your online store can certainly benefit from having a multi-select checkbox system.
Does your WooCommerce store fall into any of these categories?
Low and medium cost products. When making purchases isn’t backed by major buying decisions, customers are more inclined to add multiple products to their shopping cart. In fact, improving your shopping user flow might even encourage them to buy more from you. E-commerce stores selling stationery items, toys, books, cosmetic products, and jewelry (for example) can benefit from letting their customers use WooCommerce to add multiple products to the cart from one page.
Related products. If you’re selling products that are designed to be used together, then you can improve the shopping experience by letting customers add multiple products to the cart from a single page. For instance, if you’re selling clothes then your customers are likely to purchase more than one item from you. If they’re buying a t-shirt, they might also purchase jeans or sandals to go with it to complete their look.
Build-your-own products. Online stores selling any kind of build-your-own product can benefit from letting customers add multiple products to the cart from the product listings page. This includes stores selling items such as gift hampers, custom cosmetic boxes, or bakery items.
And that’s not all!
As you can see, there are many other businesses and online stores that can improve their shopping user flows simply by letting customers add multiple products to the cart from one page.
Customers view your foods in a list and tick all the meals they require. No need to visit the single product page! A WooCommerce add multiple products to cart plugin could be just what you need.
Introducing the WooCommerce Product Table plugin
WooCommerce Product Table is a plugin designed for WooCommerce websites that lets users add multiple products to the cart from one page.
It lets you list products in a customizable, searchable table layout with a checkbox next to each product. You can choose to display an Add Selected to Cart button directly above and/or below the product table.
With the WooCommerce Product Table plugin:
You can create a single product table to list all of your products with multiple Add to Cart buttons and/or checkboxes.
The product tables are fully customizable, searchable, and sortable. You can add them pretty much anywhere on your site (pages, posts, or widgetized areas) simply by inserting a shortcode. Its the perfect bulk add to cart plugin for WooCommerce.
How to add multiple products to the cart from one page in WooCommerce
If you have a WooCommerce online store, you can use the WooCommerce Product Table plugin to create a functional product listings table. Customers will be able to use the product list table to add multiple products to the cart from one page. Here’s what you need to do:
Get the WooCommerce Product Table plugin. You’ll also receive a license key for using the plugin in a confirmation email.
Log in to your WordPress website and head over to Plugins → Add New. Upload the plugin’s zipped file and click Activate.
Navigate to WooCommerce →Settings →Products → Product Table and paste your license key into the License Key input field.
From the same screen, scroll down till you see the Add to cart button option and select Checkbox only. This will display a multiple add to cart checkbox next to each product item in the table layout. Alternatively, select the Button & checkbox option if you want to display individual Add to Cart buttons alongside the multi-select tick boxes.
Read through the other settings and make any other changes to customize how you want the product tables to behave.
Head over to Pages → Add New to create a new page (or edit an existing page) that you’d like to add the product table to.
Add the [product_table] shortcode to your page.
Click the Publish button to proceed.
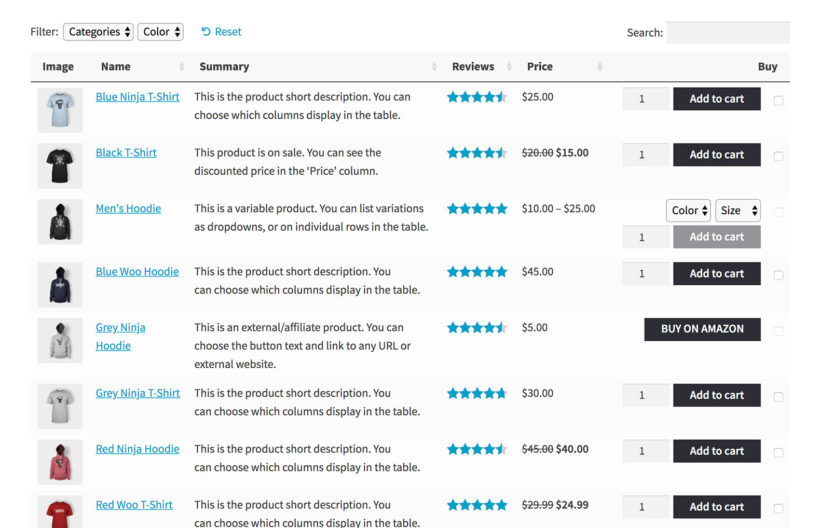
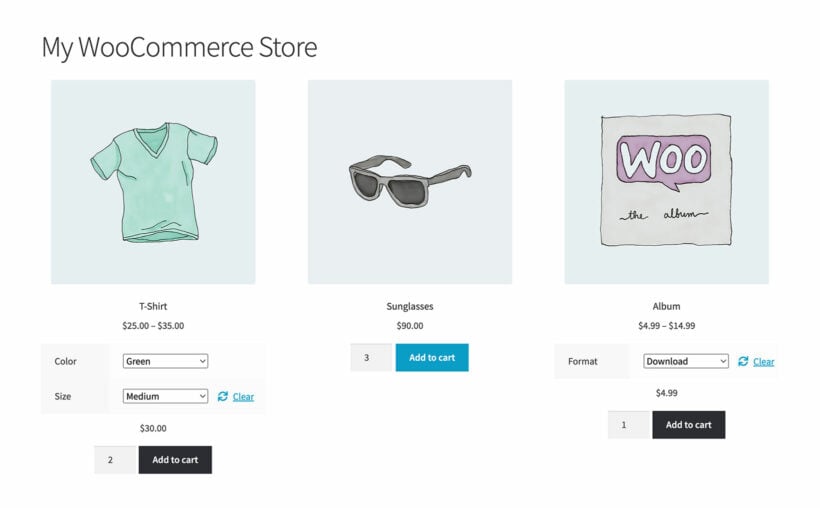
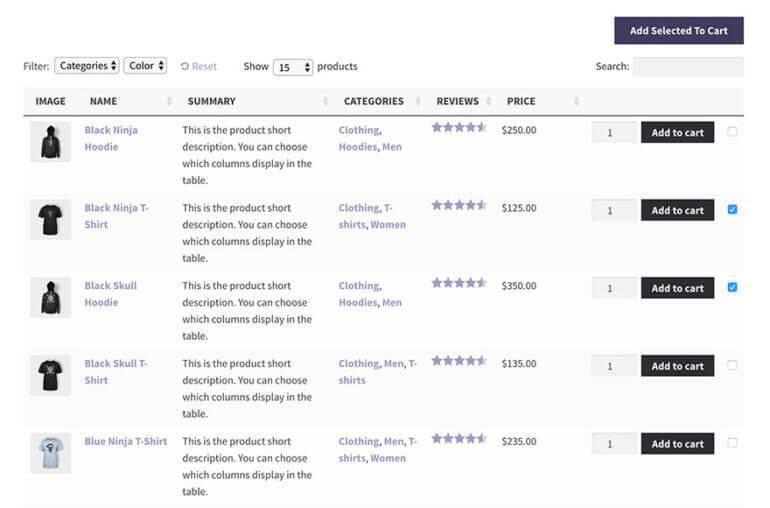
That’s it! A product table will automatically be generated on the front-end of your WooCommerce website. It'll include options to let users add multiple products to the cart from one page. It might look something like this:
Display important product information in the table
One of the key benefits of using the WooCommerce Product Table plugin is that your customers don’t have to visit single product pages to get important product information or add to the cart.
The purpose of letting customers add multiple products to the cart from one page is to speed up the shopping user flow. For this reason, it doesn’t make sense if customers can't get important information directly from product listing pages. You want to display everything the customer needs to make a purchasing decision in the table layout.
"We were looking for a product table with the ability to buy several things without being directed to the individual product pages and well, that's what your plugin does! :)"
With WooCommerce Product Table, you can choose which columns to show (or hide) in the table view. Out of the box, the plugin supports all the standard product data that WooCommerce stores in the WordPress database. You can also add extra columns, such as custom fields and taxonomies. Here’s a complete list of the available columns you can choose from.
Choose your columns carefully to maximize your sales. Add the columns that will actively encourage customers to add more products to their shopping cart. For example, you might decide to include a product reviews column. This will give customers some insight into what other people thought about the product.
Let customers select quantity and product variations
Customers might want to use a quantity selector or provide variation options to customize their product or order. Making these options available alongside the Add Selected to Cart button will further improve your site’s user experience.
Here’s what you need to do:
Activate the quantity selector. The WooCommerce Product Table plugin comes with a built-in option to display a quantity selector directly in the table layout. Simply activate the quantity selector option from the plugin’s settings page. By doing so, customers will be able to set a quantity before adding a product to their cart.
Display product variations. With the WooCommerce Product Table plugin, you can display product variations as dropdown lists or as separate rows.
If you’re using the WooCommerce Product Options plugin in tandem with WooCommerce Product Table, extra product options will show up next to the Add to Cart buttons. In some cases, adding variable products might not make sense for the type of product you’re selling. Instead, you can add extra options (in the form of checkboxes, radio buttons, or text fields) directly to the table layout.
Add product quick view buttons
Adding multiple products to the cart is all about keeping the customer on one page. So what happens if you want to provide extra information which doesn't fit on the one page order form? You don't want to send customers to a separate page for each product - that defeats the purpose of the multi-add to cart features.
The solution is to use the method described in this tutorial with the WooCommerce Quick View Pro plugin. This plugin works with WooCommerce Product Table and adds quick view links or buttons to the WC order form. Customers click on these links to view more product information in a quick view lightbox window. They can learn more about the product and then close the lightbox to return to the one page order form, where they can add multiple products to the cart. This aids multiple purchases better than sending customers to multiple pages.
If you want customers to add multiple products to the cart at once, then you may wish to remove the add to cart buttons from the quick view lightbox. Instead, use the plugin settings page to show other information in the lightbox such as the short description and full product image gallery. Customers will still need to use the multi-select checkboxes to add products to the cart, directly in the order form. Or if you prefer, you can have the checkboxes on the order form AND allow customers to purchase products individually from the lightbox. The choice is yours.
Adding multiple products to the cart is all about letting customers order more quickly and easily. However, that's only the first half of the customer journey.
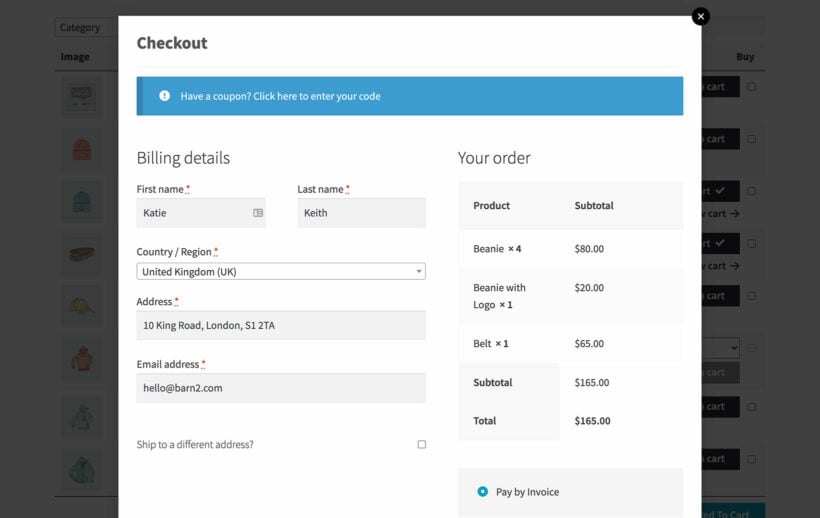
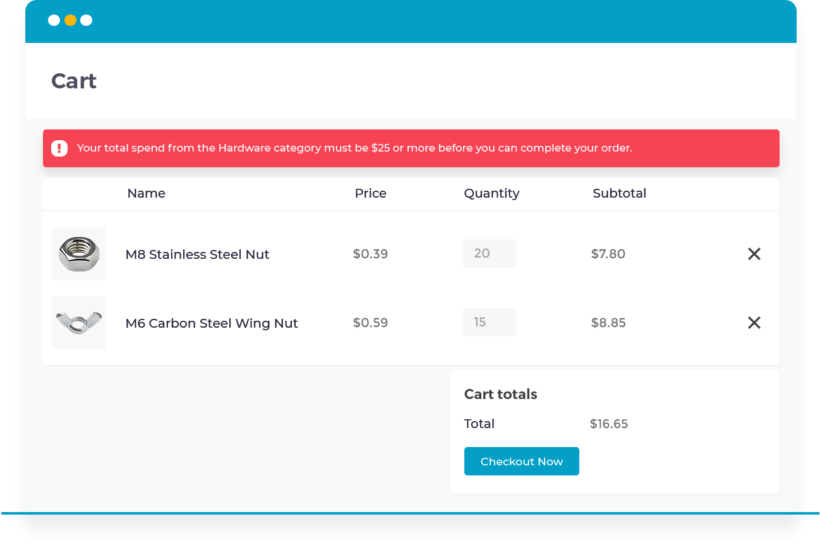
It's equally important to provide quick ways for customers to add their details and complete the purchase. That's where WooCommerce Fast Cart comes in.
This handy plugin displays a popup cart and checkout after customers add products to the cart. They can then complete the order directly in the popup, without leaving the page. This is much better for customers than having to visit separate cart and checkout pages.
Add WooCommerce Fast Cart for a quick popup cart and checkout.
Letting customers add multiple products to the cart form one page:
Improves the shopping user flow for your customers.
Boosts sales.
Increases the value of each sale.
Depending on what types of products you’re selling, speeding up the buying process and letting customers select products quickly just might convince customers to buy more from you.
"It is super simple for the customer to select many items at one time."
Do your customers typically purchase more than one product from your online store at a time? If so, do you think that letting them add multiple products to the cart from one page would improve their shopping experience? Share your thoughts in the comments section below!
If you're looking for a way to increase sales on your WordPress e-commerce website, it's time to consider a bulk add to cart WooCommerce plugin.
Customers can buy more quickly by adding multiple products to the cart at once. They simply tick a checkbox next to each product and click a button to add them all to the cart:
It's the perfect way to increase your WooCommerce store's conversions.
Today, I'm going to tell you how to use our popular WooCommerce Product Table plugin to add bulk add to cart buttons in WooCommerce.
Let's get started!
What is the bulk add to cart WooCommerce plugin?
WooCommerce Product Table is our bestselling WordPress plugin and works perfectly as a bulk add to cart plugin.
It lists products in a customizable table layout, with a tick box next to each item. There will be an 'Add Selected to Cart' button above and/or below your product tables.
You can create a single product table listing all your products with multiple add to cart buttons. Or you can create tables listing specific products only (e.g. by category). There are options to add tables anywhere on your site, or to replace the default layouts on the main Woo shop and category pages.
You can configure pretty much any aspect of your product tables. For example, you can choose which columns of product data display in the table. You can choose whether or not to show quantity selectors and product variations in the table. It's even possible to control how the table and quick add to cart buttons behave responsively on mobiles and tablets.
Here are just a few of the benefits of using bulk add to cart buttons:
Help site users find and add products to cart faster
Make it easier to add multiple products to cart
Potentially increase conversion rate
Simplify and streamline the buying process
How to add bulk add to cart buttons in WooCommerce
First, get WooCommerce Product Table and install it on your WP website. I'm assuming that you've already got a website with WooCommerce setup and some products.
Go to WooCommerce > Settings > Products > Product Table.
Next, paste your license key from the confirmation email, and choose the default settings for your product tables. (You can override these for each individual table if needed.)
For the 'Add to Cart button' setting, choose the 'Checkbox only' style to display a multiple add to cart checkbox next to each product. Choose 'Button & checkbox' if you want a add to cart button AND bulk tick boxes.
Now it's time to add 1 or more product tables. There are 2 ways to do this:
Create a page where you want to add a product table. Add the shortcode [product_table] to the page. Enter any further product table options to the shortcode.
If you want to use product tables directly on the main WooCommerce shop page, follow the instructions in the knowledge base to add the product table layout directly to your theme's template file.
Finally, view the page and you'll see your tables with WC bulk add to cart checkboxes next to each product.
The whole point of a bulk add to cart Woo plugin is to make it quicker for people to buy from you. With that in mind, I'll give you some tips on how to encourage customers to add multiple products to the cart. Use these to get more sales by encouraging each customer to buy more products.
Are customers likely to add multiple products to the cart?
First, you need to decide whether the products you sell will benefit from quick buy options such as a bulk add to cart WooCommerce plugin. Multi-select checkboxes are a major asset to many WooCommerce stores (including wholesale WooCommerce stores). However, they're not for everyone.
Customers are more likely to add multiple products to the cart when you're selling relatively small, low-cost items; or products that are designed to be used together.
Examples of products that benefit from quick add to cart checkboxes
Low cost products
Low cost products sell better with a bulk add to cart WooCommerce plugin. This applies to any store where each product isn't a major buying decision with low value products. For example, stationery, cosmetics and make-up, food and drink, gifts and toys.
Subtle improvements like quick buy checkboxes can convince them to buy more. Further encourage this with postage discounts for multiple items, or quantity-based bulk discounts.
Make sure your customers know they can save money, and use a bulk add to cart WooCommerce plugin to make it quick and easy.
Build a box
WooCommerce Product Table is popular for selling build-your-own products such as gift hampers or wine boxes.
The box contents are listed in a table. Customers use the quick add to cart buttons to bulk select the box contents. Once they've ticked the required items, they add all selected products to the cart at once.
They add their restaurant menu to a single page, with a separate product table for each section (e.g. starters, mains, sides). Each product table has bulk add to cart buttons with an 'Add Selected to Cart' button.
Customers tick all the food options from one table, add them to the cart in a single click, and then choose items from the next table. This is much quicker than clicking individual add to cart buttons for every product.
Related products and sets
If you're selling multiple products designed to be used together, then WooCommerce bulk add to cart buttons will make the process more user-friendly. Perhaps you're selling kitchen units where customers choose their own combination from a set of items such as worktops, cabinets and doors.
Customers need to plan their entire purchase before adding to the cart. When they're ready to order, WooCommerce bulk buy checkboxes make it much quicker to buy.
Case study - using a WooCommerce add to cart plugin to sell items in bulk
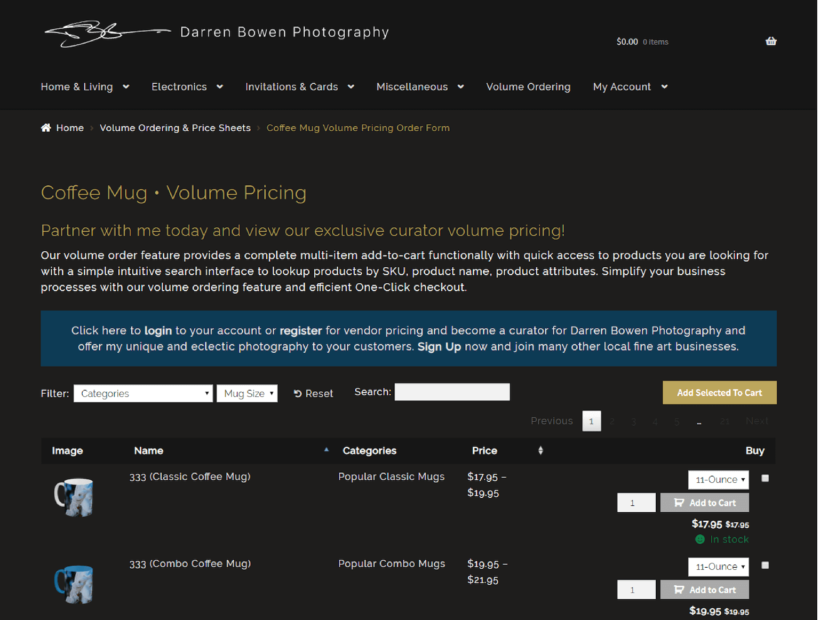
Darren Bowen Photography sells a range of products printed with Darren’s unique artwork. To help customers quickly buy multiple products there are two bulk ordering pages powered by WooCommerce Product Table. One for mugs and the other for iPad smart covers.
To buy multiple items, you simply select the quantities and use the “add to cart” function or check the “buy it” box. Once you’ve put everything you need in the cart, you can check your order before making your payment. And to keep things simple, there's an easy to use one-click checkout system.
Keep reading to learn how to add similar WooCommerce bulk order forms to your own site.
Which WooCommerce products don't need bulk add to cart buttons?
As you can see, many types of product will sell best with a plugin that provides quick buy options. However, a bulk add to cart WooCommerce plugin isn't going to help you with major purchases such as selling furniture online. If each purchase is a major decision for the customer, then adding quick check boxes won't really encourage them to buy more.
Think about whether the types of product in your store lend themselves to a quick bulk add to cart format.
Show important buying information in the table
There's no point having a WooCommerce bulk add to cart plugin if customers still need to visit the single product page before they buy. The whole purpose of the quick add to cart checkboxes is to allow customers to add multiple products directly form the main shop or product listings page.
This means that your WooCommerce product tables need to contain all the information that is needed to make purchasing decisions. You can do this by choosing which columns appear in the product table.
Joseph uses the WooCommerce Product Table plugin to include a quantity field in his product table:
This plugin is absolutely fantastic. I have been looking for a plugin just like this for a while now. I so glad I discovered this one. I wanted a quick, nice way to have my many products listed in a table with a quantity field and an add to cart button. This plugin was the answer. I love the way you can customize the table to include only the columns you want and how you can order the table by a specific column. I would totally recommend this plugin.
The WooCommerce Product Table plugin supports all the standard product data that WooCommerce stores. Read the full list of available columns and choose your columns wisely. Add the product data that will actively encourage customers to buy without clicking elsewhere. You can even add extra data such as custom fields and taxonomies. These are ideal for adding any further information or downloadable documents that will help customers to reach a quick buying decision.
Add a quantity picker and variations
Customers will only use the plugin's bulk add to cart checkboxes if they can select product options directly from the product table view. This means that you need to make these options available alongside the quick add to cart buttons. This includes:
Activate the quantity selector on the WooCommerce Product Table plugin settings page. This lets customers choose a quantity before selecting the product and adding it to the cart.
Use one of the options to show variable products in the product table. You can show product variations as dropdown lists next to the bulk add to cart boxes. Alternatively, each variation can have its own row in the product table with a separate add to cart checkbox for each one.
If you're using the WooCommerce Product Options plugin with WooCommerce Product Table, then extra product options will appear next to the bulk add to cart check boxes. These two plugins work perfectly together, so this is a good way to add extra product options if variable products aren't right for you. For example, you can add extra options as checkboxes and radio buttons, or even add text fields where customers can add a personal message for each product. All this works directly on the product listing page, so customers can choose their options and add multiple products to the cart.
Help customers find products faster
Built-in options
Bulk add to cart buttons are just one way to speed up the buying process in WooCommerce. It works because products become more visible, faster. The WooCommerce Product Table plugin comes with plenty of features to help customers find products more easily. All these improvements work together to truly improve your sales and increase conversions.
For example, add filter dropdowns or filter widgets to let customers quickly refine the list of products. They can choose their filters, view a list of products they're interested in, tick the boxes and add multiple products to the cart in bulk. Keyword search above the product table offers another way to do this.
Performance and page load time is also important. If you have lots of products, you can use the lazy load option to load fewer products at a time. Lazy load lets you list hundreds or even thousands of products in a table. It minimizes load time and avoids potential speed and performance issues.
Advanced filtering plugin
For stores that need bulk add to cart options with more advanced filtering, you can use WooCommerce Product Table with its sister plugin - WooCommerce Product Filters. This adds even more sophisticated filters to your bulk order forms, as you can see in the screenshot above.
Bonus tip #1 - force customers to buy in bulk
The Product Table plugin makes it easy for customers to add bulk quantities and add multiple products to the cart at once. However, customers can still buy small quantities if they want.
If you only want to receive bulk orders, then you need to use WooCommerce Product Table with a minimum quantity plugin. It is designed to work alongside the Quantity Manager plugin, which lets you set different types of WooCommerce minimum quantity rules.
For example, you can set a minimum order quantity or value to prevent customers from placing small orders. Alternatively, you can set minimum quantities for the whole order or per category, product or variation.
Either way, WooCommerce Quantity Manager helps you to guarantee your profit margins by stopping customers from placing non-bulk orders.
Bonus tip #2 - add quick view links to your product tables
Bulk add to cart plugins are all about helping customers to buy as quickly as possible. So what happens if you have too much information, or too many product options, to fit in the product table? Obviously, you don't want customers to have to visit the single product page. After all, this would slow down the buying process and defeat the purpose.
Instead, you can enhance your product tables with the WooCommerce Quick View Pro plugin. This handy plugin works hand-in-hand with WooCommerce Product Table and your bulk add to cart buttons. It adds quick view buttons or links to the product tables. Customers can view more product information and purchase options in a quick view lightbox. They can then either select variations and add to the cart directly in the popup, or they can quickly close it and use the bulk add to cart buttons in the product table.
Adding products to the cart in bulk lets customers order more quickly and easily. However, they can still lose time completing the standard multi-page WooCommerce cart and checkout.
To optimize the second half of the customer purchase process, I recommend installing WooCommerce Fast Cart. This plugin displays the WooCommerce cart and checkout in a popup after customers add products to the cart in bulk. They can complete their order from directly within the popup. This is so much faster than having to visit multiple page after adding products to the cart.
Install WooCommerce Fast Cart for an on-page cart and checkout.
Now you can create your own WooCommerce bulk add to cart buttons!
Now you know everything about how to use a bulk add to cart WooCommerce plugin. It's the easy way for customers to add multiple products to the cart at once. As you have seen, it will really speed up the buying process on your store.
Research shows that faster customers can use an e-commerce shop, the higher your conversion rate and sales will be. Test the add to cart checkboxes on our WooCommerce quick order form demo. Get the plugin today and add bulk add to cart buttons to your WooCommerce store straight away!
Discover the best free and premium WooCommerce custom add to cart button plugins, and how to choose the right one for your store.
One of the most important features of any e-commerce store is the "add to cart" button, which allows customers to easily add items to their shopping cart and continue shopping. While WooCommerce offers a default add to cart button, many businesses may want to customize this button to appeal to their customers more effectively. In this article, I will explore the best free and pro plugins available for customizing the WooCommerce add to cart button. I'll also help you choose the one that's right for your business.
To give you plenty of options, I'll focus on three plugins which take different approaches to customizing the add to cart button:
WooCommerce Custom Add to Cart Button (free plugin) - Change the 'Add to Cart' button text, replace the add to cart text with an icon, or add an icon alongside the button text.
Express Shop Page (premium plugins) - Extend the add to cart button on the shop page by adding quantity and variation pickers.
WooCommerce Product Table (premium plugin) - Make it quicker and easier to add products to the cart by listing them in a fast one-page order form. It comes complete with multiple add to cart buttons, quantity fields and variation pickers for true one-page shopping. Use it alone or with the free WooCommerce Custom Add to Cart Button plugin.
Keep reading to learn more about these options, and choose which one(s) to install on your store for the best results.
Why customize the WooCommerce add to cart button?
There are lots of reasons why store owners might want an option in WooCommerce to upgrade the add to cart button.
For example:
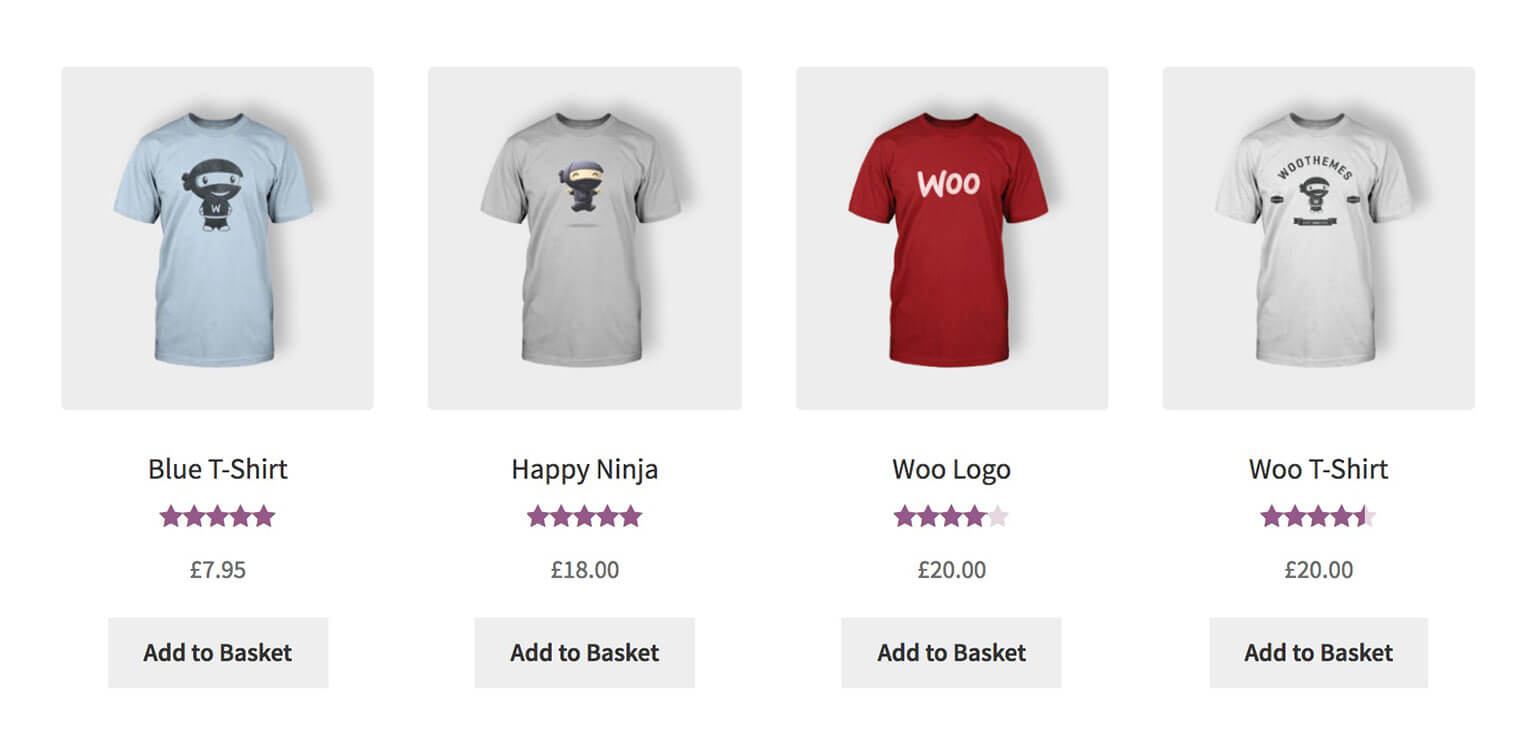
Do you feel that the 'add to cart' text wording doesn't quite fit with your brand? For example, a lot of WooCommerce store in the UK change the button text to 'add to basket'. Think about what custom add to cart text would work better for you.
Are you using another plugin to change the function of the WooCommerce add to cart button? This could be through a course bookings plugin, events plugin, add to quote plugin, etc. If so, you might want to reword the Add to Cart text with something more relevant, such as 'Buy Now', 'Enrol Now', 'Book a Place', 'Add to Quote' or 'Make an Enquiry'.
Are your customers frustrated by the basic add to cart buttons on the Shop page, which don't let you change quantities or choose variations? If so, then you might want to extend these using a plugin like WooCommerce Express Shop Page. This brings all the usual product options onto the shop page, instead of having standalone add to cart buttons.
If you've used our Product Table plugin to create a WooCommerce order form, then you might want to remove the Add to Cart text and replace it with a simple cart icon for each product.
A website using the free Custom Add to Cart Button plugin with WooCommerce Product Table
Or maybe you just want to change the capitalization of the add to cart text, for example from lowercase to uppercase or vice versa.
Whatever your reason for wanting to change the add to cart link in WooCommerce, you can do it with the free WooCommerce Custom Add to Cart Button plugin.
Option 1: Change the add to cart text and add an icon
WooCommerce Custom Add to Cart Button is a 100% free WordPress plugin for customizing the add to cart button. It comes with all the essential features for customizing the WooCommerce add to cart button text and adding a cart icon:
Change the wording of the WooCommerce add to cart button text.
Add a high definition (retina) WooCommerce cart icon alongside the text.
Hide the add to cart text and just have an icon.
It's super-simple and lightweight, so it won't weigh down your site.
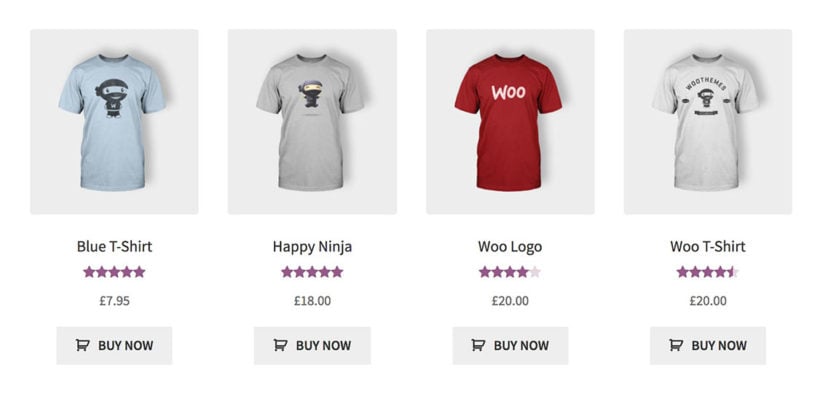
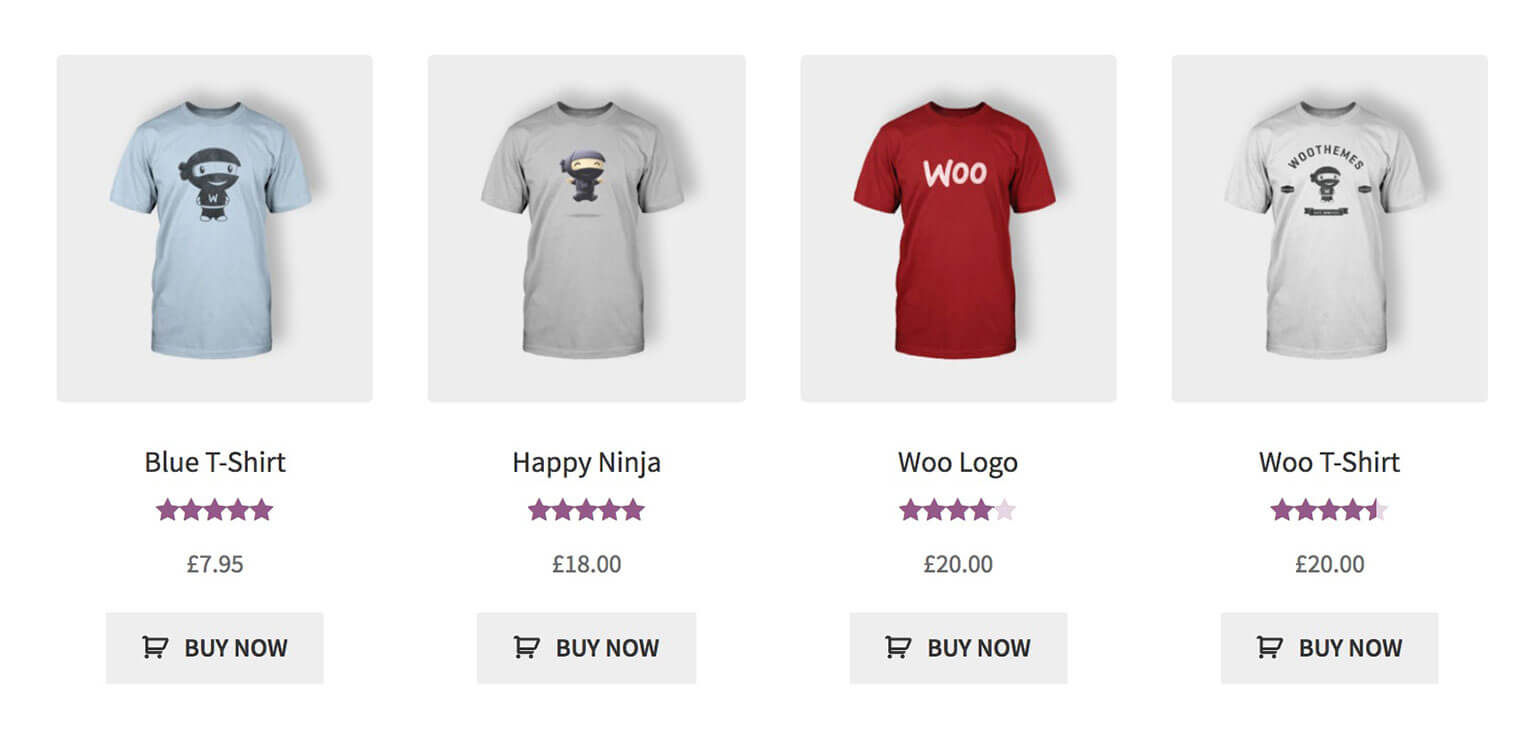
Here are some examples of the plugin in action:
'BUY NOW' text with cart icon
'Add to Basket' button text
Integration with the WooCommerce Product Table plugin with cart icons
How to create WooCommerce custom add to cart buttons
Log into the WordPress Dashboard and go to Plugins → Add New.
Search for 'WooCommerce Custom Add to Cart Button'.
Install and activate the plugin of this name by Barn2 Media.
Go to Appearance → Customizer → WooCommerce → Add to Cart. Here, choose the options for your custom WooCommerce add to cart buttons.
Option 2: Add quantity and variation pickers to the Shop page add to cart button
WooCommerce puts add to cart buttons on your main product listing pages, such as the main Shop page and your category pages. However, these are pretty useless as they come! That's because clicking the add to cart button only adds 1 of each product to the cart - there's no way to choose a quantity. It's even worse for variable products, which show a 'Select options' button linking to the single product page.
It's much better to allow customers to choose quantities and variations directly on your Shop and category pages.
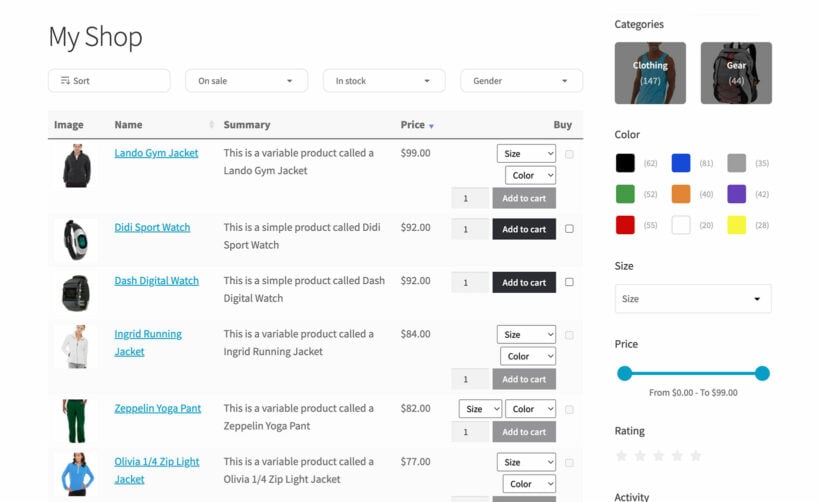
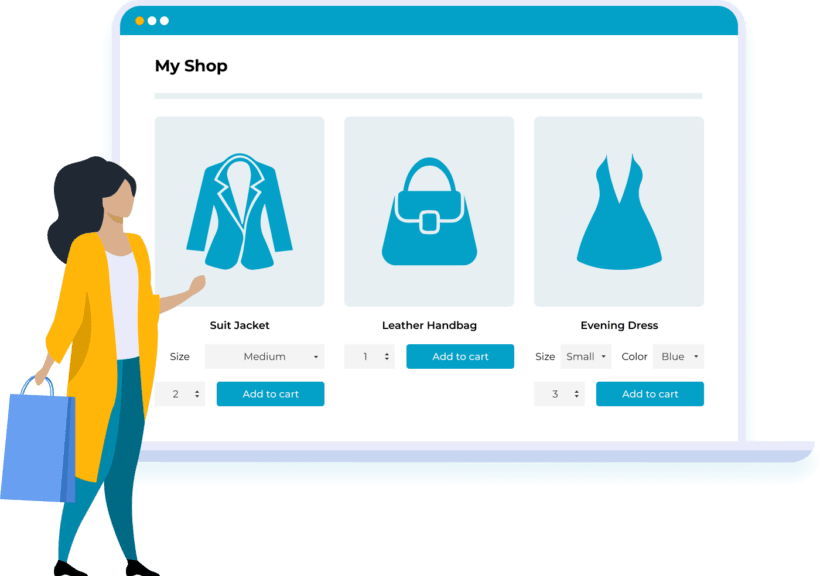
Fortunately, you can easily do this with the WooCommerce Express Shop Page plugin. It adds variation dropdowns and quantity pickers to the shop page like this:
As you can see, customizing the basic add to cart button in this way makes it much easier to add products to the cart.
Option 3: Create one-page order forms with custom add to cart buttons
So far, we've discovered two plugins for customizing the WooCommerce add to cart button. These create a custom button without changing the overall layout of your products.
The WooCommerce Product Table plugin takes things to the next level. It takes your products and displays them in a quick one-page order form for faster shopping.
WooCommerce Product Table is a powerful solution for taking your custom add to cart buttons to the next level. This plugin offers a unique approach to product displays by creating a table format. This allows customers to purchase products directly from the main shop page. As a result, there's no need to click through to individual product pages.
Why should I use custom add to cart buttons in a product table?
Product tables are a good addition to your store because:
There are a variety of purchasing options. These include the ability to select product variation and choose quantities. As a result, customers can quickly add products to the cart directly from the order form. This enhances the customer experience by streamlining the purchasing process. It also helps to increase conversions by reducing the number of clicks required to make a purchase.
You can also add WooCommerce custom fields to the product table, such as SKU, weight, and dimensions. Add multiple columns to provide customers with additional information.
It is highly customizable, with a range of options to control the appearance and functionality of the product table. You can choose which columns to display in the table, enable filters and sorting, and even add product search functionality.
As you can see, this gives you a lot of conversion-boosting flexibility compared the default WooCommerce shop page. Bringing the full range of add to cart options to the main shop page can help to increase conversions. The end result: driving more sales for your business.
Which WooCommerce add to cart plugin should I use?
In conclusion, customizing the WooCommerce add to cart button is a crucial step in improving the shopping experience for your customers. By using the free WooCommerce Custom Add to Cart Button plugin, you can easily change the button text and add an icon, helping to improve the design and functionality of your website.
Additionally, the WooCommerce Product Table plugin takes things one step further by bringing the full range of add to cart options directly onto the shop page. This allows customers to purchase products without having to navigate to individual product pages.
While each of these plugins offers its own unique set of features, they work best when used together. Combine them to create a highly customized and streamlined shopping experience for your customers. This will help to conversions and drive more sales for your business.
So why wait? Try them out today and see the difference they can make for your WooCommerce store!
Customers often ask if our bestselling Product Table plugin works with any WooCommerce 'add to quote' plugins. In this article, I'll share an excellent Request a Quote plugin that allows customers to add products to their shortlist directly from the product table
If you're using WooCommerce Product Table to list products in a table, you might want customers to request a quote instead of buying online. This is essential if you provide bespoke services or custom pricing which varies for each customer.
A WooCommerce add to quote plugin provides 'add to quote' buttons, which you can use in addition to or instead of the usual add to cart buttons. Your customers can select as many products as they like, choose the quantity, and create a bespoke list. They can then view the list and submit the quote request to you.
Which WooCommerce quote plugin can I use with product tables?
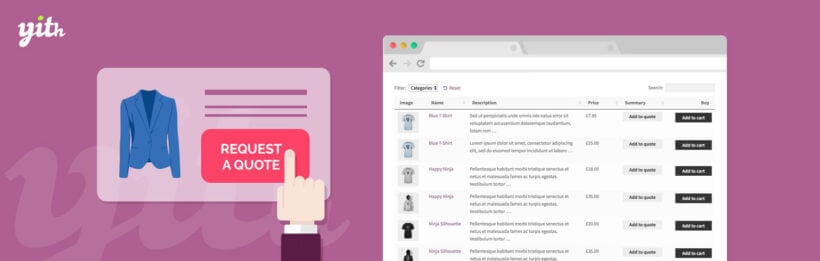
Most add to quote plugins don't work with WooCommerce Product Tables straight out of the box. However, we have integrated with the YITH WooCommerce Request A Quote plugin so that you can easily add quotation buttons to your product tables.
This video shows the 'Add to Quote' buttons in the product table. When you add a product to the quote, it is added to a list.
When you create your product table columns, add a column called request_quote. Set a custom heading by adding a : after followed by the heading, e.g. request_quote:Add to quote
Follow the documentation for bother plugins to set them up as required.
That's it! When you view the product table, it will contain an Add to Quote column containing the buttons from YITH's plugin.
FAQ
Can I hide the add to cart button?
Some people like to use add to quote buttons alongside the usual add to cart buttons. Others like to remove the add to cart button completely so that the only option is to get a quote.
The YITH WooCommerce Request A Quote plugin has an option to hide the add to cart button. This does not work with WooCommerce Product Table and will remove the add to cart button from the single product page. You can easily remove the add to cart buttons from your product tables - simply don't include an add to cart column when you add columns to the product tables.
Where can customers see their quote request?
The YITH WooCommerce Request A Quote plugin comes with a 'Request a Quote' page. This lists the products you have added to the quote request, and includes a form to submit the request.
When a customer uses the product table to add an item to the quote, a link to the Quote Request page will appear in place of the button. This makes it really easy for them to add multiple products to the quote and then click to review the quote.
You can also link to this page from your navigation menu. Alternatively, you can add a button linking to the page above/below the product table.
The premium version of the YITH WooCommerce Request A Quote plugin also has many extra features. This lets you customize the quote features to your exact needs.
Can customers choose a quantity for their quote request?
It can be a bit tricky to make the quantity picker in WooCommerce Product Table work with the YITH Request a Quote buttons. This is because the quantity picker appears in a different column of the table from the 'Request a Quote' buttons, and the two columns don't relate to each other.
Here are two suggested workarounds:
If you've enabled the option to display the product tables on your main Shop page then you can follow these instructions to make the quantity picker work with YITH's Add to Quote buttons. This method will only work when you display product tables and quote buttons on your shop page templates, and not when you create tables using a shortcode.
Where you have created tables using a shortcode, your customers should use the 'Add to Quote' buttons in the product table to built their quote. This will add a quantity of '1' to the quote for each product. When they click through to the quote page, they can modify the quantity of each product as required.
Does it work with variations?
If you want people to be able to add variations to the quote, then you need to enable the option on the WooCommerce Product Table settings page to list each variation on its own row of the table. If you display the variations as dropdowns then YITH's plugin won't know which variation to add to the quote.
Conclusion
We hope you enjoy using YITH's Request a Quote plugin with WooCommerce Product Table to create table layouts with add to quote buttons.
Our bestselling WooCommerce table plugin has yet another new feature! The new version of WooCommerce Product Table lets your customers select multiple products in the table and add them to the cart. All in a single click!
Didn't the WooCommerce table plugin already have Add to Cart buttons?
Yes. Previously, your WooCommerce tables could include an 'Add to Cart' column. Each row of the table had a separate Add to Cart button for each product.
This was very popular, but could be time-consuming for customers wanting to buy lots of products. Quite a few of our WooCommerce Product Table customers have requested a multiple add to cart feature. They wanted to select multiple products and add them to the cart at the same time.
Now you can do this too.
How do the multiple add to cart boxes work?
If you activate the new multiple add to cart boxes in your WooCommerce table then a check box will appear alongside each product. It will be added to the 'Add to Cart' column for each product.
Customers can tick as many products as they like. Once they've ticked them all, they can click 'Add Selected to Cart' to add them all to their WooCommerce shopping basket.
Depending on your WooCommerce settings, a success message will appear at the top of the page. Customers can click to view their cart and check out as usual. (All this is handled by WooCommerce - all the WooCommerce table does is control how products are displayed and added to the cart.)
You might be using plugin to change your Add to Cart behaviour such as Ajax Add to Cart. If so, it will work for your multiple add to cart button as well as the other buttons in your WooCommerce store.
Can customers select variations from the WooCommerce table?
Absolutely - we added support for variable products in a previous release of the WooCommerce table plugin. Customers can use the multiple add to cart option to buy simple or variable WooCommerce products.
If you activate the variations option in the product table then each variation appears as a dropdown in the Add to Cart column. Customers can choose their variations, view the correct price, tick the check box and use the 'Add Selected to Cart' button above the table.
Does my product table have to use the new multiple add to cart?
No. Your WooCommerce table can work in any of these ways:
You can have a check box alongside each product with an 'Add Selected to Cart' button above the WooCommerce table.
If you prefer, you can have an 'Add to Cart' button next to each product (as it was before).
Alternatively the table can have both the check box, multi add to cart AND individual Add to Cart button for each product!
Instead of an add to cart column, you can display a custom field in the WooCommerce table. You can add a link or button to the custom field for each column, instead of the default add to cart button. (e.g. you could use this to add a 'Request Quote' button linking to a page with contact form.)
You don't have to have an add to cart column at all.
The WooCommerce table plugin really is that flexible!
How can I add multiple add to cart boxes to my WooCommerce table?
You can see the new multiple add to cart feature in action on the WooCommerce Product List Demo Site. The main demo features a product table with both Add to Cart options active.
Browse around this site to see the different combinations. This will show you the flexibility of the WooCommerce table plugin before you buy.
Where can I get the WooCommerce Product Table plugin?
Our bestselling WooCommerce table plugin is available on the Barn2 Media website. Get it today - your product tables can be up and running in minutes.