Online proofing is the process of sharing creative content with your clients or customers to get their approval. For example, if you're a wedding photographer, you might send the final wedding pictures to the happy couple for them to approve the pictures and/or choose which photos they want to purchase.

Online proofing is a necessary part of the creative process when you're working with clients, but it can also be time-consuming because it involves back-and-forth and you might have a lot of items that need to be proofed.

A good online proofing tool can help you streamline the approval process and save time. What's more, it provides a more convenient experience for your clients to review items, and helps you with project management.

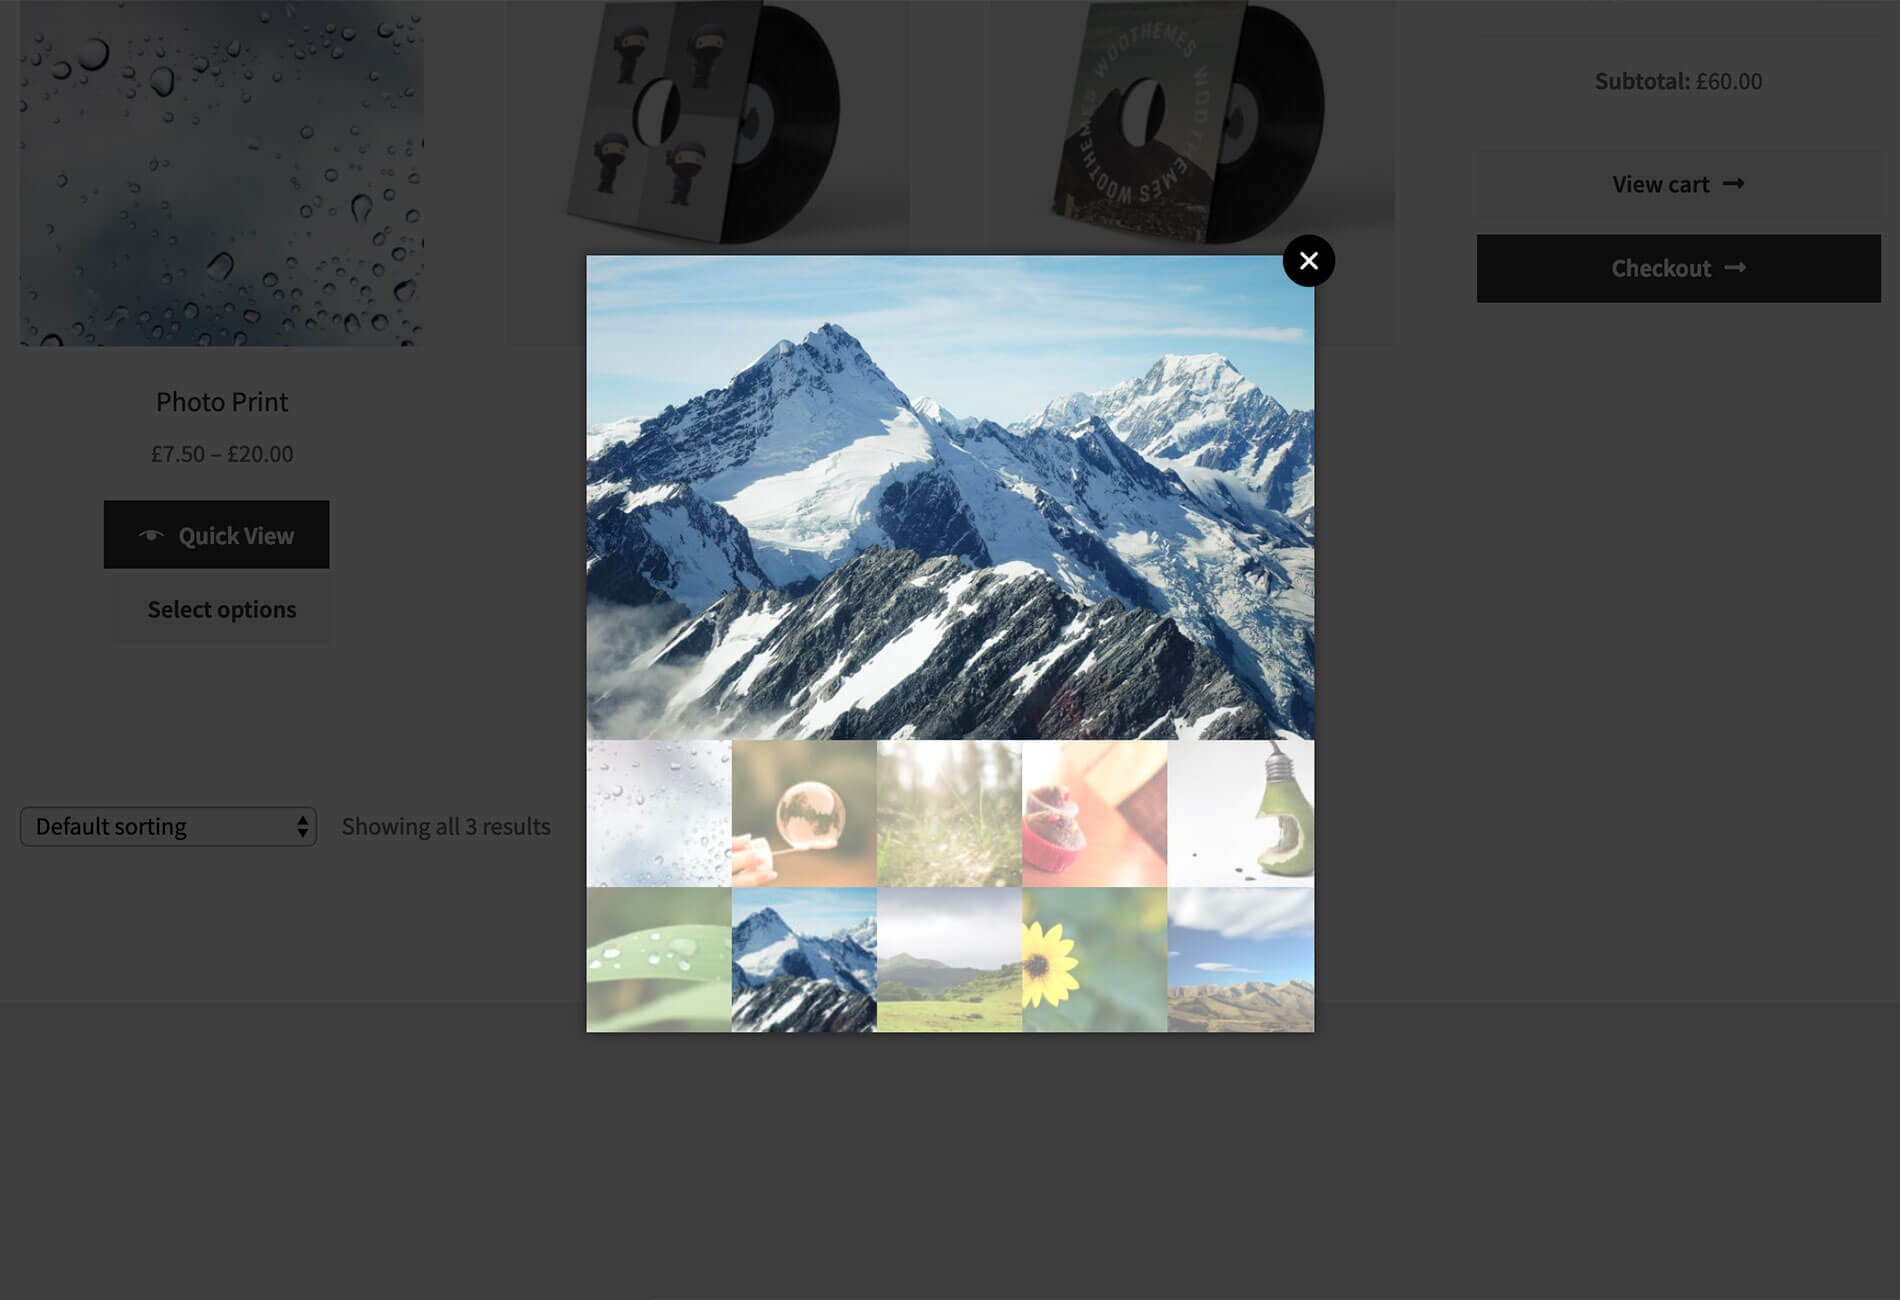
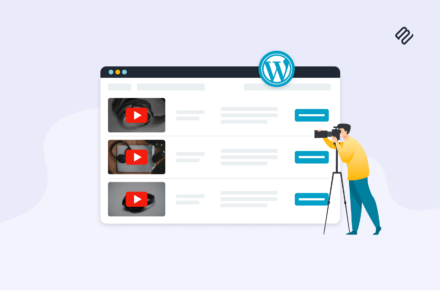
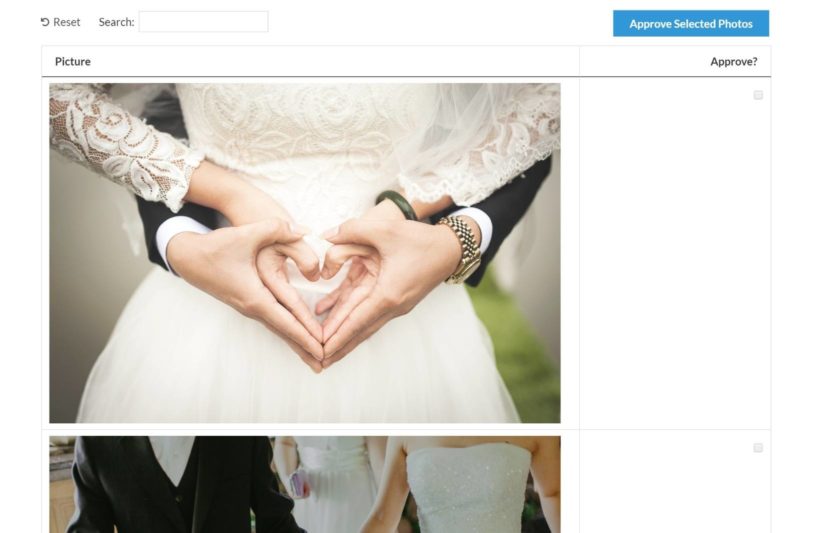
In this post, you'll learn how to create your own flexible, affordable online proofing system with WordPress and WooCommerce. You'll be able to send clients a private area with just their items and they'll be able to mark which items they approve using simple checkboxes:

Online proofing example

Why you really need an online proofing tool (the benefits)

Picking the right online proofing software helps both you and your clients. It will:

  • Eliminate the frustrating back-and-forth via email or phone. Customers can approve items in real-time, right from your website.
  • Help you stay organized and know which items have been approved and received final approval/sign-off.
  • Give customers a chance to make revision requests (and help you stay organized there, too).
  • Keep your work in one spot, instead of sending new files for every new version. WordPress also includes basic side-by-side version control so you can track changes and you can also add an audit trail with plugins.
  • Offer digital asset management for various file types.

Basically, it's just a lot more convenient and a lot less time-consuming for both you and your clients.

And when you build your own online proofing solution, you'll have full control and can make sure it integrates perfectly into your workflows.

The best way to set up WooCommerce for online proofing

To create your online proofing solution, you're going to use WordPress and WooCommerce as the base. From there, you can use some affordable WooCommerce plugins to adapt the WooCommerce plugin to online proofing:

  • WooCommerce Password Protected Categories - lets you create a private category for each client. This ensures clients only see the items that apply to them.
  • WooCommerce Product Table - lets you display items that need to be proofed in a flexible table layout. This creates a much more efficient experience for your clients, as they can just browse through a list and check all the photos they want.
  • Product Add-on Options - lets you add a "comments" text field so that customers can add notes, feedback, requests, etc.

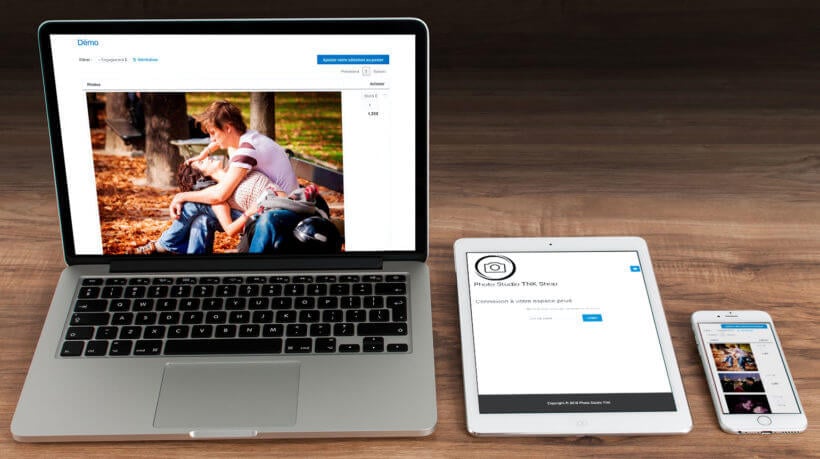
Case study: Photo Studio TNK

WooCommerce photography client photo prints page

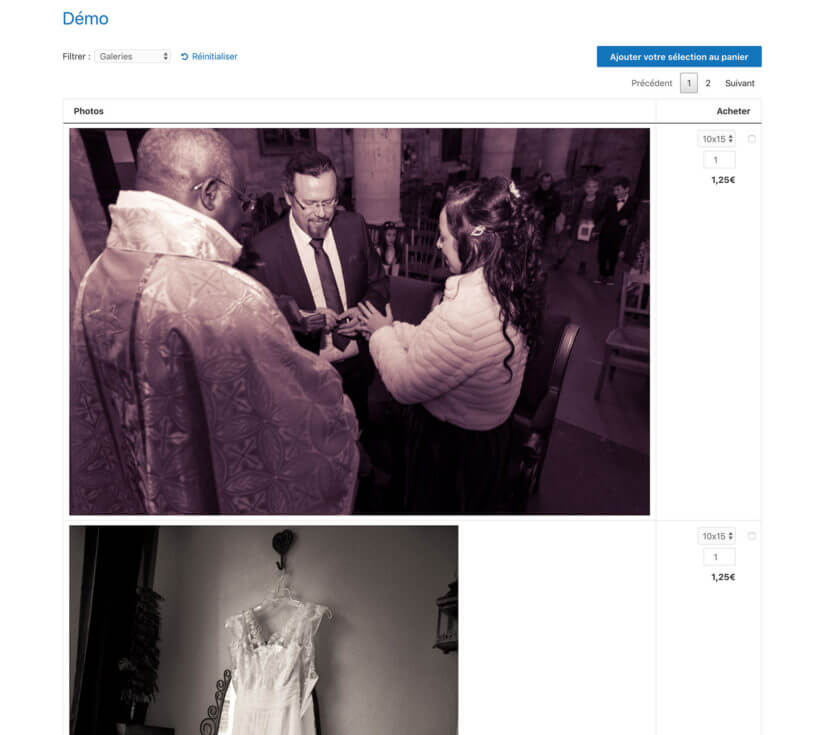
Photo Studio TNK is a wedding studio in Paris run by Thierry. Thierry uses the exact method above to organize all his online proofing for his photography clients. He uploads all of his clients' pictures to WooCommerce and then displays them in a private, table layout using WooCommerce Product Table and WooCommerce Password Protected Categories.

How to configure WooCommerce for client online proofing

By the end of this tutorial, here's how your online proofing process will work.

  1. Your clients will go to a unified login page.
  2. They'll enter their unique password, which will automatically redirect them to their photos (no need to create an actual account).
  3. They can browse their photos in a simple table layout, including viewing high-resolution images in a lightbox and using checkboxes to mark photos for approval.
  4. They can "check out" using WooCommerce. You can either have them pay via WooCommerce or just list the prices as zero and collect payment in person based on your agreement.

1. Create private client areas with WooCommerce Password Protected Categories

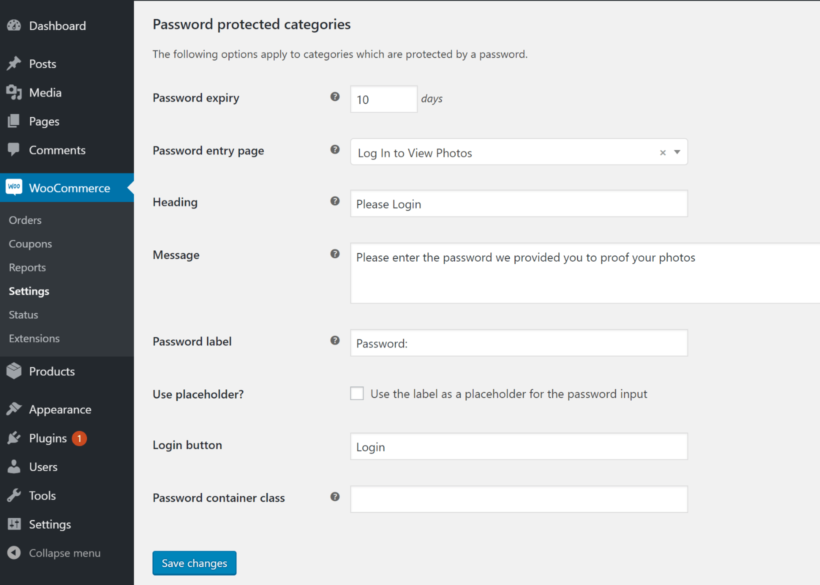
WooCommerce Password Protected Categories lets you restrict access to an entire category of WooCommerce products and automatically redirect people to the right category when they log in.

To get started, go to WooCommerce → Settings → Products → Protected categories to configure your login page. You can use the same login page for all your clients:

Configure login page

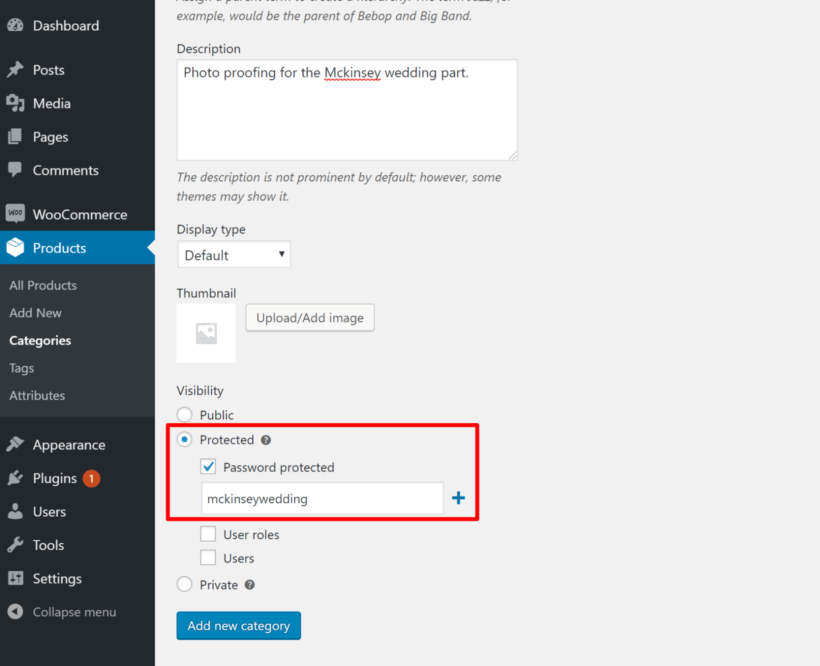
Then, go to Products → Categories and create a dedicated category for your client. Near the bottom of the Add new category form, you'll see a new Visibility option.

Choose Protected → Password protected and then enter the unique password for that client. If needed, you can add multiple passwords, each of which will unlock the category:

Enter password

Repeat the process for each new client as needed.

2. Create an efficient proofing process with WooCommerce Product Table

The default WooCommerce product layout isn't convenient for online proofing. To fix that, you can use WooCommerce Product Table to create a table/list view.

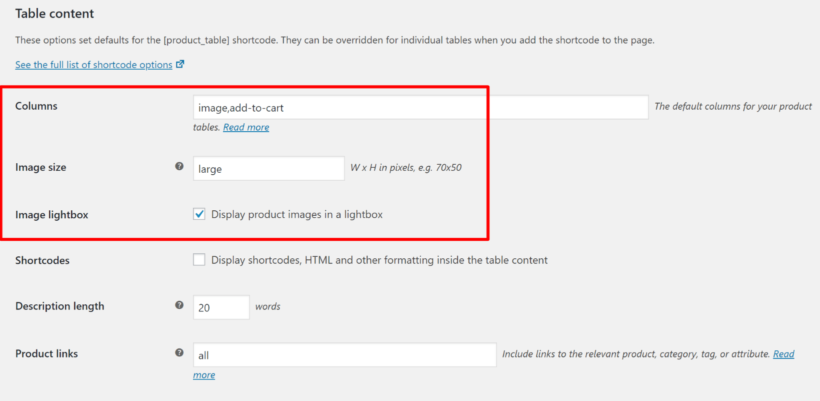
To configure the plugin, go to WooCommerce → Settings → Product → Product tables and:

  • Choose your Column settings, which control the information that displays for each photo. You can view a full list of column options here, but a good starting point for online proofing is two columns: image, buy.
  • Choose the Image size.
  • Check the box for Image lightbox. This lets clients open a high-resolution image in a lightbox if needed.
Configure columns

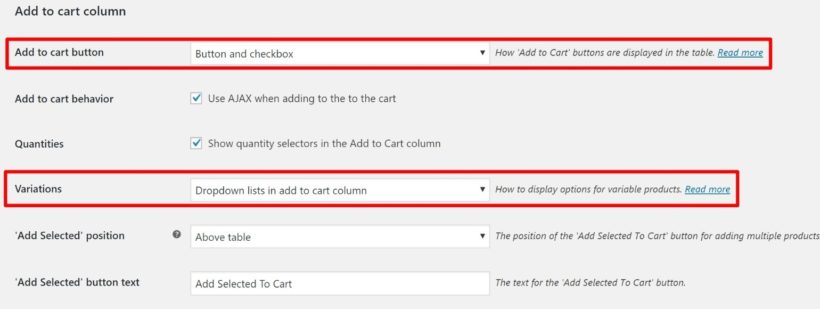
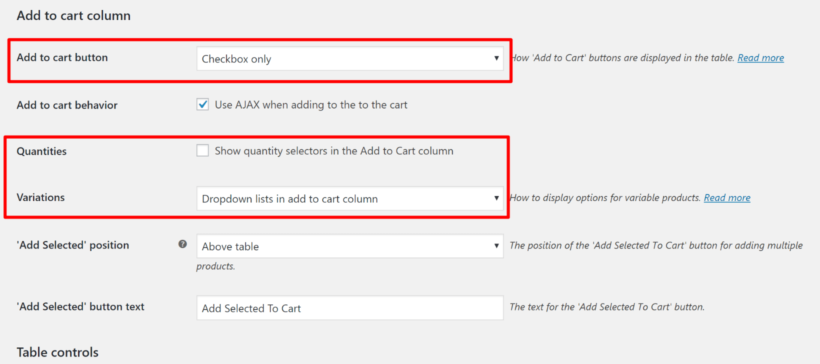
Then, scroll down to the Add to cart column and:

  • Select Checkbox only for the Add to cart button. This lets shoppers bulk select all the photos they want for faster proofing.
  • Choose Quantities behavior. You may or may not want to give people the option to select different quantities for individual photos.
  • Choose Variations behavior. If you use variations for individual photos (like different sizes/resolutions), you can let clients choose variations using a drop-down.
Configure add to cart

Finally, follow this tutorial to replace the default WooCommerce category layout with your new table layout.

3. Add a "Comments" box with Product Add-ons

To give clients the option to add comments (like retouching requirements) or otherwise annotate options, you can use the Product Options plugin.

To add the comments box to all images, go Products → Options and create a new short or long text field to apply to all products:

Add new addon

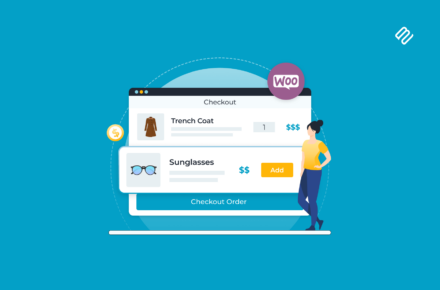
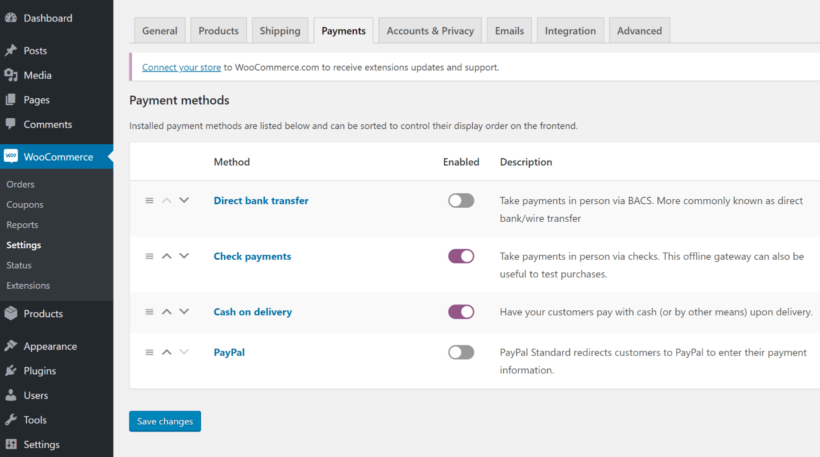
4. Configure core WooCommerce checkout process according to your needs

Once a client has selected all the photos they're interested in, you can have them pay through WooCommerce. Or, if you've already handled payment offline, you can make all the photos "free" and have them "check out" using a local method like cash on delivery.

Go to WooCommerce → Settings → Payments to set this up:

Configure checkout method for online proofing

Other helpful WooCommerce proofing plugins

Create your own client proofing portal with WooCommerce

With the right plugins, WooCommerce makes a great solution for online proofing that will save you time and create a more convenient experience for your clients versus other online proofing tools.

To use WooCommerce for online proofing, you'll want:

You can also use other WooCommerce photography plugins to further enhance your online proofing and workflows.

Get started today and make your proofing a whole lot simpler!

If you're a photographer, learning how to sell photos in WooCommerce gives you a simple, affordable way to connect with customers and potential clients and grow your online revenue. Having your own online store makes you look more professional and ensures you don't have to pay a commission to a third-party just to sell your photos.

WooCommerce is a great solution for selling photography because it includes all the features you need to manage, display, and deliver your photos. However, while the core WooCommerce plugin includes all the basics, you'll want to use some add-ons to more effectively sell photos on WooCommerce, which is a big part of what we'll cover in this post.

Specifically, you'll learn how to more effectively display your photos in an easy-to-browse table layout, and you'll also learn how to restrict access to your photography, which is especially important if you're doing any kind of client-specific work.

Here's an example of what you'll be able to create by the end of this post:

Sell photos on WooCommerce with a table layout

Two plugins to help you sell photos in WooCommerce

In this tutorial on how to sell photos on WooCommerce, you'll see two plugins play big roles on your photography WordPress site.

WooCommerce Product Table

First, there's the WooCommerce Product Table plugin. This plugin lets you display your photos in an SEO-friendly, customizable table layout, rather than the default WooCommerce shop layout. You can control exactly which product details to display, and also add other helpful features, like sort and filter options.

This table approach has a few big benefits for WooCommerce photography websites:

  • Larger images - rather than relying on tiny thumbnails, a table photo gallery layout lets you display larger images without forcing people to click through to the single product page or open a lightbox gallery. This creates a much more efficient experience for people to browse lots of photos.
  • More details - you can display relevant photo details - like resolution or file format - without forcing people to visit the single product page. You can also let customers choose their preferred variation.
  • Bulk add to cart - shoppers can use checkboxes to select all the photos they want and bulk add them to their cart for an easier checkout or client proofing process.

WooCommerce Product Table works with physical products, digital products, and any WordPress photography theme.

Check out a demo of a WooCommerce photography store built with the WooCommerce Product Table plugin.

WooCommerce Protected Categories

Second, there's the WooCommerce Protected Categories plugin, which lets you restrict access to categories of photos. This is great for professional photographers who don't want the public to have access to some or all of their photos. Some of the benefits here are that you can...

  • Use passwords to restrict access, which means you don't have to force people to create a WordPress account just to browse photos.
  • Create different passwords for different categories, which lets you create a private area for each individual client.
  • Automatically redirect shoppers to different categories of photos based on the password they enter.

What kinds of photos can you sell on WooCommerce?

There are a lot of different types of photos you can sell on WooCommerce, and the exact approach that you use to set up your store should depend on what type of photos you want to sell.

For example, if you want to sell event photos, you might want to keep your photos private and only for people who attended the event. On the other hand, if you're selling stock photos, you probably want to keep your store public.

Here are some common types of photos and the best way to approach how to sell photos on WooCommerce for each type:

  • Stock photos - you can use WooCommerce Product Table to create easily-browsable lists of images. You'll also want to use filters to help shoppers find the stock photos they need.
  • Editorial images - you could either create a public store or restrict access to specific clients with WooCommerce Protected Categories.
  • Client-specific photos - if you're selling any type of client-specific photos (events, portraits, school photos, etc.), you'll want to pair WooCommerce Product Table with WooCommerce Protected Categories to create private client areas.
  • Digital art prints - you can use WooCommerce Product Table's features to display variations right in your table. For example, you can let people choose different image resolutions.

How to sell photos on WooCommerce: Step-by-step guide

Next, let's get into how to sell photos on WooCommerce using the methods we've discussed above.

First, you'll learn how to use WooCommerce Product Table to display your photos in a customizable list view. If you want to sell photos publicly, that might be the only WooCommerce extension you need.

Second, if you have a use case where you need to make some or all of your photos private, you'll also learn how to use WooCommerce Protected Categories to restrict access to your photos on a category-by-category basis.

Finally, we'll also share some general tips for selling photos on WooCommerce, including how to add sidebar filters, add a product quick view feature, and bulk upload images as WooCommerce products.

1. Set up WooCommerce and add photos as products

If you haven't already, you'll want to start by installing the free WooCommerce plugin from WordPress.org and running through the setup wizard. Then, go to Products → Add New to add the first photo that you want to sell.

Fill in all the details, paying special attention to the Product data box (like marking your photos as digital downloads). Also, make sure to use the featured image uploader to add your photo:

Add photos as WooCommerce products

If you want to sell variable photos - like different resolutions or file formats - you can choose Variable Product from the drop-down. You'll be able to display these variations in your table layout in the next step.

Make sure to repeat the process for all your photos. If you have hundreds or thousands of photos that you want to sell, we'll share a method to bulk upload photos as products later on.

2. Display photos as a shopper-friendly table

Once you've added your photos as WooCommerce products, you're ready to display them with WooCommerce Product Table. Here's an example of what you'll be building:

Sell photos on WooCommerce with a table layout

If you haven't already, purchase the plugin and then install and activate it at your store.

Then, go to WooCommerce → Settings → Products → Product tables to configure the plugin's settings.

While it's good to consider all the settings, there are a few key choices to make when using the plugin to sell photos on WooCommerce.

Configure columns and image sizes

First, use the Columns settings to control what information to display for each photo in your table. You have a range of options, but a good starting point for a WooCommerce photography store is something like:

Image,name,price,buy

If you want to display additional information about each product, you can add columns for categories, tags, attributes, and even custom fields.

Below that, choose the image size that you want to use, as well as whether or not to open an image in a lightbox. You can either enter exact dimensions in pixels or choose from the default WordPress theme thumbnail sizes:

WPT column settings

Configure add to cart settings

Further down, you can use the Add to cart column settings to control:

  • Bulk add to cart functionality.
  • How to handle product variations. For example, you could add a drop-down selector to let shoppers choose a variation.
WPT add to cart settings

Add search and filter options

Below that, you can use the Table controls section to add product filters. For example, you could let visitors filter by a photo's categories or tags. You can also add a search box if desired:

WPT filter and search options

The filters that come with WooCommerce Product Table are pretty useful for selling photos online. For even more advanced filtering, you can use it with the WooCommerce Product Filters plugin. This adds a wider range of filters, including image-based filters, color swatches, and more.

Display front-end table

Then, to create your front-end table layout, you can add the [product_table] shortcode anywhere on your site:

Sell photos on WooCommerce with a table layout

By default, the plugin will display all your photos, but you can use include and exclude rules to select specific photos if desired. For example:

[product_table category="nature"]

You can use the shortcode multiple times with different include rules, which lets you create separate tables for different types of photos.

Finally, if you want to add more filter options, WooCommerce Product Table also includes dedicated Ajax filter widgets that you can add to your sidebar to let visitors filter the table by price or product attributes:

WooCommerce Ajax filter widgets for photos

You can add these widgets by going to Appearance → Widgets.

3. Hide photos/create client-specific areas

If you want to restrict access to certain photos and/or create client-specific areas, you can use the WooCommerce Protected Categories plugin to privately sell photos on WooCommerce.

Once you install and activate the plugin, go to WooCommerce → Settings → Products → Protected categories to configure its settings.

Here, you can choose whether or not to still display hidden photos in your public-facing store. If you're selling client-specific photos, you probably want to disable this because you don't want private image thumbnails appearing on your main store page.

You can also control the password entry page, which is where shoppers will log in:

Add to cart options

Then, go to Products → Categories and either...

  • Edit an existing category that you want to restrict access to.
  • Create a new category that you want to restrict access to.

For example, if you just photographed a wedding, you could create a dedicated category just for that wedding party.

Then, use the Visibility settings at the bottom to restrict access. You can either add a password or restrict access to specific users or user roles:

WooCommerce Password Protected categories to sell photos

Once a visitor enters the password, they'll be taken straight to the associated category of photos, which creates a great user experience.

More tips for how to sell photos on WooCommerce

Beyond WooCommerce Product Table and WooCommerce Product Categories, there are also some other helpful WooCommerce photography plugins to help you sell photos on WooCommerce.

Add a product quick view

If you want to display more product details and even larger images without forcing visitors to go to the single product page, you can consider adding a product quick view to your photos' table layouts.

The WooCommerce Quick View Pro plugin integrates with WooCommerce Product Table to let you create a user-friendly quick view feature complete with product details, gallery images, variations, and more:

WooCommerce photos quick view example

Use Product CSV Import Suite for bulk photo uploads to WooCommerce

If you need to upload hundreds or thousands of photos as individual WooCommerce products, the Product CSV Import Suite plugin is a great way to save time. It'll let you bulk upload photos as WooCommerce products and configure the proper product details (like adding all the photos from a wedding to that wedding party's dedicated category).

Learn how to bulk import photos as WooCommerce products.

Automatically add an image watermark

If you're concerned about image theft, you can use the YITH WooCommerce Watermark WordPress plugin to automatically add a watermark to your product featured image. To remove the watermark, visitors will need to purchase the image.

Case study on how to sell photos on WooCommerce: Photo Studio TNK

WooCommerce photography website with client login plugin

Photo Study TNK is a wedding photography studio run by Thierry in Paris, France. Thierry uses WooCommerce to sell photos directly to his clients by using WooCommerce Product Table to display his photos in a list view.

He also adds each client's photos to a dedicated category and then uses WooCommerce Protected Categories to ensure that clients can only see their own photos.

Get started with selling photos on WooCommerce today

With WooCommerce Product Table and WooCommerce Protected Categories, it's easier than ever to sell photos on WooCommerce.

You can create a more user-friendly way for people to browse your photos via WooCommerce Product Table's table layout. And if you need to restrict access to photos on your WordPress website, you can use WooCommerce Protected Categories to create different protected categories and automatically send visitors to the right category after they enter the password.

Pick the approach that works best for you and you're ready to sell photos on WooCommerce today!