WooCommerce single product shortcode

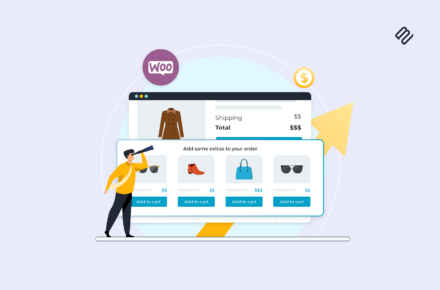
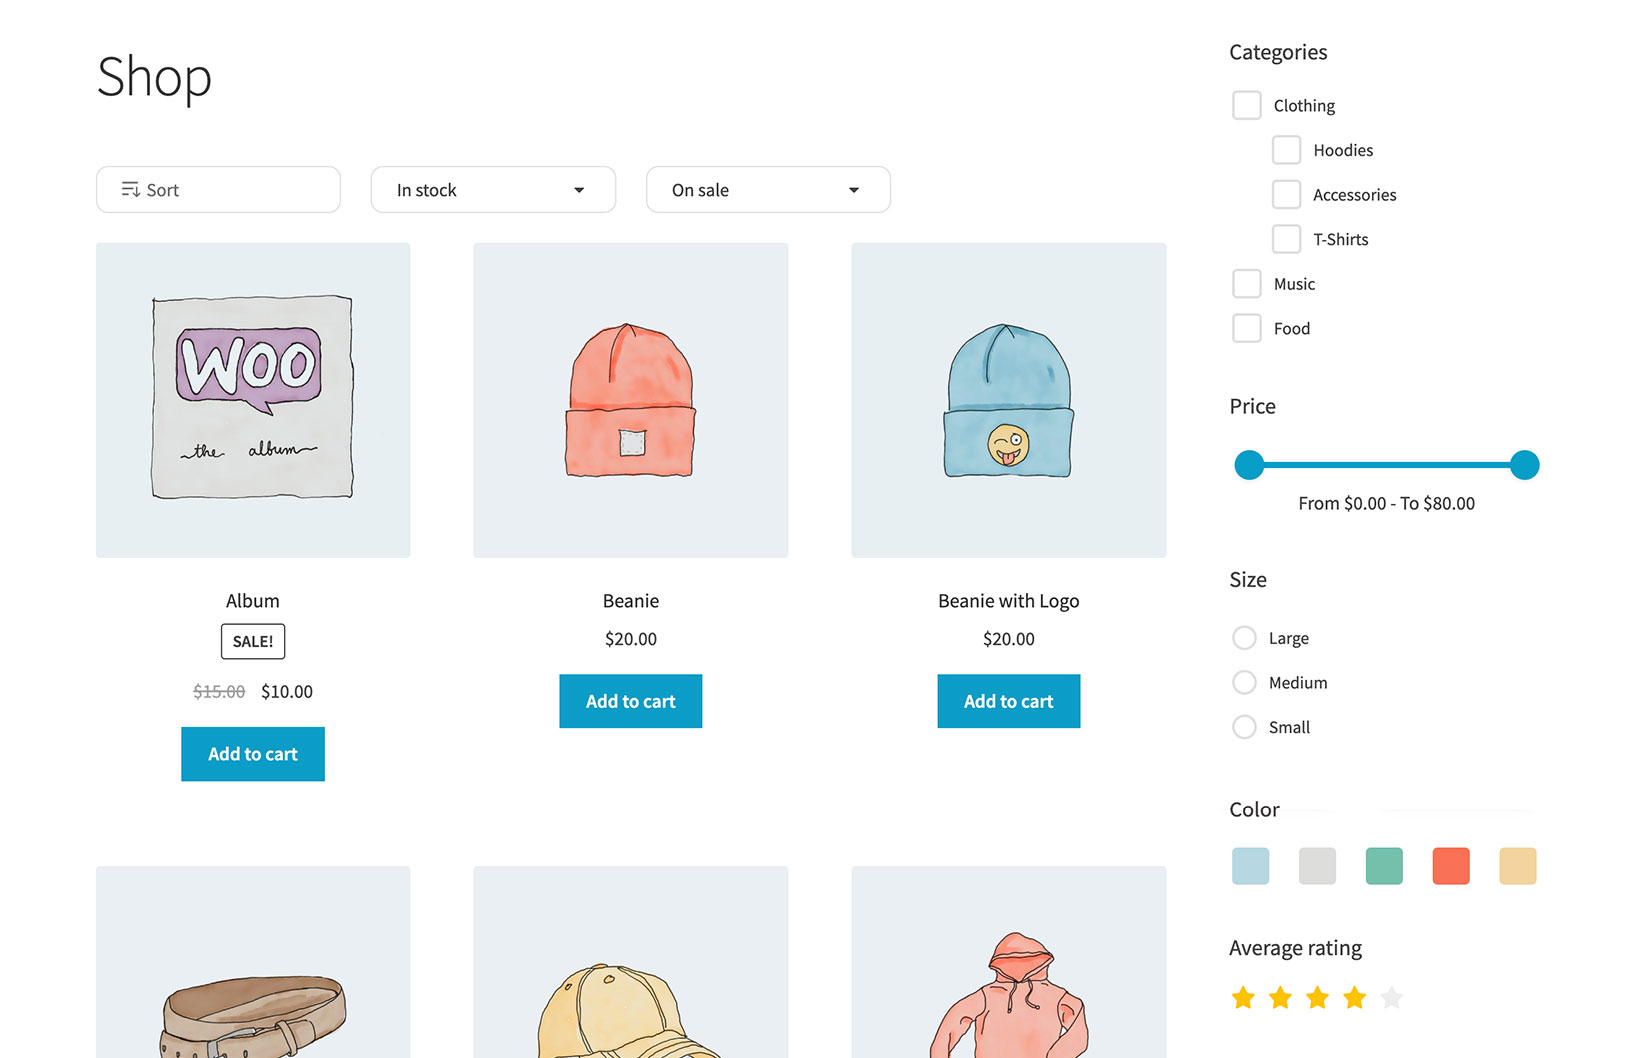
WooCommerce lists products on the shop page and product category pages. However, a standard WooCommerce installation doesn’t make it easy to add one or more products to other WordPress pages on your site. Luckily, you can use a single product shortcode to add a WooCommerce product to a page or post.

In this article, we’ll show you two easy ways to add WooCommerce products to a page or post. The products will look great and people can quickly add them to the cart without leaving the page. You won’t have to worry about styling or messing around with code.

2 ways to add WooCommerce products to a page or post

There are two ways to add WooCommerce products to a page or post on your WordPress website. Skip directly to the instructions for whichever method you’d prefer:

  1. Add one product only
  2. List multiple products

Why add products to normal pages on your WordPress site?

There are several reasons why you might want to add one or more WooCommerce products to a page or post on your website. This is becoming more and more important due to changing trends in e-commerce.

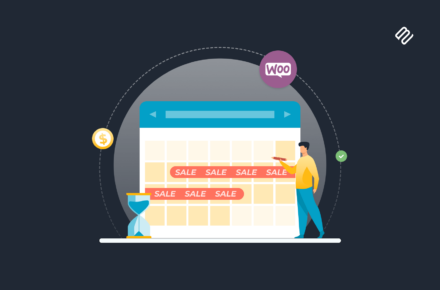
The e-commerce industry is changing and online stores are moving away from the ‘traditional’ navigation structure of focusing heavily on the shop and product category pages.

Instead, products are being shown to sell well when they’re displayed in a more content-centric way. An example of this approach is when specific products are recommended and incorporated into wider content such as a sales page or blog post. The reason why this works so well is that it puts the product into context. The user is therefore more likely to buy it!

Let’s take a look at some examples:

Websites selling only one product

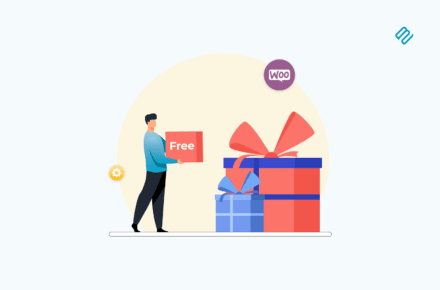
Businesses that only sell one product need to display their offering on sales pages and in blog posts and guides. These sorts of websites still need WooCommerce to power the back-end e-commerce functionality. However, the traditional shop and product category pages don’t make a lot of sense for this use case.

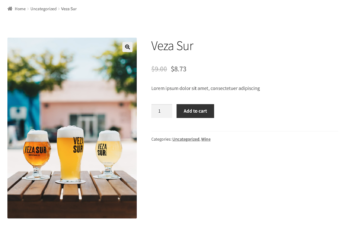
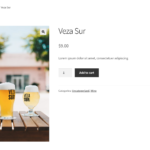
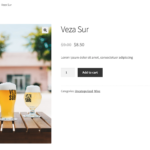
A better way to go about it is to use a page builder (like Gutenberg or a plugin) to create eye-catching content about your product and provide quick and easy ways to add the product to the shopping cart directly from that page. This is also perfect for featuring sale products.

Websites promoting products as part of a wider article or blog post

There are tons of websites that promote products as part of an article or blog post.
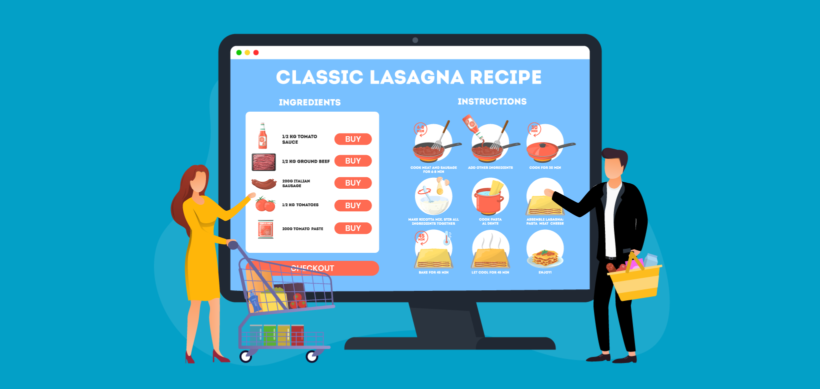
Food blog

For example, if you run a food blog, you might have a recipe page that includes a table listing all of the ingredients from the recipe as products. This way, readers can quickly buy them without leaving the page. These might be products that are sold directly on your website or affiliate products where the Buy button links to a third-party website (like Amazon or Tesco).
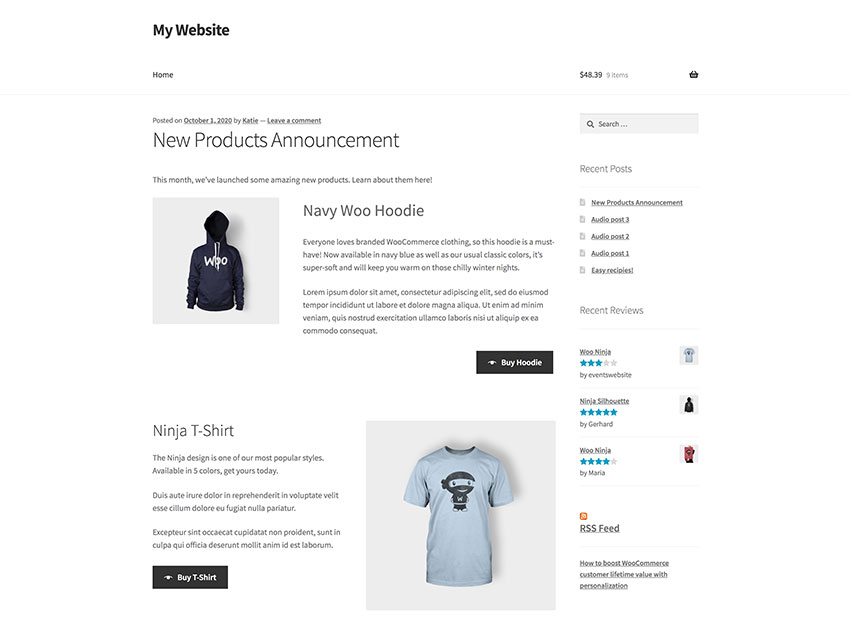
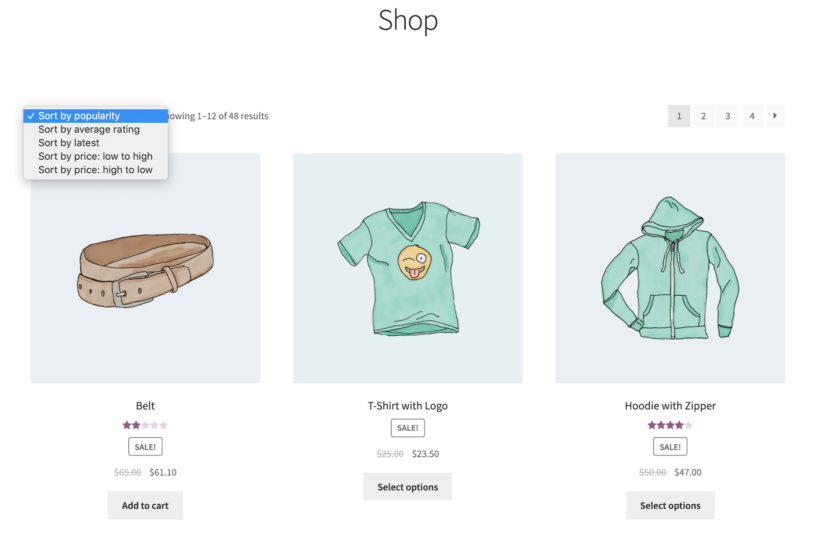
Fashion blog

If you run a fashion blog, you might publish an article about the latest trends, featured products, or the best selling products. Your article might list examples to illustrate each point along with Buy buttons linking to recommended garments. This also works for a Get the Look type blog post in which you dissect a trending look and list featured products to make it easier for customers to buy.

Tech website

And if you run a tech website, you could include an article reviewing the latest gadgets with Buy buttons for each gadget embedded directly on the page. This is much more user-friendly than having to click through to the shop page or even a separate product page for each item. Customers can simply choose the products they’d like to purchase and add them to their shopping cart in one go and proceed to the checkout page. You can also display recent products and related products.

Method #1: how to add one product to a page

The WooCommerce Quick View plugin is the easiest way to add one product at a time to a page or post on your WordPress website.

You can use the plugin’s WooCommerce single product shortcode to insert a Quick View button anywhere on your website.

Example of a blog post with two product quick view buttons, each added via a shortcode

Instructions

  1. Get the WooCommerce Quick Vew Pro plugin and install it on your WordPress website.
  2. Go to the page or post you want to add the quick view button and insert the 
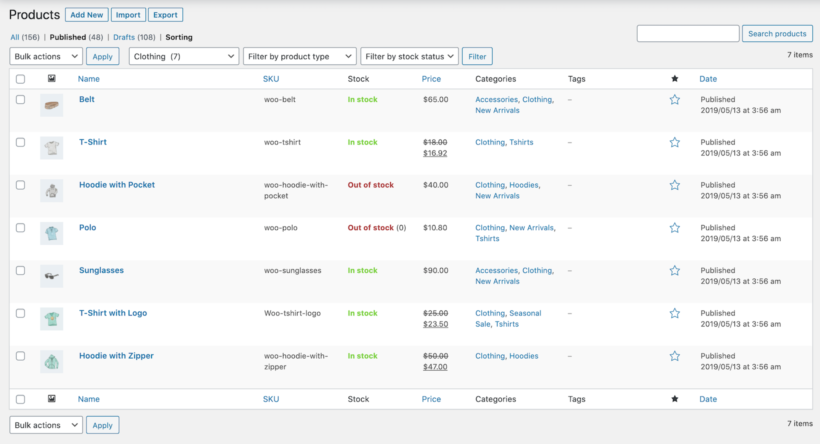
[quick_view id="123" text="Buy T-Shirt"] WooCommerce shortcode.
    1. Replace 123 with the ID of the WooCommerce product you want to show.
    2. Replace Buy T-Shirt with a suitable call to action.
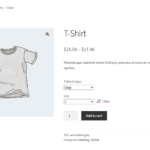
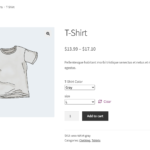
  3. Head over to WooCommerceSettingsProductsQuick view and scroll down to the Product details section to select the different product details that will appear in the lightbox:
    1. Reviews
    2. Price
    3. Short description
    4. Add to cart button
    5. Meta information (such as SKUs)
  4. Click the Save changes button to continue.

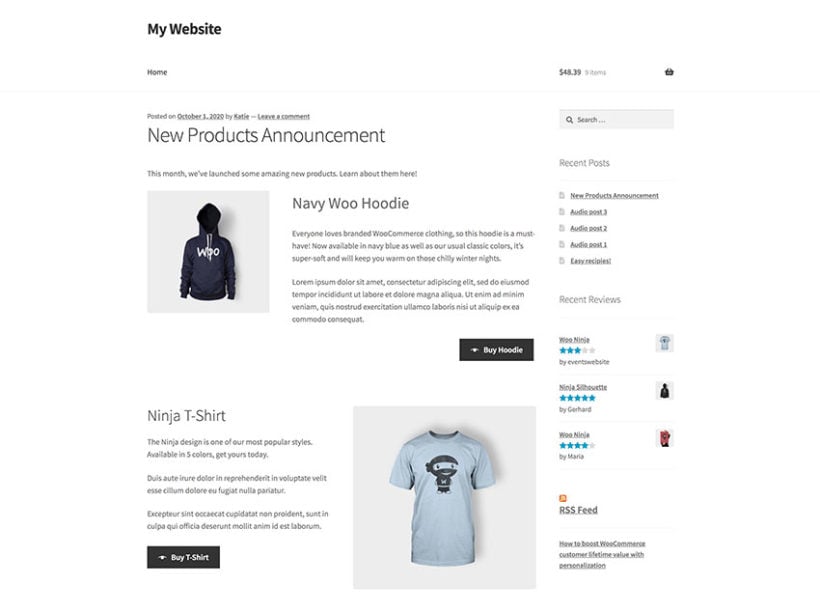
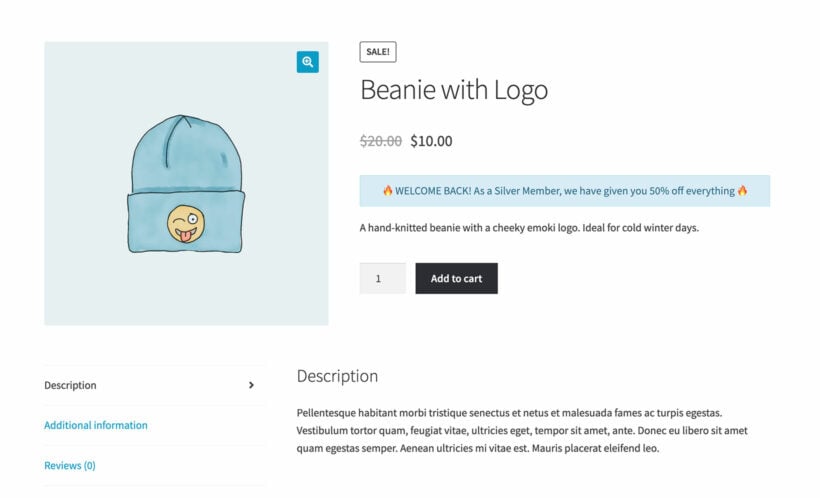
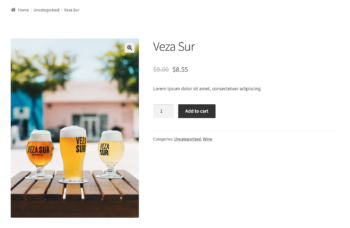
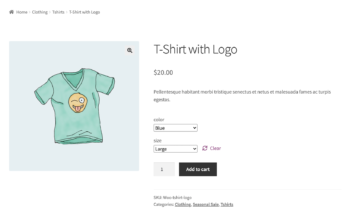
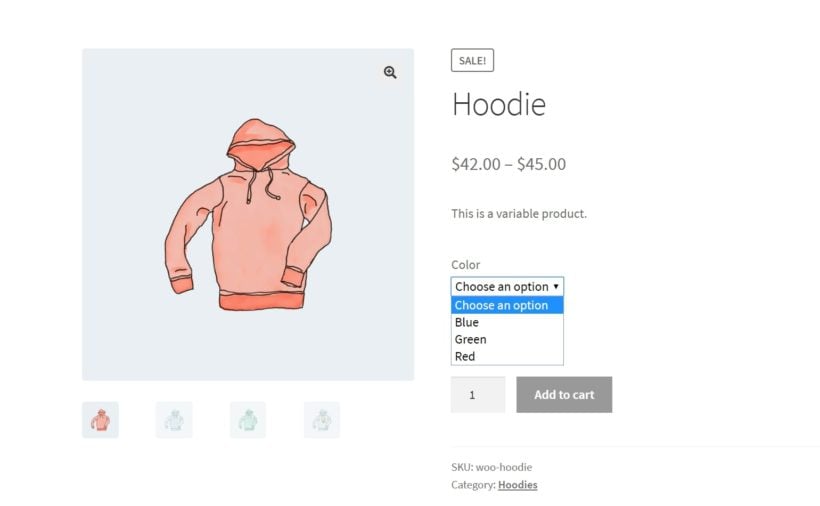
Whenever a potential customer clicks on the Quick View button, it opens a lightbox containing product information. This way, customers can learn more about the product and add it to their WooCommerce cart without being taken away from the page they’re currently on.

Here are some actionable tips on how to optimize your page for conversions:

  1. Add the quick view button immediately after a large image and overview of the product. This improves the button’s visibility and customers will be more likely to click on it!
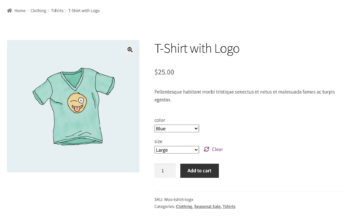
  2. Reword the button text to make it relevant to your use case. You can set it to Buy Now if it’s a simple product or Select Options if you’re selling a variable product.

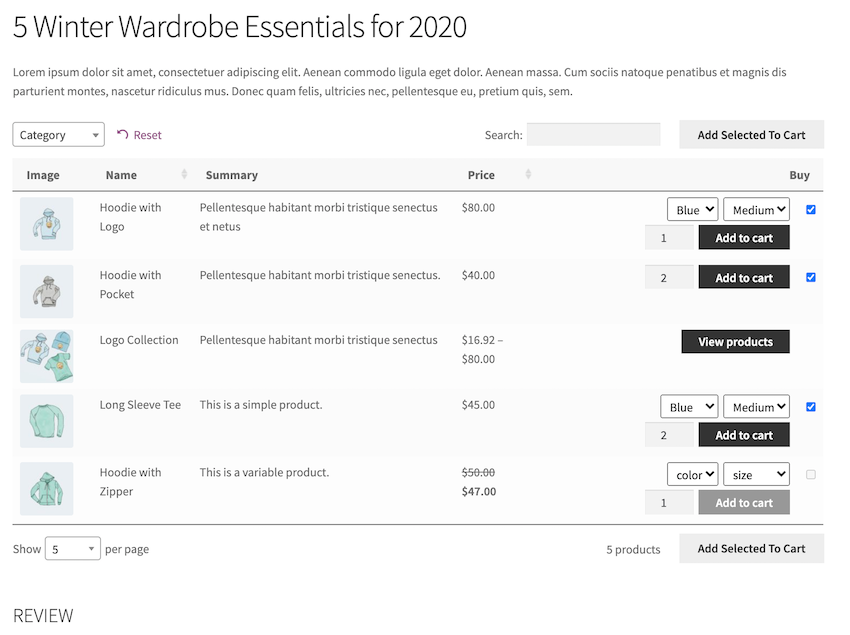
Method #2: how to list multiple products on a page using WooCommerce single product shortcode

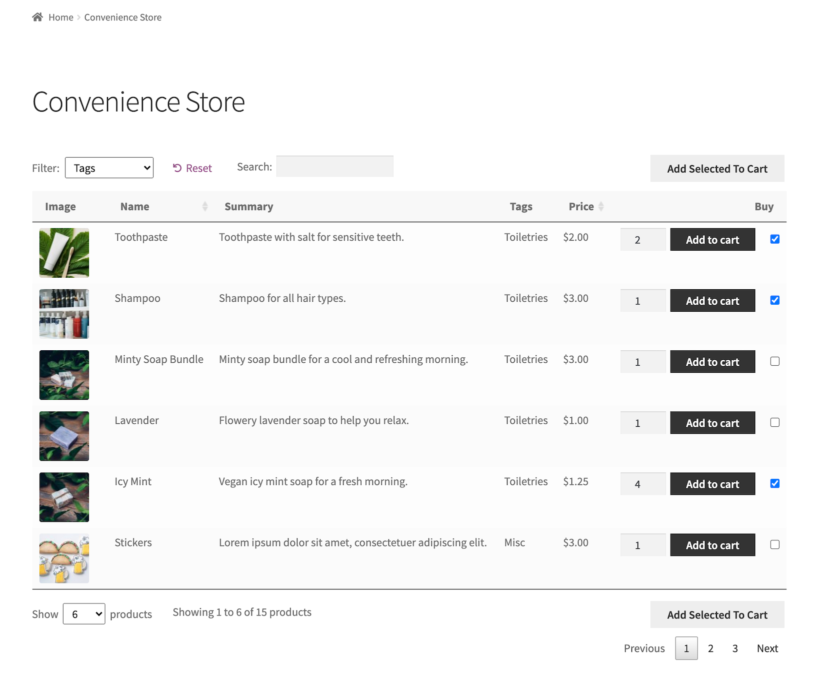
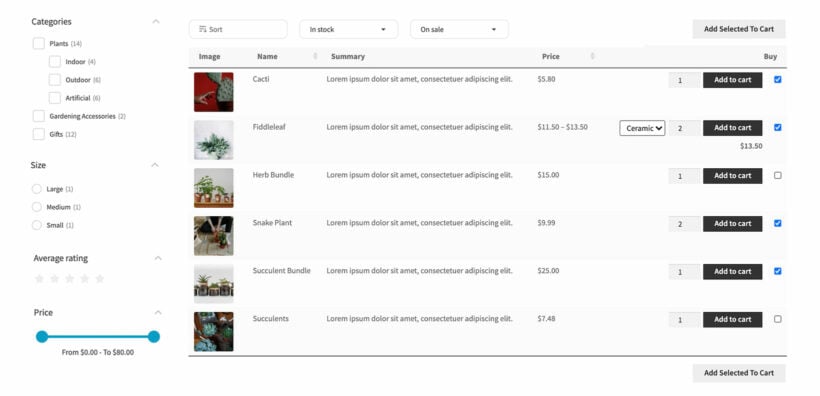
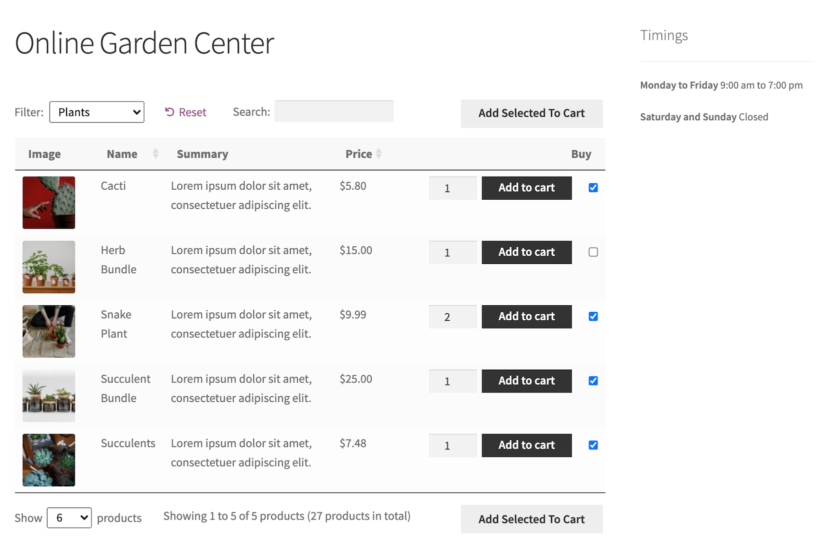
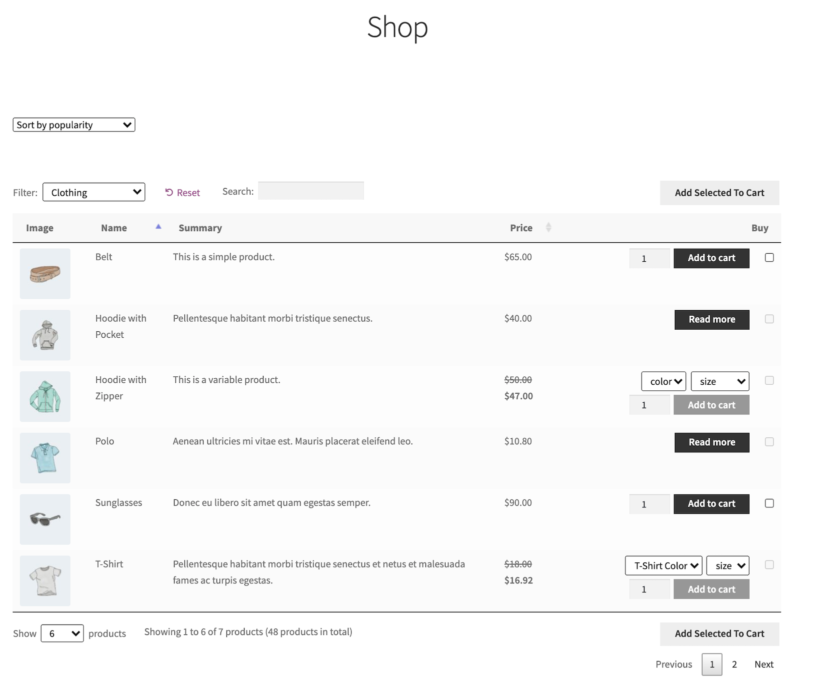
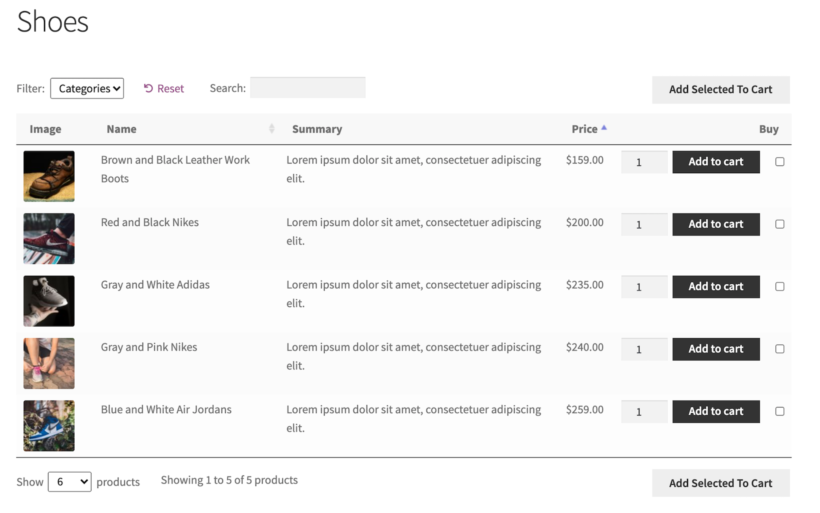
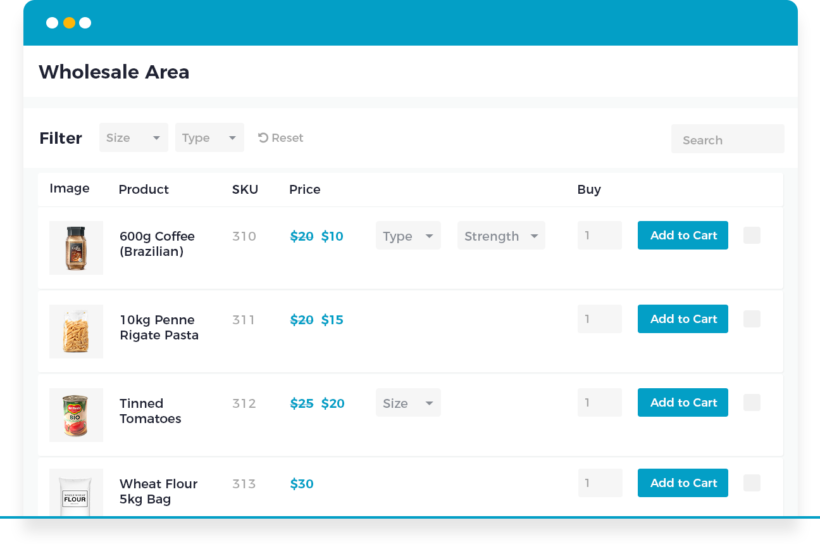
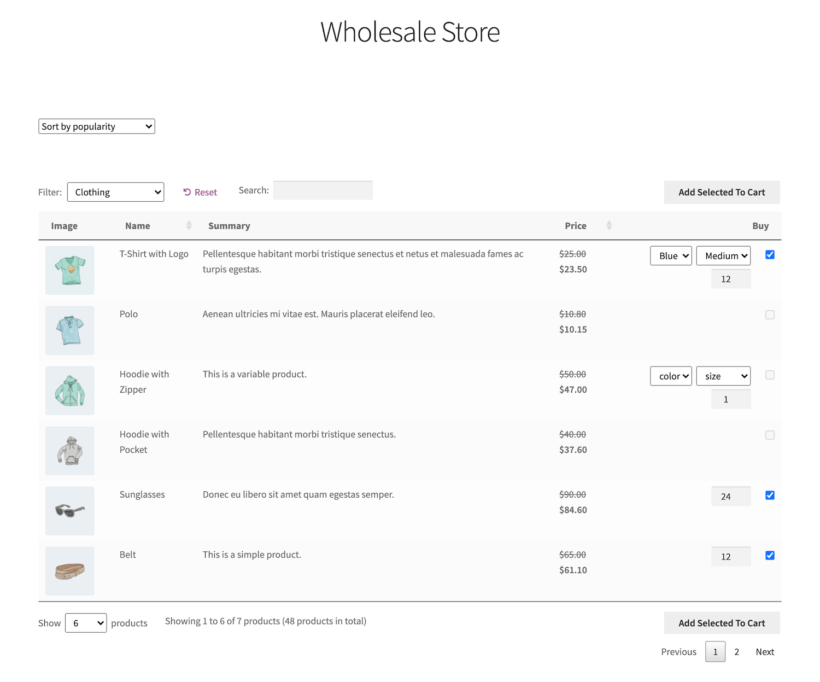
The best way to list multiple WooCommerce products on a page or post is in a product table layout. This makes it easy for visitors to see all of the products at a glance and view product details without having to click through to the single product page. The best part is that they can select options and purchase products directly from the page they’re on.

We recommend using the WooCommerce Product Table plugin to list specific products on your page or post. This versatile plugin lets you specify the products you’d like to list by product category, tag, or product ID. All you have to do is insert a WooCommerce single product shortcode into your page or post.

WooCommerce Product Table preview

Instructions

  1. Get the WooCommerce Product Table plugin and install it on your WordPress website.
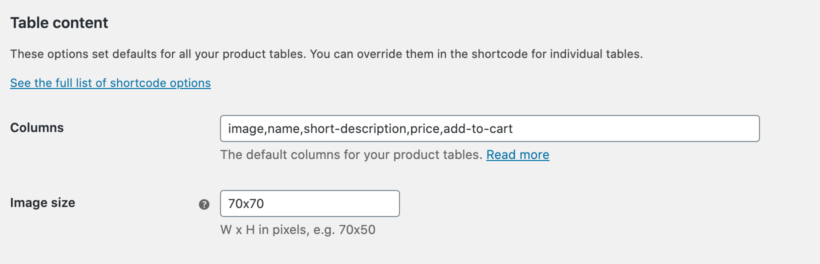
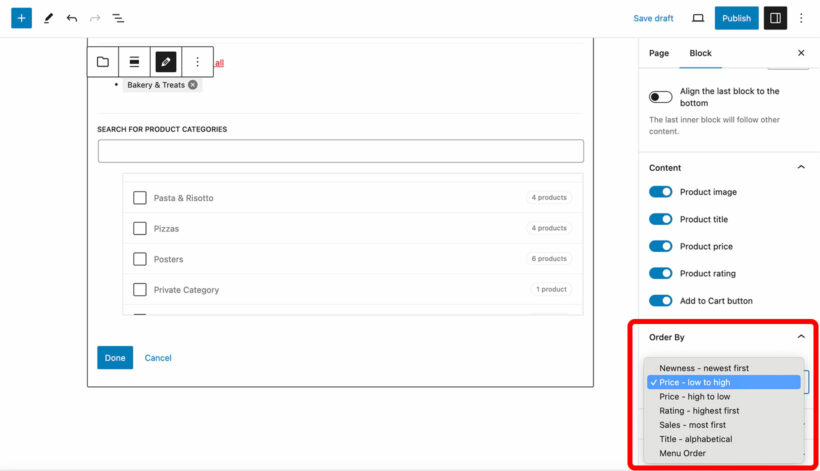
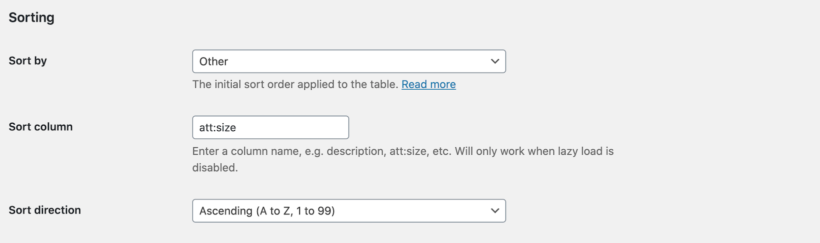
  2. Navigate to WooCommerceSettingsProductsProduct tables and configure the following settings:
    1. Enter image,name,description,price,buy in the Columns option.
    2. You can display additional columns like SKU, depending on your needs.
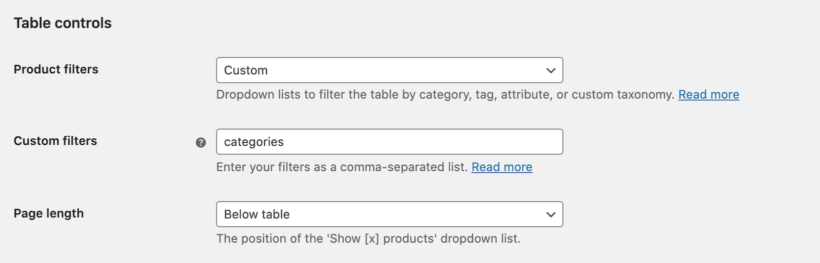
    3. The plugin lets you select the number of products to display on the page.
  3. Go to the page or post you want to add the product table to and insert the [product_table] WooCommerce shortcode. Learn how to list specific WooCommerce products in your product table.

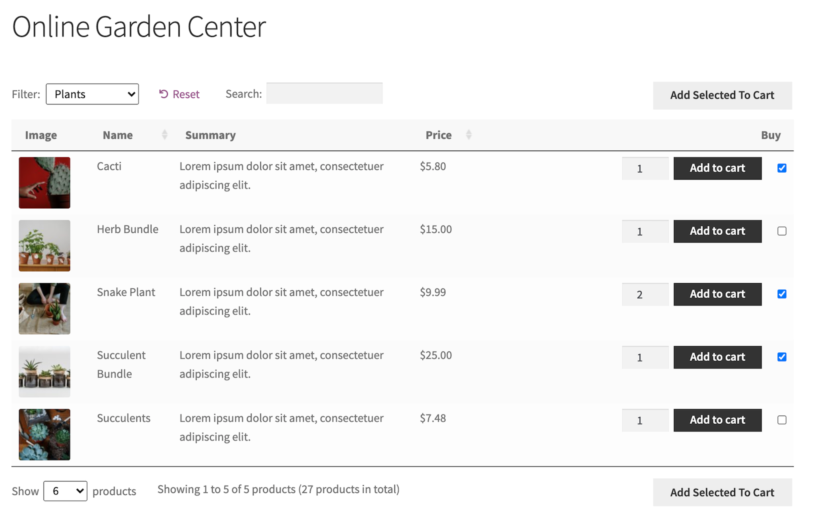
This method lets you list specific WooCommerce products away from the shop and category pages.

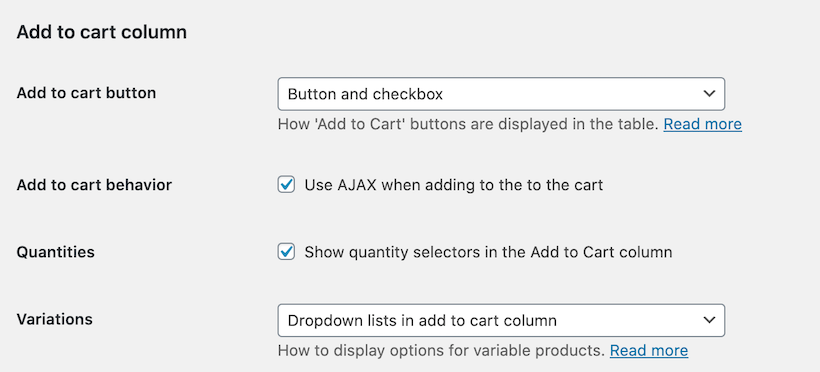
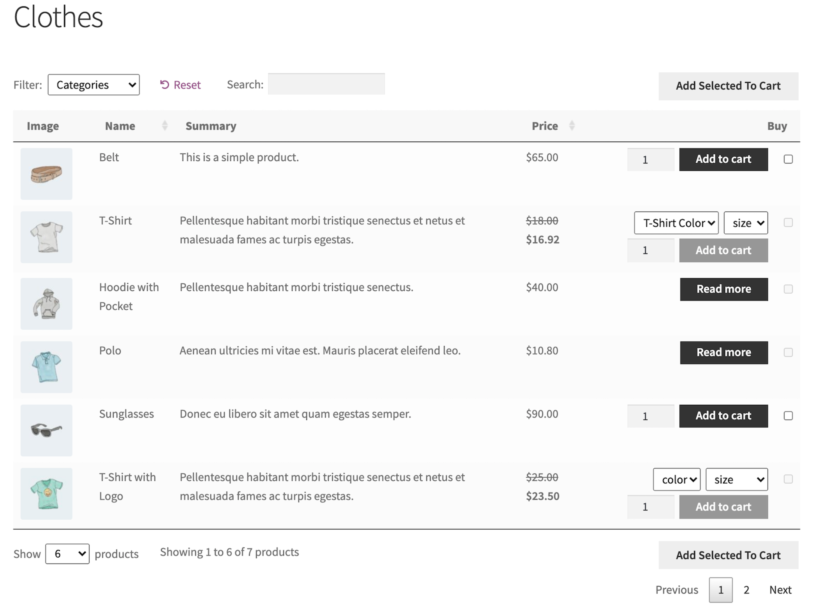
You can choose what information to show about the product and include quantity pickers, variation dropdowns, and add to cart buttons (or even multi-select checkboxes) directly in the table. It also lets you display specific types of products such as best-selling products.

In this way, people can quickly find everything they’d like to purchase and add the products to their shopping cart without leaving the current page.

Bonus: combining both methods

What if you want to list multiple products on your page or post and want to display them in a lightbox?

Fortunately, the WooCommerce Quick View Pro plugin and WooCommerce Product Table work seamlessly which means you can combine Method #1 and Method #2 to add quick view buttons to your product tables!

WooCommerce Product Table with quick view functionality

Instructions

  1. Get the WooCommerce Quick View Pro plugin and the WooCommerce Product Table plugin and install both on your WordPress website.
  2. Navigate to WooCommerceSettingsProductsProduct tables and configure the following settings:
    1. Enter image,name,description,price,quick-view,buy in the Columns option.
    2. You can display additional columns like SKU, depending on your needs.
  3. Go to the page or post you want to add the product table to and insert the [product_table] WooCommerce shortcode. You can list specific WooCommerce products in your product table.

Start using WooCommerce single product shortcode plugins

Instead of struggling with the WooCommerce plugin, you can use WooCommerce Quick View Pro or WooCommerce Product Table to add one or more products to pages and posts on your WordPress website. It’s incredibly easy to set up and you don’t have to worry about messing around with CSS styling.

And the best part is that it helps you deliver a better user experience. Customers can read through your content, make an informed purchasing decision, and buy the product(s) directly from the page they’re on.

Get WooCommerce Quick View Pro if you want to add one product to your page or WooCommerce Product Table to add multiple products to your pages and posts using WooCommerce single product shortcode!

Garden center WordPress

Everyone wishes to live in a picturesque atmosphere, but in modern times, we are encircled by man-made constructions that has increase the solitariness from the natural world. Without a doubt, gardening is a pleasurable hobby, and there are a number of other advantages to take into account.

With the increasing era of technology and the business model for plant nurseries and center can help people's growing interest in gardening. Therefore, if you have a deep love for nature and a passion for gardening, you can consider beginning an online plant business to assist people achieve their goals. The good news is that you can set up a garden center online shop using WordPress and WooCommerce in a few simple steps.

In this complete, guide, we’ll show you step-by-step how to set up a garden center in WordPress. This will enable you to continue running your business even if you can't serve as many customers in person, which can make a big difference to your sales.

Online garden center

You’ll learn how to set up a garden center store in WordPress using the WooCommerce Product Table plugin.

Why garden centers need to start selling online

During the Coronavirus outbreak, businesses of all sizes were looking for ways to stay operational. However, with social distancing policies and lockdown restrictions, it sometimes proved to be difficult to sell to customers from a brick-and-mortar store.

Garden center

Fortunately, as a garden center owner or florist, you can set up an online store so you don’t miss out on sales. It’s also a great way to reach more customers and potentially increase sales. As well as selling to local customers who would normally visit you in person, you can extend your reach to a national or even international audience.

You can add products to your garden center store and allow customers to browse and purchase them from home. You can choose to ship products to customers or offer in-store (or curbside) pickup options.

Setting up a garden center in WordPress

The first thing you need to do is set up an easy-to-use website for your garden center. The easiest way to do this is by using WordPress and WooCommerce. Since WordPress is open-source, you’ll have complete ownership over your garden center online store.

If you already have a non-ecommerce website for your garden center, don't worry. Simply link this to your WordPress WooCommerce online store and vice versa.

Here's what you need to do:

  1. WordPress. Start by installing and setting up the WordPress.org CMS on your hosting server.
  2. WooCommerce. Install the WooCommerce plugin on your WordPress website to enable e-commerce functionality.
  3. WordPress theme. You’ll need a gardening WordPress theme or a drag-and-drop page builder plugin to create an attractive website. There are plenty of free WordPress themes to choose from. This will help you deliver good user experience to customers.
  4. Product categories. Your garden center online store will likely have multiple product categories if you sell a variety of different types of products. This makes it easier for customers to quickly find the products they’re looking for.
  5. Navigation menu. You can set up your menu by going to Appearance Menus from the WordPress admin panel. Depending on the types of products you sell, you can list product categories in your navigation menu or simply link to the main shop page.

Once you've set that up, you can set up a garden center online store in WooCommerce.

WooCommerce Product Table: the perfect plugin for setting up a garden center store

The WooCommerce Product Table plugin is perfect for setting up a garden center store in WordPress. It lets you display products in a front-end table layout with search, sort, and filter options. This way, customers can quickly find the products they’re looking for and add them to their shopping cart.

As compared to the default store layout you get with WooCommerce out of the box, the WooCommerce Product Table plugin lets you showcase your garden center products in an order form layout. You can choose which columns to display in your product table.

This way, customers don’t have to visit the single product page to learn more about each item, select variations, or add it to their shopping cart. Instead, customers can view product details, set the quantity selector, tick the checkboxes next to the products they’d like to purchase and add them to cart in one go.

How to set up a garden center in WooCommerce

Once you’ve set up your WordPress website, follow the steps below to set up a garden center in WordPress using the WooCommerce Product Table plugin.

Step #1: Add garden center products to your online store

Start by adding products to your garden center e-commerce store as individual WooCommerce products. If you sell a variety of different products – plants, flowers, seeds, soil, planters, lawn care products – then we recommend creating categories to keep them organized. This also makes it easier for customers to quickly find the garden products they’d like to purchase.

Head over to ProductsAdd New from the WordPress admin panel to add each item as a WooCommerce product. Enter a title, brief description, product image, and price for each item. Finally, select the appropriate category for the product. Click the Publish button to continue.

Step #2: Configure the WooCommerce Product Table plugin settings

Navigate to WooCommerce SettingsProductsProduct tables from the WordPress admin panel. From here, you can configure the WooCommerce Product Table plugin’s settings.

Columns

Use the Columns option to choose which columns appear in the product table. For example, you might consider displaying the product image, name, short description, price, and add to cart options. You can also display reviews and stock. Here’s a complete list of columns to choose from.

Add to cart options

Next, scroll down to the Add to cart button option and set it to Button and checkbox using the dropdown menu. Make sure the Quantities checkbox is ticked.

This is because people often buy multiple garden center products at once. For example, a customer might purchase a few planters, soil, and seeds. They can then use the checkboxes to select the products they’d like to purchase and add them all to their cart in one go. In addition to this, they can use the quantity selector to buy more of each item.

Table controls

Most garden centers have many different product categories such as plants, flowers, planters, soils, seeds, lawn care products, and gardening tools. Using the WooCommerce Product Table plugin, you can let customers filter the items in the table by categories. To do this, set the Product filters option to Custom. Next, enter categories in the Custom filters option.

Click the Save changes button to proceed.

Step #3: Display products on the front-end

The WooCommerce Product Table plugin automatically replaces the default WooCommerce shop page layout with the table layout. Your shop page should look something like this on the front-end:

Online garden center

Customers can use the filter options to view the category they’d like to purchase from. They can tick the checkboxes next to the products they’d like to purchase and set the quantity selectors to add multiple products to their cart at once. If you sell variable products, customers will be able to choose the variation they’d like to buy directly from the main shop page.

Bonus: Adding extra features to your garden center website

To enhance the user experience your garden center website delivers, you can add other features to it. The sky's the limit wit WordPress and WooCommerce, but here are some examples.

Provide advanced filters to help customers to find products more easily

The WooCommerce Product Filters plugin works perfectly with WooCommerce Product Table, and adds even more advanced filtering options to your store:

Garden centre website with filters
A garden centre website using both WooCommerce Product Table and WooCommerce Product Filters

As you can see in the screenshot above, you can use WooCommerce Product Filters to add user-friendly features above and/or next to the list of products. This is perfect for garden centres with lots of products, and helps customers to narrow down their selections and make quick decisions.

Add opening and closing hours

If you have set opening hours and closing hours, you can add a text widget to the sidebar to display them on every page throughout the site.

Online garden center timings

Go to Appearance Widgets from the WordPress dashboard and add a Text widget to the sidebar. Enter a title and your opening and closing times.

You can also use widgets to display other information such as testimonials, featured products, on sale products, photo galleries, or garden care tips. For best results, use a free plugin like Widget Context to show different garden care tips on different product categories. This will add value to your customers and is a good way to subtly encourage them to buy more.

Set up your garden center store today

By setting up a garden center website, you can continue running your business during the lockdown. The best part is that you can do this whether you have a physical store or not.

Once you have your WordPress website set up with the WooCommerce plugin installed on it, it only takes a few minutes to set up a complete garden center website. Start by adding garden center products as individual WooCommerce products. Next, configure the WooCommerce Product Table plugin’s settings to display products in a table layout.

You can set up a similar online store if you’re in the gardening business or the landscaping business.

Ready to set up your garden center in WordPress? Get the WooCommerce Product Table plugin!

WooCommerce sort products

As a business-savvy online store owner, you probably already know that the order in which WooCommerce products are sorted and displayed on the front-end is essential to the success of your e-commerce store. It directly influences which items capture the customer’s attention first.

Allowing customers to sort your product list in different ways is also important. It enables you to help prospective customers find the products they want to purchase quickly and easily.

Essentially, WooCommerce product sorting forms a central part of your store’s navigation structure alongside other on-page elements such as the menu, keyword search, and product filters.

In this article, you will learn how to customize WooCommerce sorting on your online store using built-in options. You’ll also learn how to add more advanced product sorting to your e-commerce store using the WooCommerce Product Table plugin. You can change the WooCommerce product order based on a wide range of sort criteria including product name, description, order by SKU, price, attribute, categories, tags, and more.

What product sort options are built into WooCommerce?

Out of the box, WooCommerce gives store owners some basic product sort options.

The Customizer

WordPress Customizer

You can go to the CustomizerWooCommerceProduct Catalog to set the initial sort order of products in your online store using the WordPress Customizer. You can choose default sorting (custom ordering + name), popularity, average rating, most recent, and price.

WooCommerce shop page

Most WooCommerce-optimized themes display a basic sort dropdown at the top of the shop and category pages. Customers can use this to change the default sorting order by popularity, average rating, latest, price: low to high, and price: high to low.

The only problem is that the default product sorting options in WooCommerce are pretty limited. More specifically:

  • You can only sort WooCommerce products by a very restrictive list of values. The default options let you sort by popularity, average rating, latest, price: low to high, and price: high to low.
  • While you can choose how products are sorted, there’s no option to select the sort order.
  • The default options don't improve the layout of your products or present them in a way that allows easy sorting or comparisons.

Gutenberg block editor

When you use any of the Products blocks in the Gutenberg block editor which comes with WordPress, you can choose the sort order. This controls the order of products when the page first loads.

Products block order sort options

Lots of store owners build their store pages using other page builders such as Elementor or Divi. That's fine - just check which modules they provide for displaying products, and look for sort options.

Shortcodes

Similarly, you can list WooCommerce products using shortcodes. Each shortcode includes options for controlling the initial sort order and direction of the products. You can learn all about these in our Complete guide to WooCommerce shortcodes.

Custom snippets

Developers can also use custom code to sort products programmatically. WooCommerce have provided a useful article to get you started with this.

But what about letting customers sort products?

On the front end, WooCommerce itself displays a 'Sort Products' dropdown at the top of your main shop pages. For example, you'll see this on the Shop page, product category pages, etc. Customers can use this to sort by various data such as product name and price, in ascending or descending order.

WooCommerce Storefront products sort dropdown

As you can see, all of these product sort options are pretty limited. Most of them focus on letting store managers control the sort order, not on allowing customers to re-order products.

Thankfully, there’s a better way to let customers sort products on the front-end.

Product Table - the perfect WooCommerce product sorting plugin

The WooCommerce Product Table plugin provides a more flexible and effective way to sort products.

You can enable product tables globally on your shop and category pages. Alternatively, you can insert custom product tables using a shortcode to any page you’d like. This provides a better, more intuitive way to sort products throughout your store in just a few minutes.

Whether you're looking for a WooCommerce sort products by attribute plugin or a way to sort in a particular order, WooCommerce Product Table makes it easy.

Why use WooCommerce Product Table for product sorting?

  • Better layout. Instead of the basic grid layout that comes out of the box with WooCommerce, the WooCommerce Product Table plugin lets you list products in an intuitive, user-friendly table layout with multiple columns of information. This naturally lends itself to sorting WooCommerce products in a variety of different ways.
  • Tons of sorting options. WooCommerce Product Table lets you sort by many, many different types of product data. You can sort by product name, attribute, menu order, product ID, SKU, custom fields, price, popularity, reviews, date, and last modified date. In addition, you can also choose to sort products by any column in the table, or even randomly.
  • Set the sort order. For each sorting option, the WooCommerce Product Table plugin lets you choose the sort order using the orderby option. You can choose to sort the products either in ascending order or descending order. For example, you can sort products by product name in ascending order i.e. alphabetical sorting. This way, customers can quickly find products alphabetically.
  • Date sorting. As well as alphabetical sorting, you can set any column as a date column so that it is sorted correctly by date.
  • Customers can sort products. You can set the initial sort order for your products i.e. the default sort order when the page first loads. In addition, this WooCommerce sort products plugin also lets customers sort the products in ascending order or descending (or date) order simply by clicking on any of the table column headers.
  • Bonus options. The column sorting in WooCommerce Product Table works perfectly alongside the plugin’s other features which help prospective customers find products quickly and easily. These include the instant AJAX search box, the ability to choose the number of products per page, and WooCommerce product filters.

With the best WooCommerce product table plugin, column sorting happens automatically as soon as you activate the plugin on your WordPress website. You can use the plugin options to change this as required.

How to set up product sorting

Once you have the WooCommerce Product Table plugin installed and activated on your WordPress website, you can set up WooCommerce product sorting. There are two ways to do this:

Method #1: Configure WooCommerce product sorting for all products

If you want to set the WooCommerce product sorting options for all products then you can simply configure the plugin’s settings. This way, the products on your main shop page and product category pages will follow the sort options and sort order you set in the WooCommerce Product Table settings page.

To do this, head over to WooCommerce → SettingsProductsProduct tables from the WordPress admin menu.

Scroll down till you reach the Sorting section. From here, you can set the sorting options. The Sort by option lets you set the initial sort order (i.e. orderby) that’s applied to the product table layout.

WooCommerce Product Table sort options

You can choose from the following options using the dropdown:

  • As listed in the Products screen (menu order)
  • SKU
  • Name
  • ID
  • Price
  • Number of sales
  • Average reviews
  • Date added
  • Date last modified
  • Other

Custom product sort options

If you select Other, you can specify which product table column you’d like to sort by. In other words, you can create a custom sorting order for your WooCommerce products:

WooCommerce sort products

The 'Other' option lets you sort products by any column in the table. Keep in mind that this only works if lazy load is disabled. The available columns are:

  • SKU - Order products by their unique SKU code.
  • ID - Sort products by database ID.
  • Name - Order products by name or title.
  • Description - Order products by the first word of the main description.
  • Short-description - Sort products by the first word of the short description.
  • Date - Order products by published date.
  • Categories - Sort by WooCommerce product category.
  • Tags - Order products by tag.
  • Reviews - Order products by average rating.
  • Stock - Sort products by stock status or number of products in stock. (This depends on the inventory settings in your wide WooCommerce store.)
  • Weight - Order products by weight, e.g. lightest or heaviest first.
  • Dimensions - Order products by their dimensions, e.g. size starting with the smallest first.
  • Price - Order products by price.
  • Product attribute - Sort WooCommerce products by attribute, e.g. size. To do this, add att: in the 'Sort column' field followed by the attribute slug, e.g. att:size.
  • Custom field - Sort WooCommerce products by custom field values, e.g. a 'Reference' custom field column. To do this, add cf: in the 'Sort column' field followed by the custom field name, e.g. cf:reference.
  • Custom taxonomy term - Sort WooCommerce products by custom taxonomy terms, e.g. a taxonomy called 'Brand'. To do this, add tax: in the 'Sort column' field followed by the custom field name, e.g. tax:brand.

Change the WooCommerce sort direction

Once that’s done, use the Sort direction option to set the sort order. You can choose:

  • Automatic
  • Ascending (A to Z, 1 to 99)
  • Descending (Z to A, 99 to 1)

Click the Save changes button to continue. It might look something like this on the front-end:

WooCommerce sort products preview

Method #2: Configure WooCommerce product sorting for selected items

If you sell lots of products (or lots of different types of products) then you might want to sort some products in one way and others in another way. For example, you might want to order clothes by Menu order and shoes by Price.

This is possible with the WooCommerce Product Table plugin. All you have to do is set the product order directly in the shortcode. Following our example, the shortcode might look something like this for products in the Clothes product category:

[product_table columns="image,name,summary,price,buy" category="clothing" sort_by="menu_order" sort_order="asc"]

It would look like this on the front-end:

Sorted by menu order

And this for ordering products in the Shoes product category:

[product_table columns="image,name,summary,price,buy" category="shoes" sort_by="price" sort_order="asc"]

The sorted products would look something like this on the front-end:

Sorted by price

Simply add the shortcode to the page or post where you’d like to display the sorted product table and click the Publish button.

Bonus: Re-order products using the menu order

The WooCommerce Product Table plugin lets you sort products by menu order. This gives you granular control over the order of products on your main shop page. You can set the menu order for your WooCommerce products directly from the WordPress back-end.

WooCommerce menu order

Go to WooCommerce → Products from the WordPress admin panel. Click on the Sorting tab. From here, you can simply drag and drop the products into place. The products that appear first in the list will appear at the top of the product table on the front end.

Bonus: Enhance your customer's shopping experience with the WooCommerce Products Filter plugin

If you're reading this article on how to customize WooCommerce product sorting and ordering, chances are you're interested in making it easier for your customers to find and purchase the products they want. But did you know that you can also enhance your customers' shopping experience by using a WooCommerce Products Filter plugin?

The WooCommerce Products Filter plugin offers a wide range of filters to help customers narrow down their search for the perfect product. Customers can filter products by categories, attributes, color, tags, custom taxonomy, price, ratings, in-stock, and on-sale. What's more, the plugin allows you to display the filters in a variety of formats, including dropdown lists, checkboxes, radio buttons, labels/tag clouds, images, or color swatches.

But that's not all. The WooCommerce Products Filter plugin also allows customers to choose how they want the list of results sorted. This means that they can filter and sort products based on their preferences, making it easier for them to find what they're looking for. By providing a more personalized and streamlined shopping experience, you can increase customer satisfaction and loyalty. So if you're looking to take your WooCommerce store to the next level, consider using a products filter plugin in addition to customizing your product sorting and ordering.

Where to get the product sorting plugin

The product sort options you get out of the box with the WooCommerce plugin are pretty basic.

Using the WooCommerce Product Table plugin, you can set the initial sort order and let customers sort products themselves in a variety of different ways. Plus, you’ll have the option to configure the sorting settings globally or on a per-category basis.

Ready to sort products on your WooCommerce store, increase product visibility, and boost sales? Get the WooCommerce Product Table plugin today.

WooCommerce payment user role

As an online store owner, you might want to offer different payment options to different types of customers. This complete guide will tell you everything you ever wanted to know about how to set up WooCommerce payment by user role. In other words, we'll explain how you can show different payment options to different users based on their user role.

Out of the box, the WooCommerce plugin shows the same payment options to all of your customers – regardless of their user role. But what if you want to offer different WooCommerce payment gateways by user roles to different types of customers?

The easiest way to set up WooCommerce payment by user roles is by using the WooCommerce Wholesale Pro plugin. It’s incredibly easy to set up and you can choose which user role(s) can see available payment gateway in WooCommerce.

Why you might want to offer different payment methods to different customers

There are plenty of reasons why you might need to offer different payment methods to different types of customer. Here are some use cases for when you might consider showing WooCommerce payment gateways by user role:

  • Wholesale customers or B2B buyersYou can set up WooCommerce payment by user roles to offer popular online payment options – such as PayPal, Stripe, or credit card – to retail customers and additional payment options – such as invoice, cheque, cash on delivery, or bank transfer – to regular wholesale customers.
  • Offline payment options for trusted customersYou might want to create a user role for loyal customers and offer them extra payment methods such as invoices. Users with the Customer role and guest users, on the other hand, will only have the option to make payments online at the time they place their order.
  • Different payment terms for different groups of customersSome online stores offer different payment terms and shipping methods depending on the customer’s past behavior. For example, reliable payers might qualify for longer payment periods.
  • Test payment gateways for administrators and shop managersMost online store owners have a separate staging site that they use for testing payment methods. Others temporarily activate an offline payment gateway such as Check and use this whenever they want to test their live checkout. It’s best to permanently add a test payment method and only make it visible to Administrators and Store Managers only, not users with the Customer role.

Offering different payment gateways to different customers based on their user roles helps you deliver a better, more personalized customer experience. As a result, this can help you boost sales.

In addition, you can use the WooCommerce Wholesale Pro plugin to offer different shipping methods to different user roles. It's the perfect way to create a tailored shopping experience for each role.

How to set up WooCommerce payment by user role

For this tutorial, we’ll assume you already have the free WooCommerce plugin installed and set up on your WordPress website.

Step #1: Install and activate WooCommerce Wholesale Pro

Get the WooCommerce Wholesale Pro plugin and install and activate it on your WordPress website. Head over to WooCommerceSettingsWholesaleGeneral and enter your license key.

WooCommerce Wholesale Pro license key

Click the Save changes button at the bottom of the screen to continue.

Step #2: Create multiple user roles

WooCommerce itself creates a default 'customer' role for your retail buyers. The WooCommerce Wholesale Pro plugin automatically creates a 'wholesale' role for you. This gives you two roles to start with.

You can create as many additional WooCommerce user roles as you like. It’s the easiest way to create custom roles.

First, consider whether you actually need any extra roles. For example, if you want to offer retail customers the option to pay via PayPal, while letting wholesale buyers make check payments or direct bank transfer, then you don't need to create any new roles. Simply set the visibility for each payment gateway so that 'customers' can see the PayPal option; and 'wholesale' users can see the check and bank transfer options.

To create additional roles, head over to the plugin settings at WooCommerceSettingsWholesaleRoles and click the Add new role button. Next, enter a Display name and Discount amount for the user role, if applicable.

New WooCommerce payment user role

Click the Add role button to continue.

Step #3: Add payment options in WooCommerce

If you haven’t done so already, go to WooCommerceSettingsPaymentsPayment methods and enable the specific payment options you’d like to offer your customers. Disable any payment gateways that you don’t want to offer to any user role.

WooCommerce payment methods

Click the Save changes button to continue.

Step #4: Select which user roles can use each payment option

Finally, go to WooCommerceSettingsPaymentsPayment roles to select the specific user roles that can use each payment method.

WooCommerce payment roles

The WooCommerce Wholesale Pro plugin lists all the enabled payment methods so that you can control each one individually. By default, all user roles are selected for each payment option. Click the X to remove the roles that you don't want to see specific payment gateways.

It’s a good idea to keep the Administrator and Shop Manager user roles enabled for every payment method, in addition to the customer roles which will actually be buying online. This will make it easier for you to test the different payment methods.

Preview

When customers add products to their shopping cart and proceed to the checkout page, they’ll see payment options depending on their user role. For example, when users with the Customer user role reach the checkout page, they’ll have the option to make their payment via PayPal. It will look something like this on the front-end:

Payment options for retail customers

On the other hand, wholesale users will see Direct Bank Transfer and Check Payments as the available payment methods:

Payment options for wholesale customers

Where to get the plugin

The WooCommerce Wholesale Pro plugin lets store owners create multiple user roles and set up WooCommerce payment by user role in a few simple steps. It also lets you offer different shipping methods to different user roles.

It’s a great way to deliver a better user experience through your e-commerce store and make it easier for customers to pay you. As a result, you can effectively boost sales and grow your bottom line.

The plugin comes complete with:

  • Quick plug-and-play setup.
  • In-depth documentation and video tutorials (there's no way to get it wrong!).
  • Technical support and personalised advice.
  • 30-day money-back guarantee - love it or get a full refund!

Get the WooCommerce Wholesale Pro plugin now and set up WooCommerce payment by user roles today.

In this article, we’ll cover everything you need to know about how to set up WooCommerce shipping by user role on your WordPress website.

If you use WooCommerce to power your e-commerce store, you probably already know that the plugin offers lots of flexible shipping options out of the box. These include multiple shipping zones, the ability to let customers choose between different WooCommerce shipping methods, and the option to offer free shipping based on the amount spent. However, the free WooCommerce plugin doesn’t let you offer different shipping options to different customers based on their user role.

The solution is to use the WooCommerce Wholesale Pro plugin to charge role-based shipping fees. Keep reading to learn how you can add WooCommerce shipping by user role to your e-commerce store in under 15 minutes 🚀.

Why offer WooCommerce role-based shipping?

Depending on the type of e-commerce store you’re running, you might consider offering different shipping methods to different customers based on their user role. Here are some use case scenarios where it makes sense to set up WooCommerce shipping by user role:

  • WholesaleLet’s say you sell to both retail customers and wholesale buyers. You could offer free shipping to your retail users only, or offer additional bulk shipping or table rate shipping options for logged-in wholesale users. Alternatively, you could offer free shipping to your top-tier wholesale user roles only. You would simply move wholesale users to the top-tier as a special benefit after they spend a certain amount at your store. Normal wholesale users would continue to pay for shipping i.e. they’ll only see flat rate shipping.
  • Members-only sitesIf you run a membership shop alongside your public-facing store, you could sell to regular customers and charge them for shipping while members get access to benefits such as discounted (or free) shipping options. This way, you don’t have to absorb shipping costs for all customers.
  • Logged-in customersYou can offer discounted shipping rates to customers who are logged into their user accounts. In this case, guest users (i.e. logged out users) would have to pay the full shipping rates. In other words, you can pass on shipping costs to guest users.

There are plenty of ways you can set up WooCommerce shipping by user role depending on the type of store you’re running and the different customers you sell to. And the easiest way to do this is by using the WooCommerce Wholesale Pro plugin.

WooCommerce Wholesale Pro - the perfect way to restrict shipping by user role

WooCommerce Wholesale Pro makes it incredibly easy for e-commerce store owners to set up shipping by user role. The plugin lets you create an unlimited number of user roles and assign different shipping options to each one.

For example, you can decide which shipping options to make available for retail and wholesale customers. You might offer local pickup options and free shipping to your wholesale customers and free shipping to retail customers. This is a great way to personalize the customer experience your WooCommerce store delivers based on the customer’s user role.

In addition, you can use the WooCommerce Wholesale Pro plugin to charge different prices per product and offer customers different payment gateways (i.e. payment methods) based on their user role. This is great for when you need to give wholesale customers the option to make payments via invoice or direct bank transfer, while retail customers can only pay using an online payment gateway such as credit card, Stripe, or PayPal.

How to add WooCommerce shipping by user role

For this tutorial, we’ll assume you already have the free WooCommerce plugin installed on your WordPress website.

Step #1: Get the WooCommerce Wholesale Pro plugin

Get the WooCommerce Wholesale Pro plugin and install and activate it on your WordPress website. You’ll receive the plugin files along with a license key in the confirmation email. Activate your license key in the setup wizard.

Step #2: Create user roles

WooCommerce itself comes with a basic 'customer' role, and WooCommerce Wholesale Pro creates your first 'wholesale' role when you first install it. You can create as many additional user roles as you’d like.

To do this, head to WooCommerceSettingsWholesaleRoles and click the Add new role button to create a new WooCommerce user role. For example, you might create an extra custom role for Wholesale Customers:

Wholesale customers user role

You can give each user role a display name, discount, and choose to enable product-specific pricing.

Once you’ve created the user role, click the Save changes button.

Step #3: Configure shipping zones in WooCommerce

Go to WooCommerceSettingsShippingShipping zones to set up regions and shipping methods from the shipping settings screen. You can create custom shipping zones based on your online store and the shipping service you’d like to offer. For example, you might create a Local Shipping Zone and offer customers local pickup and free shipping options. You can also add shipping zones for sales within your country, international orders, etc.

For each shipping zone, add as many shipping methods as you like:

Add shipping method in WooCommerce

To do this, click the Add shipping method button and use the dropdown menu to select the shipping method you want to add.

Shipping zones in WooCommerce

If you want to charge different shipping prices to different user roles, then enter each one as an additional shipping option. For example, if you're charging a flat rate of $9.99 to normal customers and $19.99 to wholesale users, then create two different flat rate options.

Once you’ve added all the shipping methods for that zone, click the Save changes button to continue. Repeat the process to add shipping options to your other zones.

Step #4: Assign user roles to available shipping methods

Now you’ve set up shipping zones and shipping methods, head over to WooCommerceSettingsShippingShipping roles in the WordPress admin.

You’ll see a list of all the different shipping methods, divided into separate sections for regular and wholesale users:

WooCommerce wholesale shipping options

Offer different shipping methods per user role

By default, wholesale roles will be assigned to the wholesale shipping options and other roles will be assigned to the regular shipping options. Feel free to change this as needed to control which user roles can see each shipping option. When you delete user roles from specific shipping methods, users with these roles will be unable to see the shipping method on the WooCommerce checkout page.

For example, you might offer local pickup options to Wholesale Customers and free shipping to the Customer role. To do this, simply remove all the roles that should not have access to each shipping method.

Pro tip: It’s a good idea to add the Administrator (or the Shop Manager) user role to each shipping method. This makes it easy for store owners to test out the different shipping options to make sure everything is working properly.

Preview

That’s it! When you add products to your shopping cart and proceed to the checkout page, you should see the correct shipping methods for your user role. More specifically, here’s what you’ll see if you’re a guest user, retail customer, and wholesale customer:

Bonus: Show shipping costs per user role on the product page

Before we finish, I'll give you a tip which will make it much easier for your users to see the shipping costs for their role.

Normally, WooCommerce is terrible at this because it only displays shipping costs on the checkout page. You can fix this by using the WooCommerce Shipping Calculator plugin to let customers enter their location and view the cost for their role directly on the product page.

WOOCOMMERCE PRODUCT PAGE SHIPPING CALCULATOR

This significantly improves on the default WooCommerce shipping calculator by making shipping information available when the customer needs it the most.

If the customer is logged into their account then they will see the correct shipping cost for their user role. Perfect!

Next steps

Although WooCommerce offers tons of shipping options out of the box, it doesn’t let you set up shipping by user role. The easiest way to do this is by using a WooCommerce shipping plugin with the extra features you need - and WooCommerce Wholesale Pro is perfect for this.

You can create as many user roles as you’d like, configure WooCommerce shipping zones, and assign user roles to the available shipping methods. It’s incredibly easy to set up and you don’t have to mess around with code.

You get:

  • Quick plug-and-play setup for the plugin.
  • In-depth documentation (there's absolutely no way to get it wrong).
  • Expert technical support if you need any help.
  • 30-day money-back guarantee. Love it or get a full refund!

Get the WooCommerce Wholesale Pro plugin and add WooCommerce role-based shipping to your online store.


Discover the best WooCommerce role-based pricing plugins and how to use them to charge different prices to different groups of users. We'll look at two different types of role-based pricing for WooCommerce and which one is right for your store.

Out of the box, WooCommerce lets you add a regular price and a sale price for each product. There is no built-in role-based pricing options.

Luckily, there are several plugins available that let you add role-based pricing for WooCommerce. In this article, we will explore two different ones:

  • WooCommerce Discount Manager lets you create a wide range of discounts and pricing rules, and select which roles - or even individual user accounts - they are available for.
  • WooCommerce Wholesale Pro offers flexible role-based pricing specifically for wholesale or B2B stores.

Keep reading to learn how to use each of these WooCommerce role-based pricing plugins to add user group discounts to your store. Whichever plugin you choose, you'll learn how to create multiple user roles and charge different prices per role. Each user sees the same products, with the correct pricing for them 💪

Why do you need WooCommerce role-based pricing?

If you sell products to different groups of customers – such as retail customers and wholesale customers, or members on different subscription plans – then you probably need WooCommerce role-based pricing. This is the easiest way to set up customer-specific pricing, in which pricing is based on a logged in user's role.

Here are some example scenarios where setting WooCommerce prices by user role could save you a lot of time and back-end store management:

  • You sell to both retail customers and wholesale buyersIf you sell to retail and wholesale customers, you can sell the same product at different prices without having to duplicate products. This is a great way to deliver better user experience, especially since wholesale customers are likely to buy more from you per order.
  • You sell products to members subscribed to different membership plansIf you’re running a membership site, you might consider offering members on higher-priced subscription tiers a larger discount on purchases than members on lower-priced tiers. This is also great for offering different discounts to different customer groups.
  • You want to hide prices from your public-facing storeAs an online store owner, you might want to encourage visitors to create an account. One way to do this is by hiding prices until login. This way, guest users will have to create an account and become registered users to view product prices.

These are just some of the reasons why you might consider adding WooCommerce role-based pricing to your online store. Depending on the type of online store you’re running, you can use WooCommerce role pricing in different ways to increase conversions and boost sales.

Next, I'll tell you how to set up role-based pricing using the two dynamic pricing WordPress plugins plugins I mentioned above.

Method 1: Use Discount Manager to set up role-based pricing for WooCommerce

For method 1, we will use WooCommerce Discount Manager. This is my favorite WooCommerce role-based pricing plugin because it's so flexible and suitable for any use case or industry.

Essentially, you should use this method for all eCommerce sites except for wholesale stores. For wholesale, skip to Method 2 which is specific to that use case.

Discount Manager is an incredibly flexible discount plugin for WooCommerce. It lets you create absolutely any type of discount or pricing deal, and choose which user role(s) it applies to.

Here's a quick overview of what you get with this role-based pricing plugin:

  • Choice of 6 discount types including fixed or percentage pricing, bulk pricing tiers, free products (including buy-one-get-one-free), discounts based on order value, and more.
  • Either run each discount storewide on all products, or restrict it to specific categories or even individual products.
  • Choose which user roles each discount applies to so that only logged in users with that role can see the special pricing.
  • Run sales for new customers only by creating discounts for the 'guest' user role.
  • Schedule each role-based pricing rule to start and end on a specific date.
  • Display unique text or other information to display on product pages for users with the correct role.
WooCommerce role-based pricing product page content
Display custom messages per role on the product page

Next, I'll show you how to set up WooCommerce role-based pricing with the Discount Manager plugin.

Step 1. Create your user roles (optional)

The first step is to add any extra roles that you need. WordPress itself comes with a range of built-in user roles, such as subscriber and contributor. WooCommerce adds some additional roles, such as customer and store manager. If these aren't enough, then it's easy to create additional roles.

I recommend the free User Role Editor plugin for this. Simply install the plugin and clone the 'customer' role to create as many new ones as you like.

Step 2. Set up role-based pricing

  1. Get the plugin, save the zip file to your computer, and copy the license key from your confirmation email.
  2. Install and activate the plugin on your WordPress site.
  3. Activate your license key in the setup wizard.
  4. Next, go to Marketing → Discounts and click 'Add Discount'.
  5. A popup will appear asking you to choose which type of role-based pricing you'd like to set up. There are examples on the right-hand side to help you decide.
  6. Next, enter the information for the role-based discount. This includes:
  7. Add a name to help you identify the pricing rule in the WordPress admin, e.g. "Role-based pricing for silver users".
  8. Select which products or categories you want the role-based pricing to apply to.
  9. Enter the details of the discount. The exact options will depend on what type of role-based pricing you're creating.
    WooCommerce Discount Manager simple discount
  10. Now click 'Selected roles' and choose one or more user roles that the pricing will be applied to.
  11. Use the 'Availability' section to schedule the pricing rule, if required.
  12. The 'Product page content' field is an opportunity to display role-based information on the WooCommerce product page. Feel free to enter any fancy styles from your theme, add emojis etc. For example, you might enter: "🔥 WELCOME BACK! As a Silver Member, we have given you 50% off everything 🔥" 
  13. Select a location for the product page content from the dropdown. For example, you can display it at the top of the page or above the add to cart button.
  14. Finally, you can add some text which appears at the top of the cart page. This is a nice way to remind people they're getting special pricing.
    Role-based pricing for WooCommerce add product page content select role
  15. Finally, click 'Save'.

Repeat these steps to add as many different role-based pricing roles as you like to WooCommerce, each one different.

How it looks on the front end

When a user logs into their account on your WooCommerce site, they will see the correct pricing for their role. They will also see any additional messages that you set up for them, such as product page content or a cart notice.

WooCommerce role-based pricing plugin cart notice

Of course, users with a different role (or logged out users and guests) will continue to see your regular pricing. Only logged in users with the correct roles will ever know that your WooCommerce store offers role-based pricing 🤫

Method 2: Create role-based wholesale discounts with Wholesale Pro

The WooCommerce Wholesale Pro plugin is a role-based pricing plugin designed for a specific use case: trade sales. It lets store owners create a wholesale store which runs alongside their main public-facing shop. When wholesale users log into their account, they receive special role-based pricing - while standard customers continue to see your regular pricing.

Here's a quick overview of what you get with this role-based pricing plugin:

  • Create an unlimited number of wholesale user roles, each with its own pricing.
  • 3 types of role-based pricing: global percentage discounts, category percentage discounts, or manually set role-based prices for specific products or variations.
  • Customizable wholesale registration and login forms (with the ability to hold new accounts for moderation by an administrator before they can start shopping).
  • Role-based payment options, so that you can offer different payment gateways to wholesale users.
  • Role-based shipping options, which you can use to offer different shipping methods to regular and wholesale buyers.
  • Different tax settings for each wholesale role, so you can charge tax to different roles depending on their location or tax status.
  • Use it with its sister plugin - WooCommerce Product Table - to create quick wholesale order forms.

WooCommerce Wholesale Pro prices 1

As you can see, Wholesale Pro is a fully featured wholesale plugin for WooCommerce. It has everything you need to run a successful wholesale store, with wholesale role-based pricing at its foundation.

Next, I'll tell you how to set it up.

How to set up wholesale role-based pricing

  1. Get the WooCommerce Wholesale Pro plugin and install and activate it on your WordPress site. You’ll receive a license key along with the plugin files in an email.
  2. The plugin setup wizard will open automatically when you first activate the plugin. Use it to activate your license key and set up the other main settings for your wholesale store.
  3. Next, add as many user roles as you like:
    1. Head over to WooCommerceSettingsWholesaleRoles from the WordPress admin panel.
    2. Click the Add new role button. Enter the display name and percentage role-based discount you’d like to offer users.
    3. Click the Save changes button to continue.

Once you've created a role for each pricing group, you can use WooCommerce Wholesale Pro to add 3 types of role-based pricing:

  1. Create global percentage discounts
  2. Create category percentage discounts
  3. Set exact prices for individual products

Feel free to skip ahead to your preferred method, or read through them all to see which one best fits your needs.

#1: Create global percentage discounts

Creating global percentage discounts is useful if you want to offer a specific user role a flat percentage discount on all products. For example, you can use this to give wholesale customers a 5% discount on their orders while retail customers pay the full amount.

You can also use it to offer members on different subscription plans a percentage discount on all purchases. For example, Silver Members qualify for a 3% discount whereas Gold Members qualify for a 5% discount.

To set up global role-based pricing in WooCommerce, head back toWooCommerceSettingsWholesale → Roles and add a percentage discount for each role:

Set up global discounts in WooCommerce

Your product page will look something like this to different customers:

Notice how the product page display price is different depending on the customer’s user role.

#2: Create category percentage discounts

Some WooCommerce store owners might benefit from creating category percentage discounts. This way, you can offer different types of users a different discount for each WooCommerce category.

For example, you might want to offer Silver Members a 15% discount and Gold Members a 20% discount on products in the Seasonal Sale category. These discounts might be bigger than the reductions in your year-round categories.

Here’s what you need to do to set this up in your online store:

Create category percentage discounts
  1. From the WordPress admin panel, navigate to Products Categories.
  2. Edit the product category you’d like to set category percentage discounts for or create a new WooCommerce product category.
  3. Use the Wholesale % discount option to set the category percentage discounts for each user role.
  4. Click the Update button.

In addition to this, you can also make product categories visible to only wholesale users, only guest users, or both wholesale users and guest users. This is an easy way to hide specific products from your public-facing site.

#3: Set exact prices for individual products or variations

There are plenty of scenarios where you might want to set exact prices for specific products instead of offering percentage discounts.

This is possible with the WooCommerce Wholesale Pro plugin. You can use it to set exact wholesale prices for individual products. The best part is that it works for simple products and products with variations.

Here’s how you can set exact prices for individual WooCommerce products:

Enable product specific pricing
  1. Head over to WooCommerceSettingsWholesaleRoles from the WordPress admin panel.
  2. Edit the user role you’d like to enable exact prices for.
  3. Tick the checkbox next to the Product specific pricing option.
  4. Click the Save changes button to continue.
Set exact prices in WooCommerce

Now you can set the per-product pricing for each role:

  1. Edit the product or variation that you’d like to set custom prices for.
  2. Scroll down to the Product data section and set the exact prices for each user role. This also works for variable products.
  3. Click the Update button to continue.

Bonus: show WooCommerce role-based pricing in a table layout

Wholesale customer-specific pricing plugin WooCommerce

One of the key benefits of using the WooCommerce Wholesale Pro plugin for setting up WooCommerce price by user role is that you can list products in a table layout. For this, you’ll need to get the WooCommerce Product Table plugin which integrates seamlessly with WooCommerce Wholesale Pro.

Using the WooCommerce Wholesale Pro plugin with WooCommerce Product Table, you can create quick, one-page order forms that display role-based pricing as well as other product details (such as product ID, image, and description). For example, you can use this to make it easier for wholesale customers to add products to their shopping cart without having to click the add to cart button for each one and quickly and proceed to the checkout page.

Wholesale customers will see wholesale pricing in the table layout and they can simply use the checkboxes to select all of the products they’d like to purchase and add to cart in one go.

To save money, get WooCommerce Product Table in a bundle when you buy WooCommerce Wholesale Pro.

Set up WooCommerce role-based pricing

In this article, we've discovered two fantastic role-based pricing plugins for WooCommerce:

Whichever plugin you use, you can easily add WooCommerce role-based pricing to your store. Each logged in user will see the correct pricing for their role 🚀

WooCommerce multiple prices per product

The WooCommerce plugin is designed to let e-commerce store owners sell each product at the same price to everyone – regardless of their status or user role. This means that you can’t set WooCommerce multiple prices per product for different types of customers. Keep reading to discover the solution!

In this tutorial, I’ll tell you about an easy way to charge different prices to different user roles. You can use this WooCommerce dynamic pricing solution to have as many user roles as you want – members, wholesale buyers, retail customers – with different pricing for each one.

The best part is that you can show different product prices to each user group without having to duplicate WooCommerce products. Having multiple versions of each product is fine if there are genuine differences between them. However, this can cost you a lot of time if the products you’re selling are 100% identical, and only the prices are different.

The easiest way to set WooCommerce multiple prices per product is by using the WooCommerce Wholesale Pro plugin. It lets you create unlimited user roles and add multiple prices per product depending on the user role.

Why charge multiple prices per product?

As a WooCommerce store owner, you might consider selling products to different types of customers at different prices. This means that when a customer logs into their account on your WordPress site, they see special pricing for their role. This pricing may be different from what public visitors or other user roles see.

What are the advantages of setting multiple prices per product?

There are lots of benefits to setting multiple prices per product in WooCommerce:

  • Expand your target marketCharging different prices to different users allows you to increase the size of your potential audience. As well as selling to public retail customers, you can effectively create a hidden area of your store for other customer groups.
  • Encourage each type of customer to buy morePricing is highly psychological and you need to set prices based on the needs and expectations of each group of customers. Setting multiple prices per product gives you full control to do this.
  • No duplicationThe main alternative to WooCommerce multiple prices per product is cloning each product and charging separately for each version. That creates a big headache for you as store owner, with twice as many products to maintain. It also causes inventory problems because you can't share stock across products.
  • Fully automated and saves you timeAnother alternative to setting multiple prices per product is to take manual orders over the phone. Doing it dynamically on your WordPress site therefore saves you time.

What scenarios call for multiple prices per product?

Lots of online stores need to set different pricing for different products. The most common scenario is WooCommerce wholesale stores, where retail customers pay full price and B2B users get a discount. This might be very simple with a main public price plus one wholesale price. Alternatively, it might be more complex with large numbers of wholesale pricing tiers for different users.

Either way, the wholesale user can buy products at trade price (often in bulk) and mark it up when reselling it in their own shop.

Membership programs also like to offer members-only discounts on certain products. This rewards logged in members for their loyalty. It provides a powerful incentive to sign up in return for discounts.

Setting up multiple prices per product without a plugin

In theory, it's possible to set multiple prices per product without installing any plugins. The way to do this is to use product variations. Each variation can have a different price.

WooCommerce product variation red
Adding price variations to a WooCommerce product

However, this method isn't suitable for most stores that need to charge different prices for the same product. That's because the variations will appear in a dropdown list on the product page which everyone can see, like this:

An example of a generic WooCommerce product page with variations.

When the user selects a variation from the dropdown, they will see the price for the selected option.

The problem with this approach is that all users can see all the different price options. That's no use if you want to charge different prices to different users.

That's why we recommend using WooCommerce Wholesale Pro instead. I'll tell you about it next.

How to set WooCommerce multiple prices per product with WooCommerce Wholesale Pro

WooCommerce Wholesale Pro makes it easy to charge multiple prices for the same product. You can set WooCommerce multiple prices per product without having to duplicate the product.

With the WooCommerce Wholesale Pro plugin, you can create as many user groups as you’d like, each with their own pricing. For example, if you want to sell to retail customers, wholesale customers and members, you can offer different discounts to each user role. The plugin also lets you set global and category percentage discounts and different prices for specific products.

Although the WooCommerce Wholesale Pro plugin was designed with wholesale stores in mind, you can use it for just about any type of store that different pricing per user. It works with all sorts of products, including simple products and product variations. It also lets you hide product prices from logged out users.

In addition, the plugin makes it easy to set up front-end registration forms. You can also show and hide product categories, taxes, payment and shipping options - all based on user group.

Next, I'll tell you how to set up the plugin to charge different prices for the same product in WooCommerce. I'll assume you already have the WooCommerce plugin set up on your WordPress website and some products added.

Step #1: Get the WooCommerce Wholesale Pro plugin

Get the WooCommerce Wholesale Pro plugin. Log in to the WordPress admin and install and activate the plugin. Activate your license key in the setup wizard which opens automatically.

Step #2: Create and set up new user groups

After the setup wizard, go to WooCommerce → Wholesale → Roles and add as many user roles as you like. The first one has already been created for you. Create a separate role for each user group that you want to add separate pricing for.

Next, you can either add a global percentage discount on all products per user group, set category percentage discounts per role, or set exact prices for each WooCommerce product per role. We'll cover these in steps 3-5 of this tutorial.

Step #3: Set up global percentage discounts

Head over to WooCommerceSettingsWholesaleRoles and click the Add new role button. Enter the percentage discount you’d like to offer that user group.

Global percentage discount for WooCommerce multiple prices per product

For example, you can offer different prices for the same product, including:

  • Members a 3% discount
  • Silver Wholesale Buyers a 5% discount
  • Gold Wholesale Buyers a 10% discount

Click the Save changes button to continue.

With WooCommerce Wholesale Pro, you don’t have to set up discount rules. This makes it easy to set up bulk pricing and offer wholesale customers bulk discounts.

Step #4: Set up category percentage discounts

Go to Products Categories from the WordPress admin panel and edit the product category you’d like to set category percentage discounts for.

WooCommerce multiple prices per product category

Next, scroll down to the Wholesale % discount option and set the percentage discounts for each user group. The WooCommerce Wholesale Pro plugin makes it easy to set pricing rules.

Click the Update button to continue.

Step #5: Set exact prices for each product or variation

You can also set exact product prices (i.e. fixed prices) for individual products instead of offering a percentage discount. To do this, simply tick the checkbox next to the Product specific pricing option.

Product specific pricing option for WooCommerce multiple prices per product

So, if you’re selling a variable product such as t-shirts to retail customers for $18, you could set different per prices per product for other user groups. You can do this from the Product data section. For example:

Set WooCommerce multiple prices per product for individual products
  • Members can purchase the t-shirt for $15.50
  • Silver Wholesale Buyers can purchase the t-shirt for $13.99
  • Gold Wholesale Buyers can purchase the t-shirt for $12.99

Click the Save changes button to continue.

Briefly mention other features such as wholesale registration and login, and the ability to hide prices from logged out users.

Step #6: Preview how the multiple prices are displayed

Here’s what a WooCommerce product page (the variable product t-shirt) will look like to users with different user groups – guest users, Members, Silver Wholesale Buyers, and Gold Wholesale Buyers – on the front-end:

This is the easiest way to set and display WooCommerce multiple prices per product. The best part is that you don’t have to duplicate products for each user group you want to sell to.

Guest users will see the regular price of the product on the single product page whereas Members, Silver Wholesale Buyers, and Gold Wholesale Buyers will see different prices for the t-shirt based on their user role. They can then click the add to cart button and proceed to the checkout page.

You can do all of this using the WooCommerce Wholesale Pro plugin without having to use HTML/CSS code or adding code to the functions.php file via FTP.

Start charging multiple prices per product today!

Using the WooCommerce Wholesale Pro plugin, you can create as many user groups as you’d like and set multiple prices per product on your online store. This is a great way to encourage customers to buy more and increase your bottom line.

You get:

  • Quick plug-and-play setup.
  • In-depth documentation (absolutely no way to get it wrong).
  • Technical support is available if you need any help.
  • 30-day money-back guarantee. Love it or get a full refund, zero risk!

Get the WooCommerce Wholesale Pro plugin today and start charging WooCommerce multiple prices per product.

Related resources

Our WooCommerce Wholesale Pro plugin has become hugely popular since it launched a couple of months ago. Today we've released version 1.3, which has lots of exciting new features that our customers have asked for.

B2B trade buyers have completely different needs from retail consumers. When you create a WooCommerce wholesale store, it is therefore essential to configure the trade area according to your buyers' needs. For example:

  • WooCommerce wholesale plugin 1-3
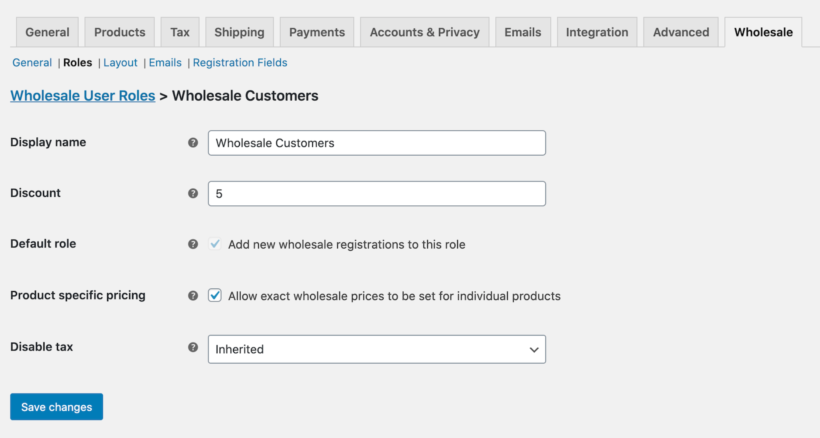
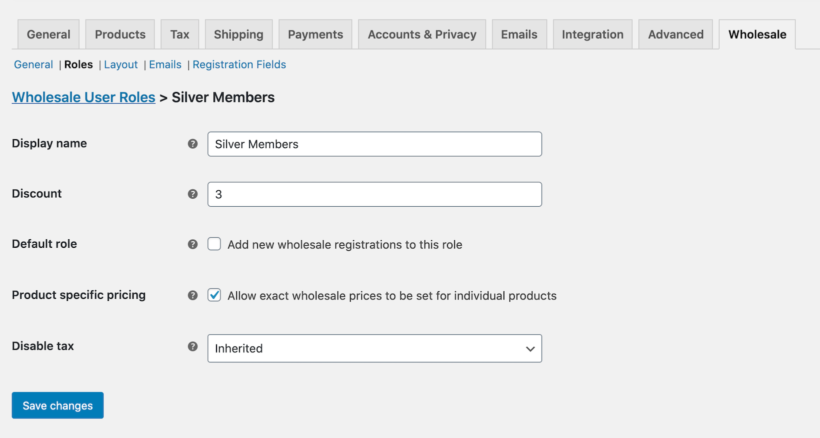
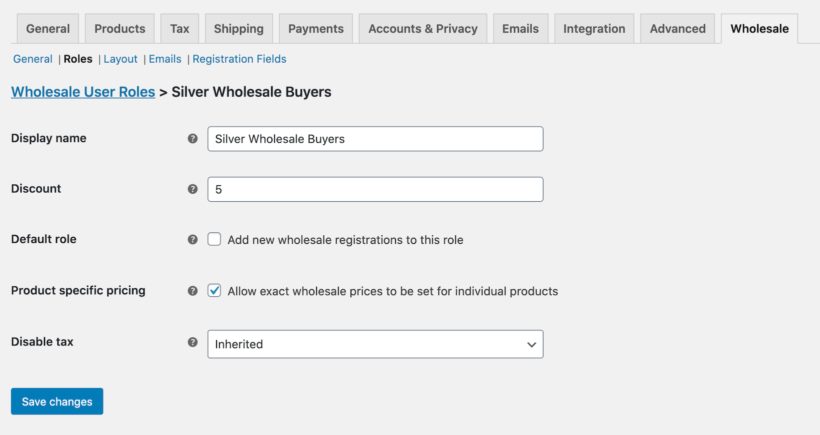
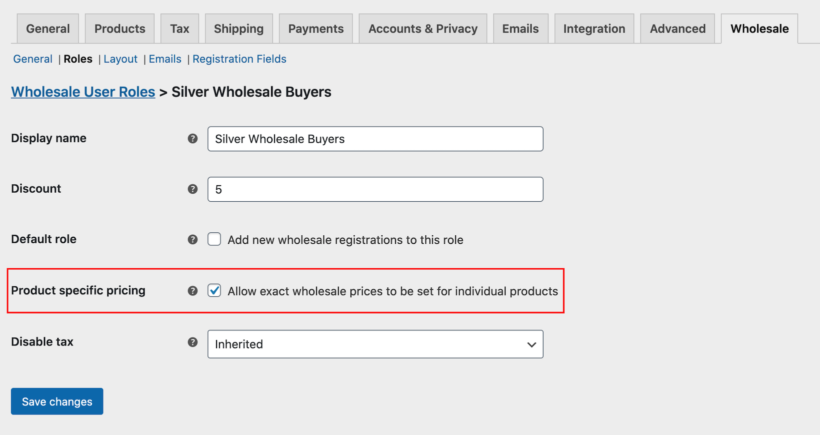
Since B2B customers are normally registered companies, you might want to disable taxes for some or all of your wholesale users - while still charging tax to public customers.
  • WooCommerce wholesale stores don't tend to offer sales and discounts to trade users, so you might want to remove the coupon code field from the checkout for trade buyers only.
  • As regular customers, your wholesale buyers might benefit from extra payment options that you don't offer to public shoppers. For example, you might allow wholesale users to pay later by invoice or BACS, instead of having to pay when they place their order.
  • Wholesale users often buy in bulk, so you might want to offer different shipping methods that aren't available to public customers. For example, perhaps you're using the Product Shipping plugin to offer weight-based shipping - but only want these options to appear to wholesale users.

Version 1.3 of WooCommerce Wholesale Pro has all these features. Use them to customize your private wholesale area so that B2B and B2C users receive an even more tailored experience.

Online convenience store

By the time you're done reading this article, you'll know exactly how to start an online convenience store and sell groceries online.

Many people's lives now heavily rely on online purchasing and selling. People can buy at virtual stores in the convenience of their homes . Online markets offer a fresh and more practical setting for the exchange of almost all products and services.

Online sales have gained popularity among both companies and customers as a more affordable and practical method of shopping and  till date remains profitable model.

So, how can convenience stores and grocery stores stay in business in  uncertain times?

The solution

The online business model helps the suppliers and customers to remain in business unaffected during emergency situations. One way to continue selling products to customers is by switching up your business model to selling online. By setting up an online convenience store, you can continue providing essential supplies to the general public while keeping your business going and reach a larger audience beyond your local area.

The easiest way to do this is with a WordPress WooCommerce website, coupled with one of these plugins for displaying your products:

So, if you're looking for a way to sell convenience store products and grocery items, then don't worry! This in-depth guide will show you how to start an online convenience store. As well as making it quick and easy to find and buy groceries and other products, you'll learn how to offer local grocery collection and home delivery options.

And the best part? We'll show you step-by-step how you can set up your online convenience store and sell groceries online. It's quick and easy, and there's absolutely no technical knowledge required to follow this tutorial. You can set everything up and start selling in no time!

Choosing the right plugin for your online convenience store

Before you can start setting up your online convenience store, it's a good idea to take a step back and figure out what sort of layout would be best for the types of products you're selling.

For example:

  • If you sell a dozen grocery items or fresh produce, you'd be better off with a menu-style food order form. This makes online grocery shopping quick and easy.
  • However, if you plan on selling hundreds (or even thousands) of convenience store products, a searchable and sortable product table ordering form with filters would be better suited to your needs.

Take another look at the two options, and choose whichever layout is best for you:

The WooCommerce Restaurant Ordering plugin is designed specifically for selling food products like flour, grains, fruits, and vegetables. The plugin also lets you display food items in a tiled layout on your site's front-end with 1, 2, or 3 columns.

On the other hand, the WooCommerce Product Table plugin is ideal for selling a large number of products, like convenience store products. It comes with searching, sorting, and filtering options out of the box to help people quickly and easily find what they need.

Next, I'll show you how to use each plugin to sell groceries or other convenience store products online.

Before you start

This tutorial assumes that you already have a WordPress website with the free WooCommerce installed, and some products added. If you haven't got that far yet, then checkout this ultimate guide to WooCommerce.

Once you're done, come back here and continue transforming your website into a fully fledged online grocery or convenience store.

Option 1 - How to start selling groceries online using the WooCommerce Restaurant Ordering plugin

The easiest way to start selling groceries online is by using the WooCommerce Restaurant Ordering plugin. All you have to do is create categories for your grocery food items, and the plugin will automatically list them in a food order form page for you.

Online grocery store

Here's what you need to do:

  1. Get the WooCommerce Restaurant Ordering plugin and install and activate it to your WooCommerce site.
  2. Go to WooCommerce → Settings Restaurant and activate the plugin's license key.
  3. Choose which page you'd like to display the grocery order form on using the Restaurant order page dropdown.
  4. Select which Categories to include in your grocery order form using the dropdown.
  5. Choose what information you'd like to display about your groceries.
  6. Click the Save changes button at the bottom of the screen to proceed.

Once that's done, go to the main list of Pages in the WordPress admin and find a new page called 'Restaurant Ordering'. Change the name to something more appropriate, and you'll see that this page lists all your grocery products.

Alternatively, you can use the [restaurant_ordering] shortcode to list each grocery category on a separate page or in a tabbed layout or on multiple pages on your website.

You can now start accepting online orders. Customers can view your 'Buy groceries' page and add products to the cart. If you've added variations of your groceries (for example, to provide different size options for the same product) then these will appear in a lightbox. Perfect!

Option 2 - How to set up an online convenience store using the WooCommerce Product Table plugin

Convenience store form preview

The WooCommerce Product Table plugin makes it easy to set up an online convenience store in WooCommerce in a few simple steps. The first thing you need to do is create categories for your online convenience store items. Do this under Products → Categories.

Once that's done, follow these steps to display your products on the front-end:

  1. Get the WooCommerce Product Table plugin and install and activate it on your website.
  2. Go to WooCommerce → Settings Products Product tables and activate the plugin's license key.
  3. To display the product table on the front-end, either:
    1. Use the [product_table] shortcode to list all the products in a table with a Categories or Tags filter above.
    2. Tick the Table display boxes on the plugin settings page to enable the product table layout throughout your online convenience store. This way, people will see the tables on the shop and individual category pages and can browse the store as needed.
  4. Tick the checkbox next to the Lazy load option under the Loading products section if you plan on selling hundreds of products.
  5. If you have lots of products, then you'll also want to enable the Search and Filter options.
  6. Set the Add to cart button dropdown to either Checkbox only or Button and checkbox. This way, customers can quickly choose quantities, variations, and tick multiple products before adding them all to the cart.
  7. Click the Save changes button at the bottom of the screen to proceed.

Set up local collection and home delivery options

The WooCommerce Restaurant Ordering and WooCommerce Product Table plugins are the perfect way to list grocery and convenience store products in a one-page order form. Once customers add products to their cart, they can proceed to the checkout page.

The WooCommerce plugin handles the entire checkout process. This means that you can give customers the option to collect the grocery items and convenience store products from your physical store, or have them delivered straight to their doorstep like Amazon. You can offer free delivery or charge a delivery fee.

In addition, online grocery and convenience stores can choose to either restrict their customers to a specific local area. Or, they can open up their usual market by offering nationwide (or even international) delivery options.

To take things to the next level, you can let customers choose their collection or delivery time slot. You can easily do this with the WooCommerce Opening Hours & Chosen Times plugin. This way, you can let people choose an exact time slot for their local grocery store delivery or collection.

The delivery slots plugin works seamlessly with WooCommerce Restaurant Ordering and WooCommerce Product Table. Offering delivery services is a great way to enhance the customer's shopping experience.

Set up your online convenience store today!

The WooCommerce Restaurant Ordering plugin makes it easy for customers to purchase grocery items from your e-commerce store. And the WooCommerce Product Table plugin lets you set up an online convenience store and start selling hundreds (or even thousands) of products in no time.

Plus, you can offer grocery delivery services. This gives customers the option to collect their orders from your store or have it delivered to their home the way Amazon does it.

Both plugins come with everything you need to get up and running quickly:

  • Quick plug-and-play setup.
  • In-depth documentation (absolutely no way to get it wrong).
  • Technical support is available if you need any help.
  • 30-day money-back guarantee. Love it or get a full refund - zero risk!

Get the WooCommerce Restaurant Ordering plugin and sell groceries online today through your online grocery store. Or, use the WooCommerce Product Table plugin to set up an online convenience store. Choose the right plugin for your needs, and set it up today!