Order food PayPal

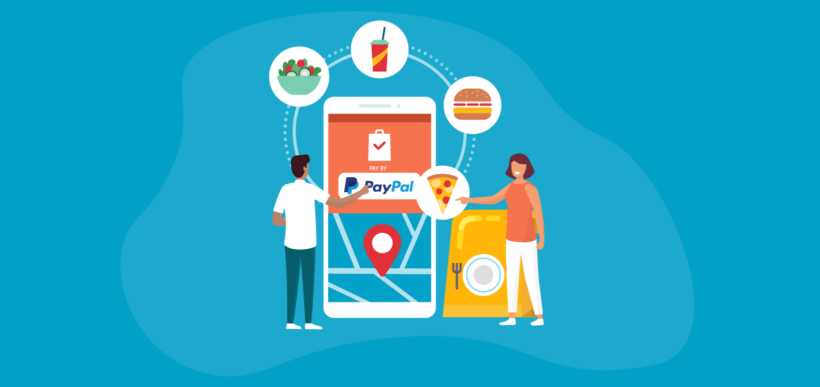
By the time you’ve read this article, you’ll know exactly how to set up PayPal for food orders. Your customers will be able to order food using PayPal, just like with hosted services such as Grubhub, Just Eat and UberEats - but with you in control.

Over the past few years, mobile payments have been very popular, and this trend is anticipated to continue as more businesses use this technology. This implies that more restaurants have started accepting cash-less food orders in coming years. Restaurants that set up online food ordering systems have seen a huge increase in takeaway orders! Restaurants are now having to make permanent changes to stay in business longer-term. Online food orders are an important part of this.

Of course, customers LOVE PayPal because it's so easy and they can pay for food orders from their mobiles.

So, how can a restaurant like yours set up online ordering with easy PayPal payments?

By the end of this FREE guide, you’ll walk away knowing EXACTLY:

  • What you need to set up online orders for your restaurant with PayPal payments just like Grubhub, Just Eat or Uber Eats.
  • How to set up all of the components without any technical knowledge or experience.
  • How to do all of this EVEN if you don’t have a website yet!

And the best part? We’ll show you how to automate the whole process.

Why PayPal alone is a terrible way to sell food online

If you’ve used PayPal to accept payments for your products or services, you probably already know that it’s not the best way to sell food online.

The problem with using PayPal for food orders is that you have to log into your PayPal account to create each PayPal payment button individually. After creating the buttons, you paste them on your website. This doesn’t look professional and makes for a terrible user experience.

Further, PayPal doesn't provide a shopping cart system that lets customers order multiple food items at once. This is a major problem since most people need to order more than one food item at a time!

From a back-end perspective, you won’t receive any sort of ‘new order’ notification or customer emails if you use PayPal alone for food orders. You will only receive basic payment notifications from PayPal which may get mixed up with other PayPal emails.

You also miss out on analytics and sales reporting features (like Google Analytics) as well as the ability to integrate with other systems, such as opening hours, delivery slots or the printer in your restaurant’s kitchen.

But what if you could set up PayPal for food orders just like Grubhub - without any of these problems?

The solution – Build a WordPress WooCommerce website for selling food online

WooCommerce restaurant plugin

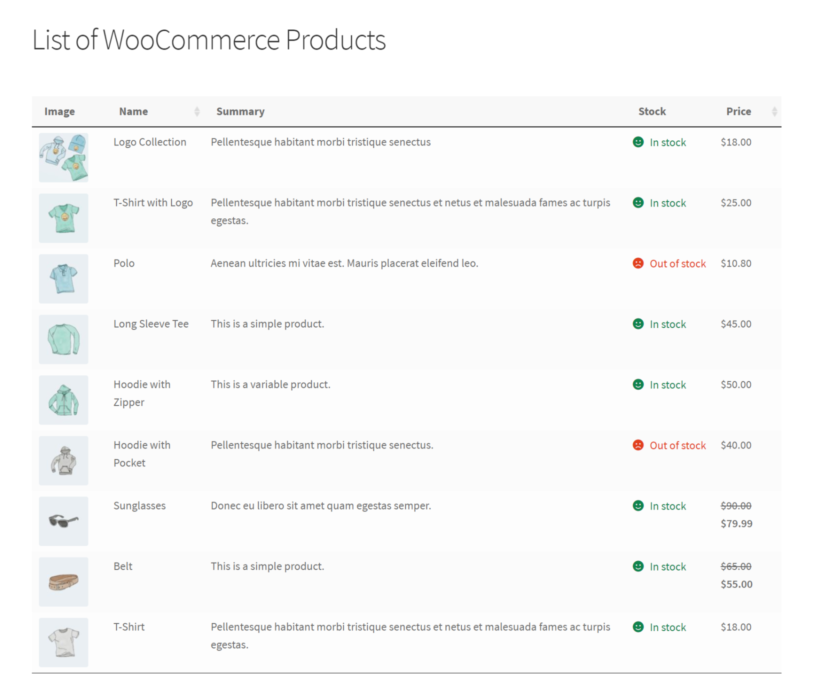
A WordPress website with the free WooCommerce plugin is a far better way to sell food online and accept payments via PayPal. The best part is that you can enhance your site’s core functionality using specialized plugins, like WooCommerce Restaurant Ordering. This makes it even easier to showcase your food items and allow customers to place orders.

The WooCommerce plugin offers seamless integration with PayPal as standard, in a much better way than if you were to use PayPal alone to let customers place orders as we described earlier.

It’s incredibly easy to set up. As a result, you can start letting customers order food with PayPal today!

Plus, this is mobile-responsive, which means it will work seamlessly on iOS and Android devices without requiring customers to download a mobile app first.

Setting up PayPal payments for food orders

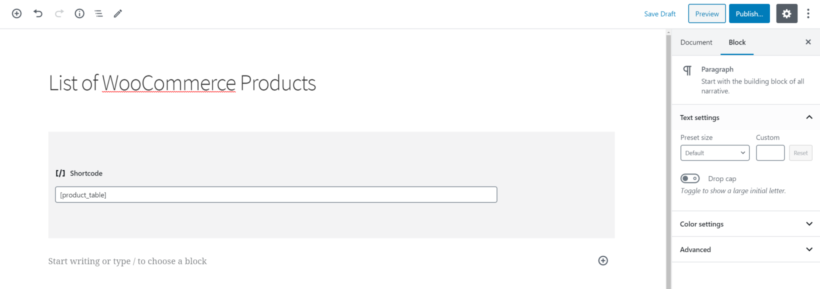
If you don’t already have a WordPress website set up with the WooCommerce plugin installed, check out this complete guide on how to get started.

Once you’ve set it up and added some food items as WooCommerce products, come back to this tutorial to learn how to set up PayPal payment options for food orders.

Step #1: Get the WooCommerce Restaurant Ordering plugin

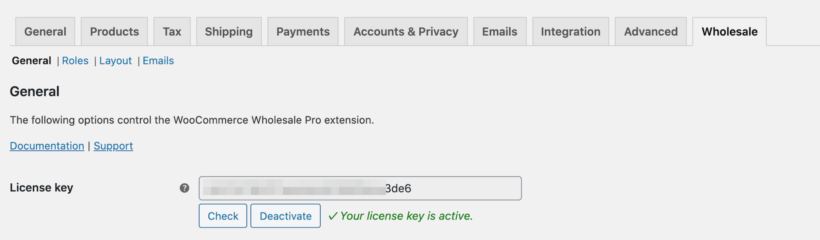
Purchase the WooCommerce Restaurant Ordering plugin and install and activate it on your WordPress website. You'll receive a license key with the plugin files.
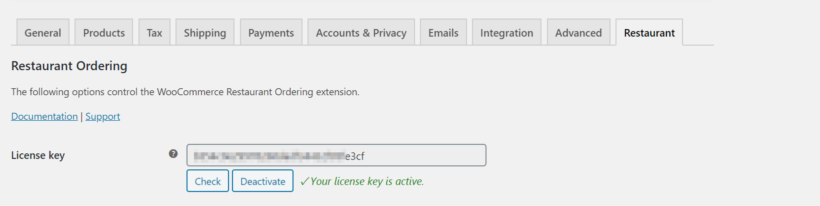
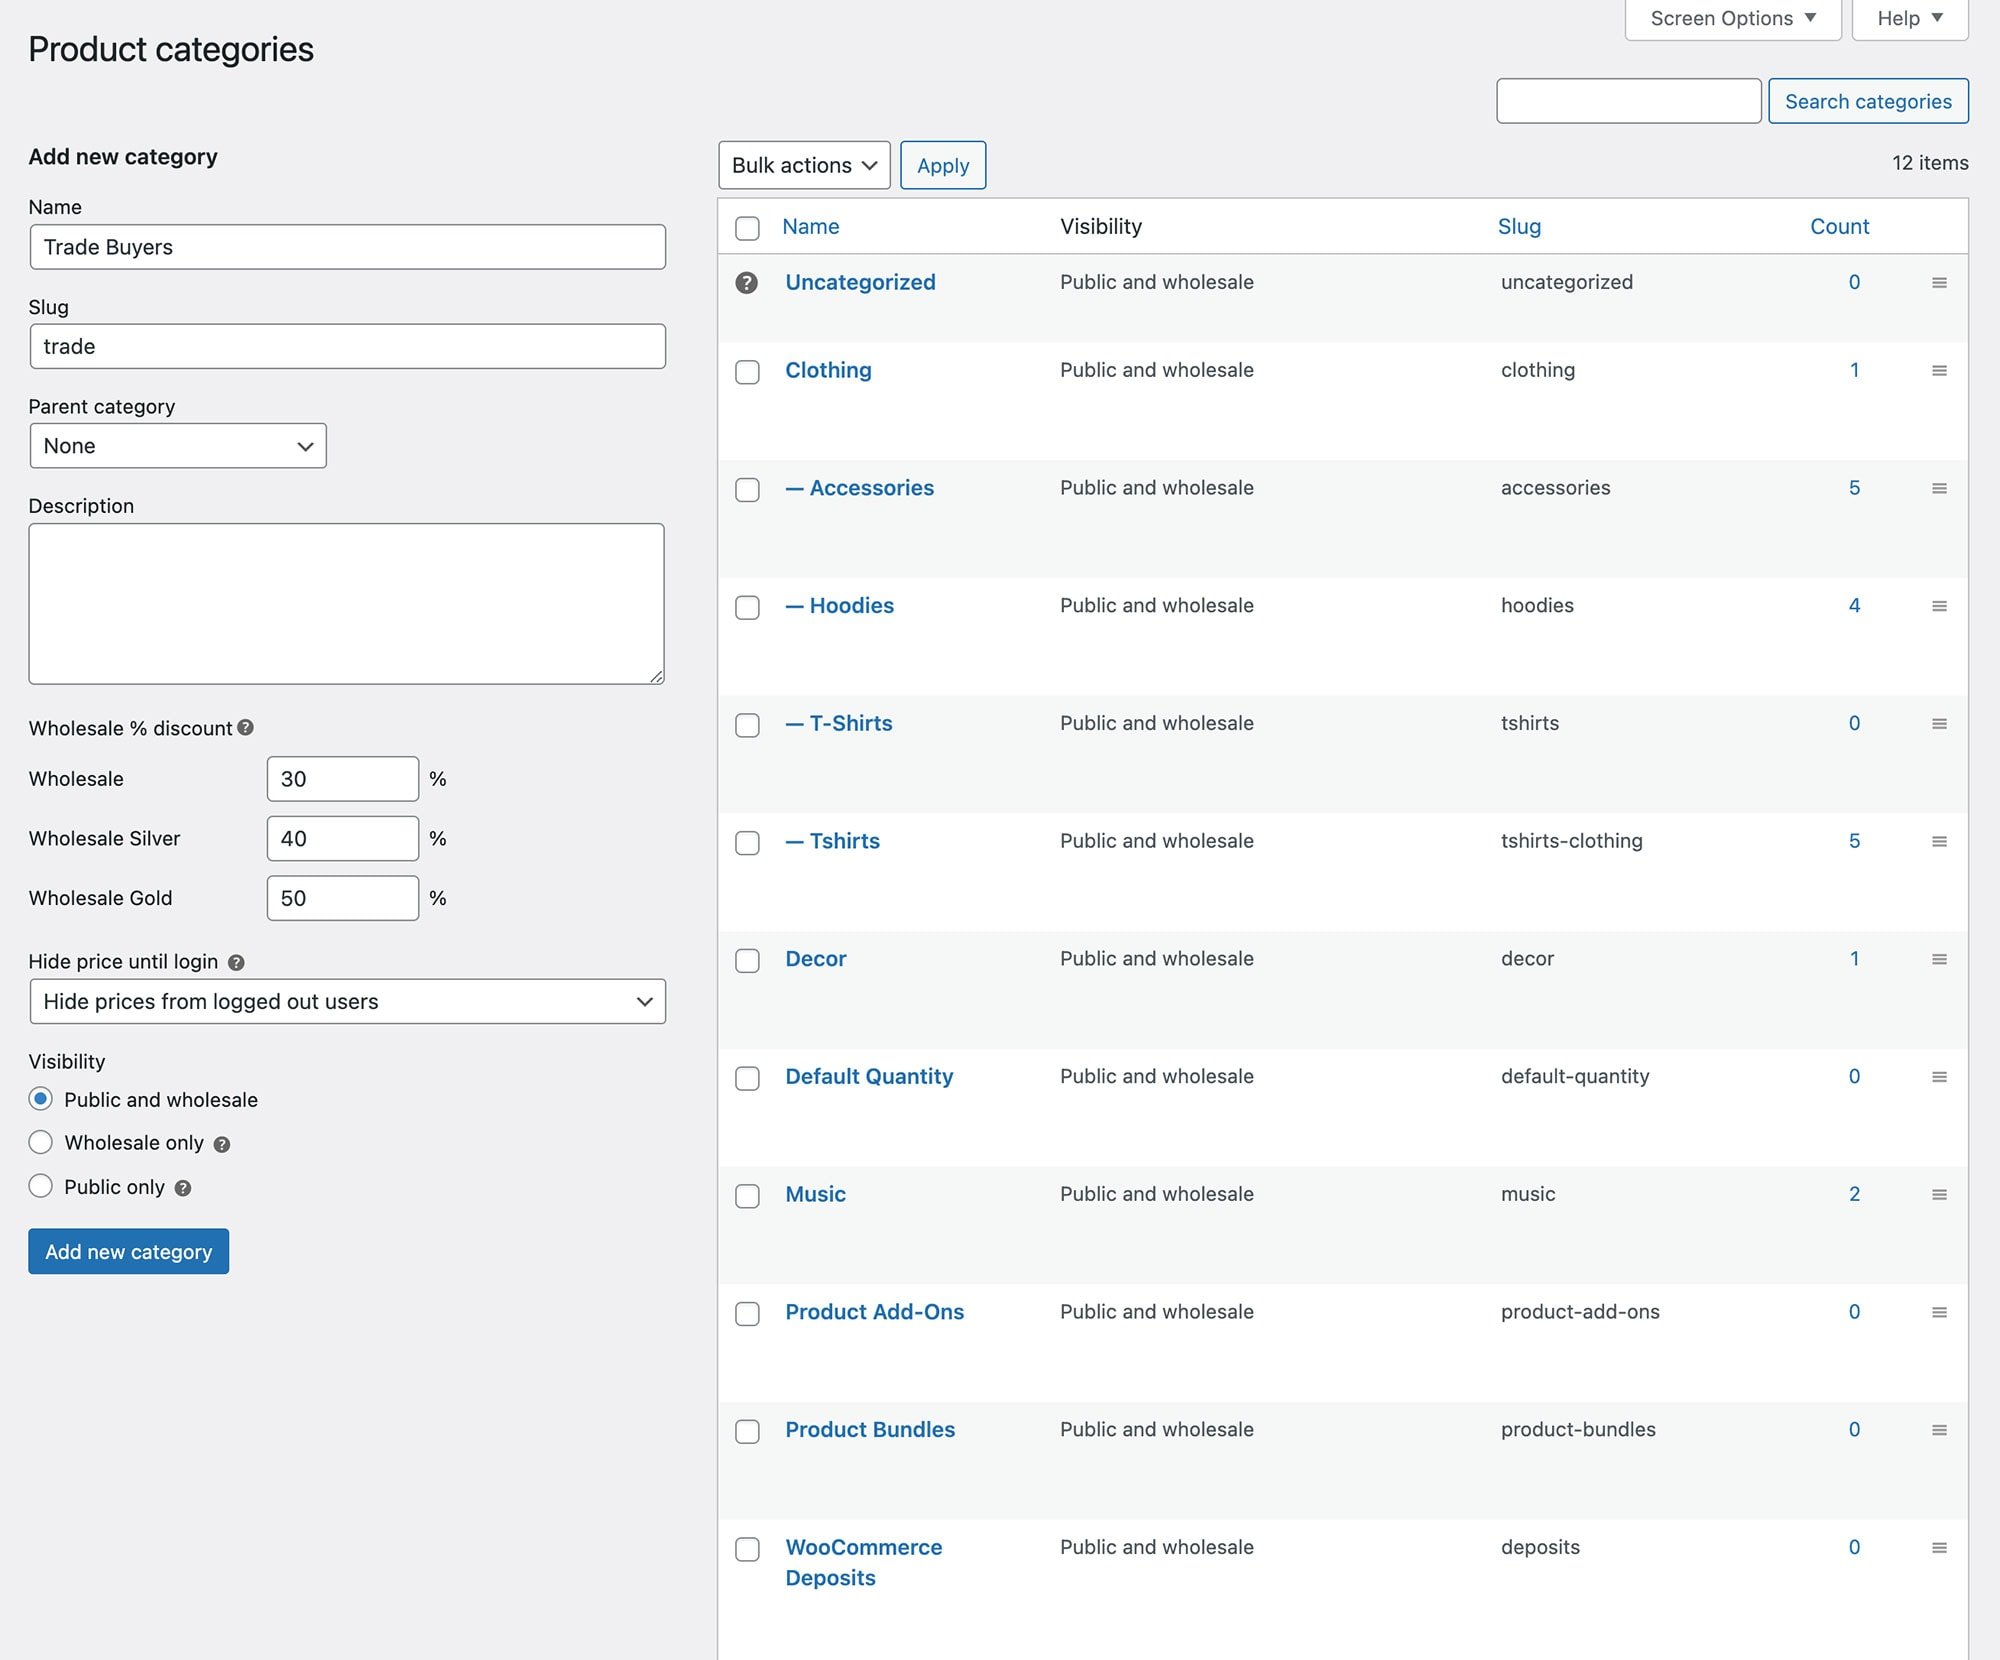
WooCommerce Restaurant Ordering license key

Go to WooCommerceSettingsRestaurant and enter the license key in the License key field.

Click the Save changes button at the bottom of the screen to continue.

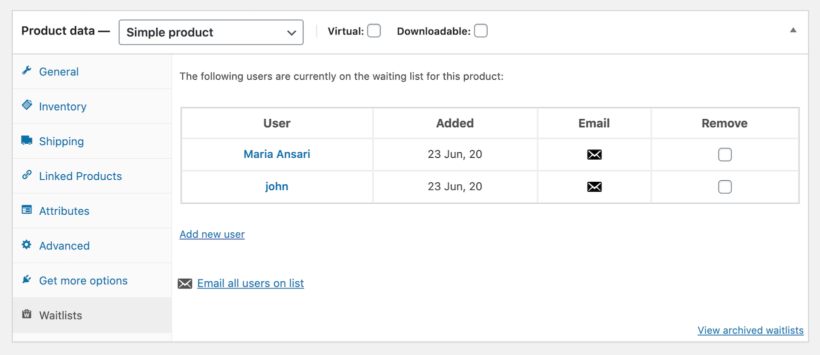
Step #2: Customize your restaurant food order form

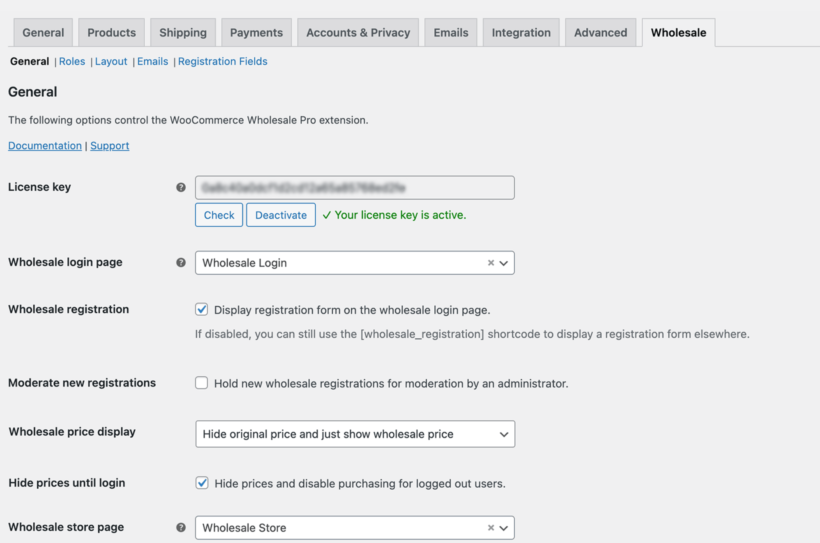
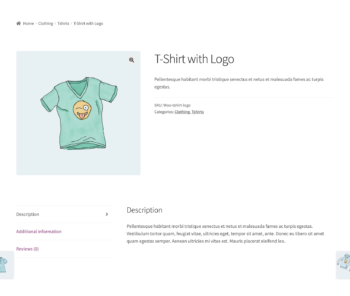
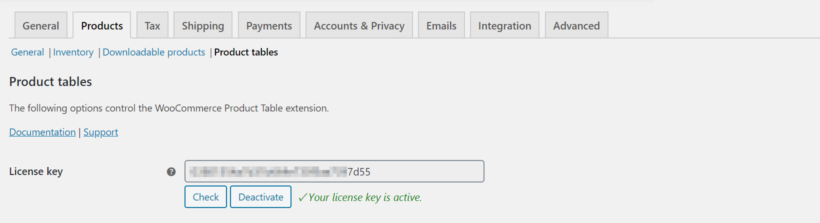
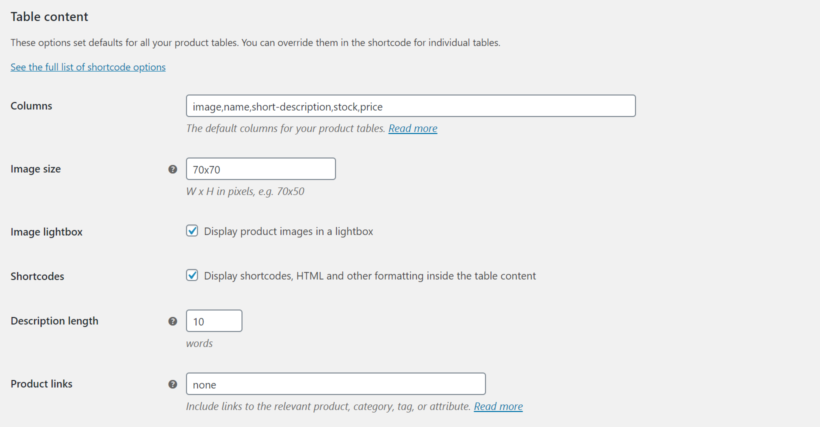
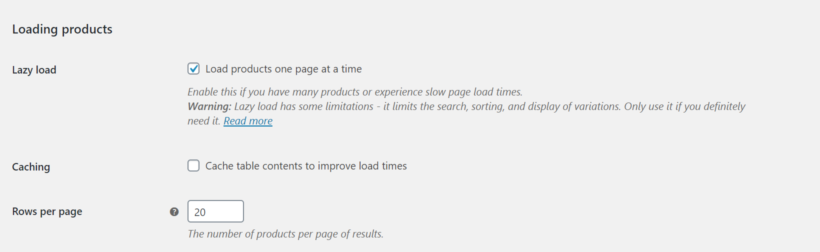
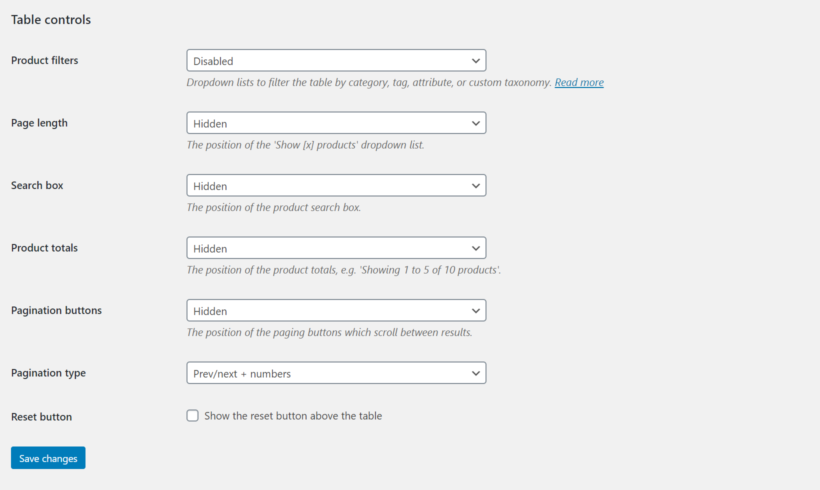
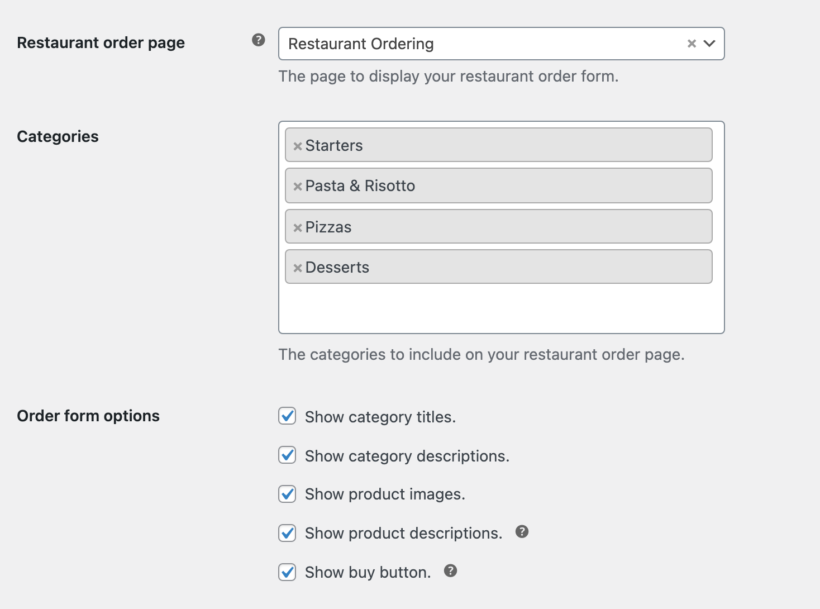
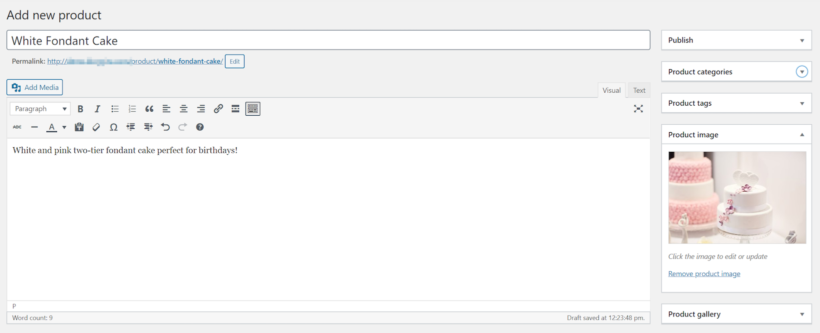
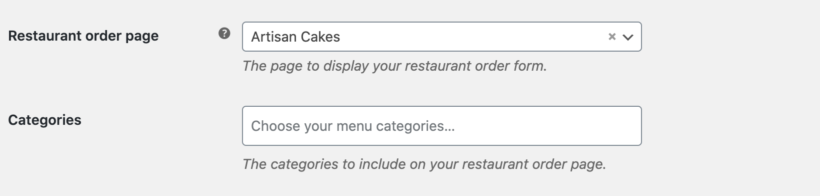
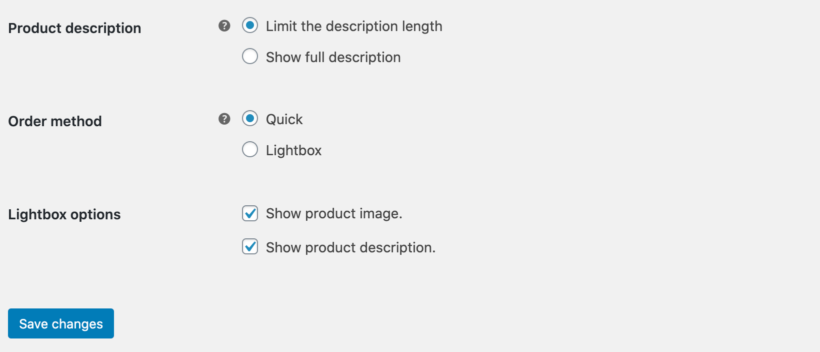
The WooCommerce Restaurant Ordering plugin automatically creates a front-end food order form for you once you activate the license key. However, you can customize the food ordering page in a variety of different ways.

For example, you can set the restaurant order page, select which product categories to showcase in the food ordering form, set the number of columns, choose an order method, and much more. You can also add your opening hours and prevent PayPal food orders from coming in while you're closed.

Check out the plugin's documentation for step-by-step instructions.

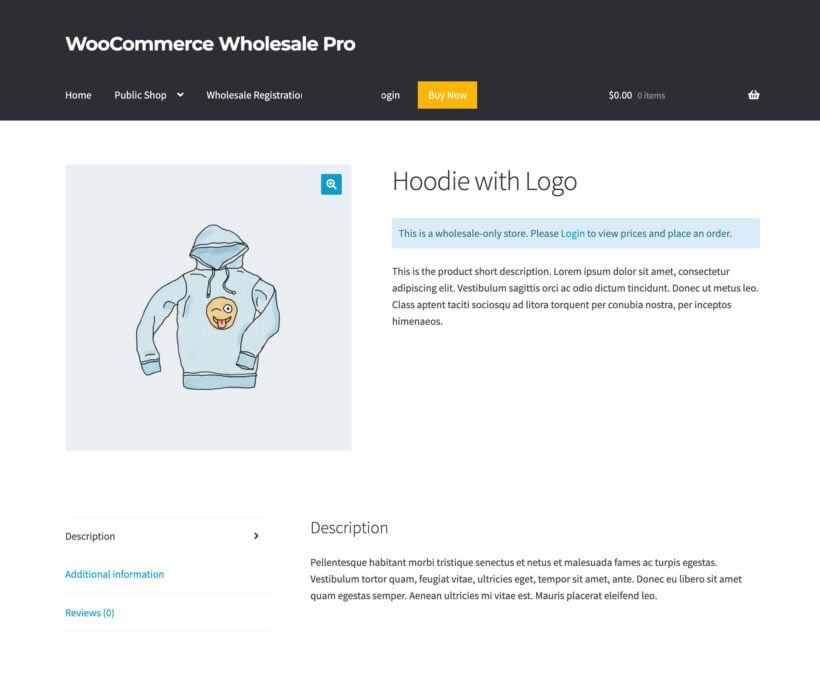
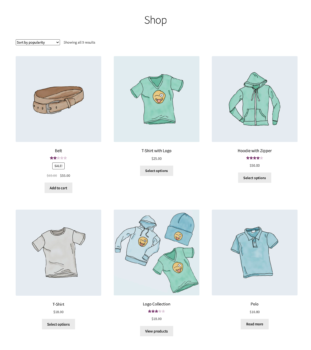
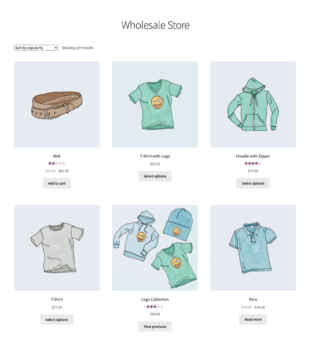
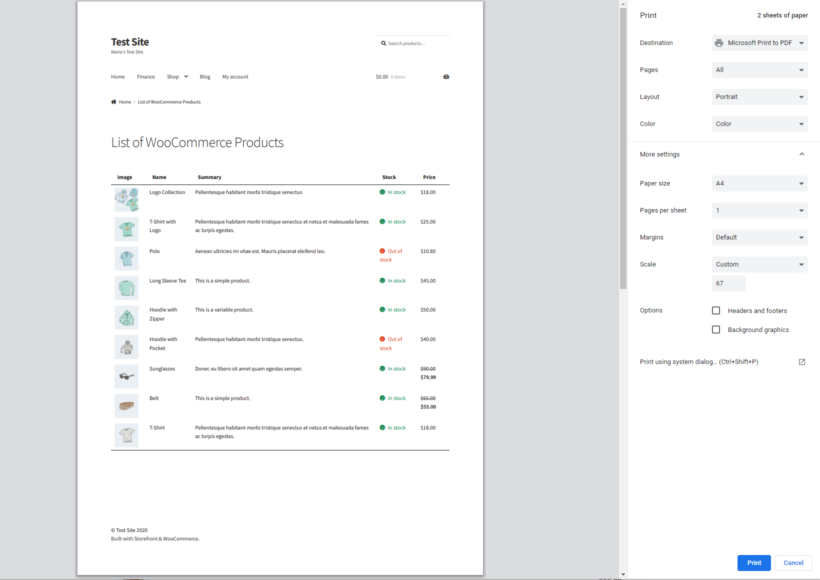
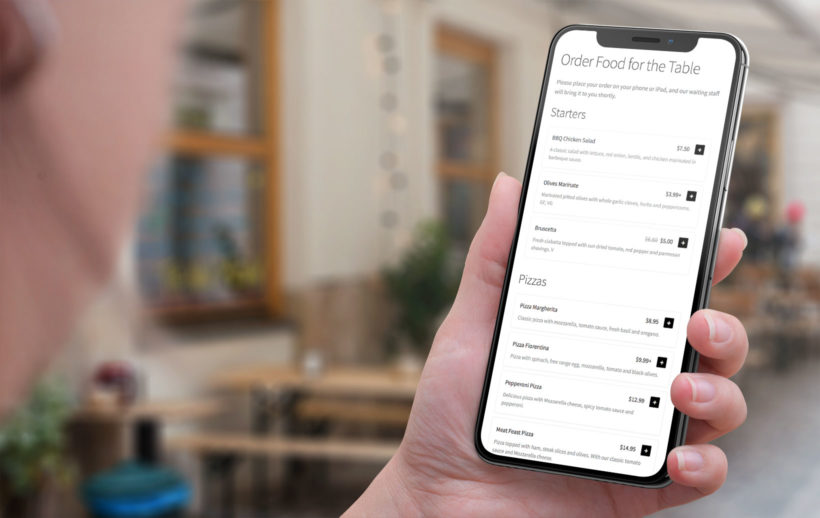
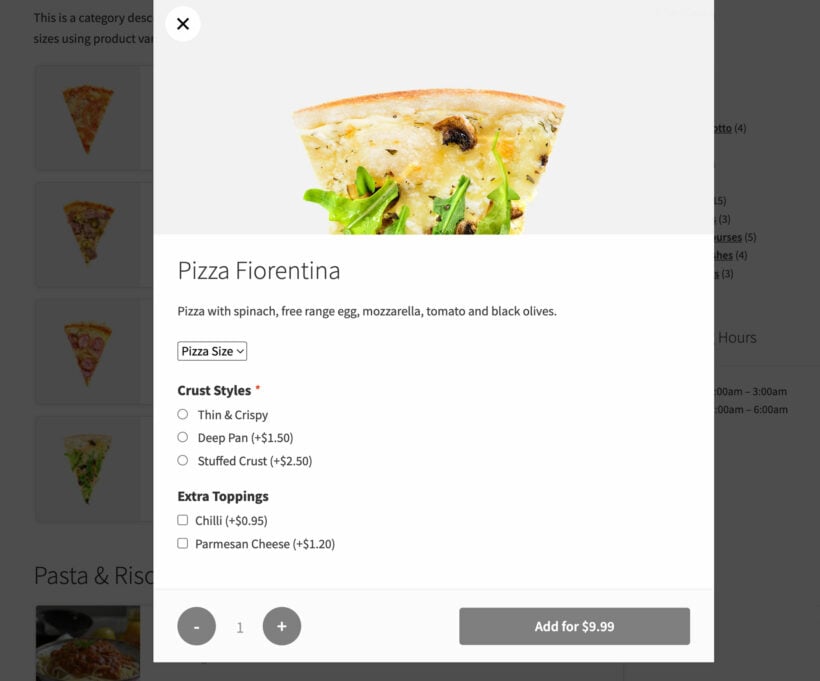
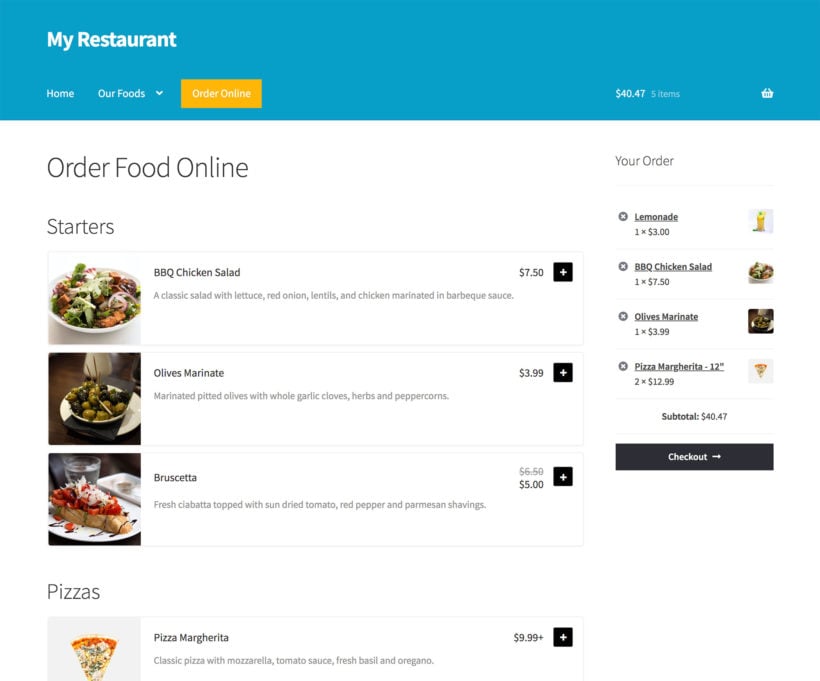
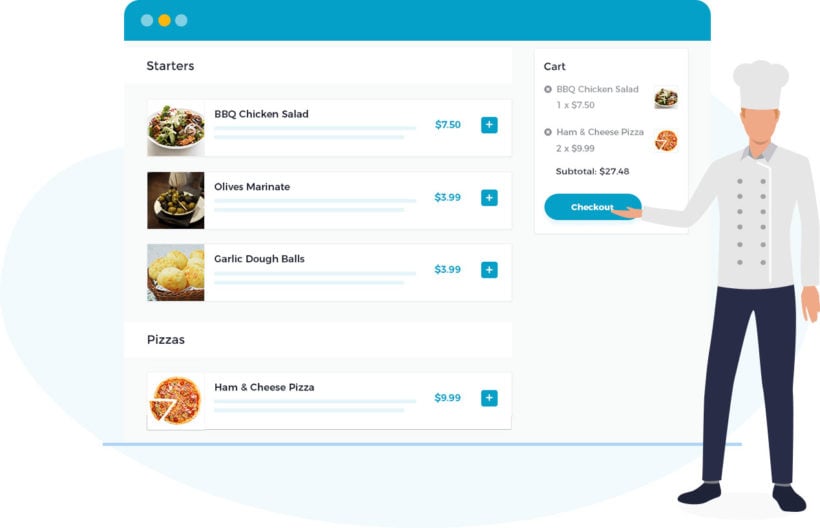
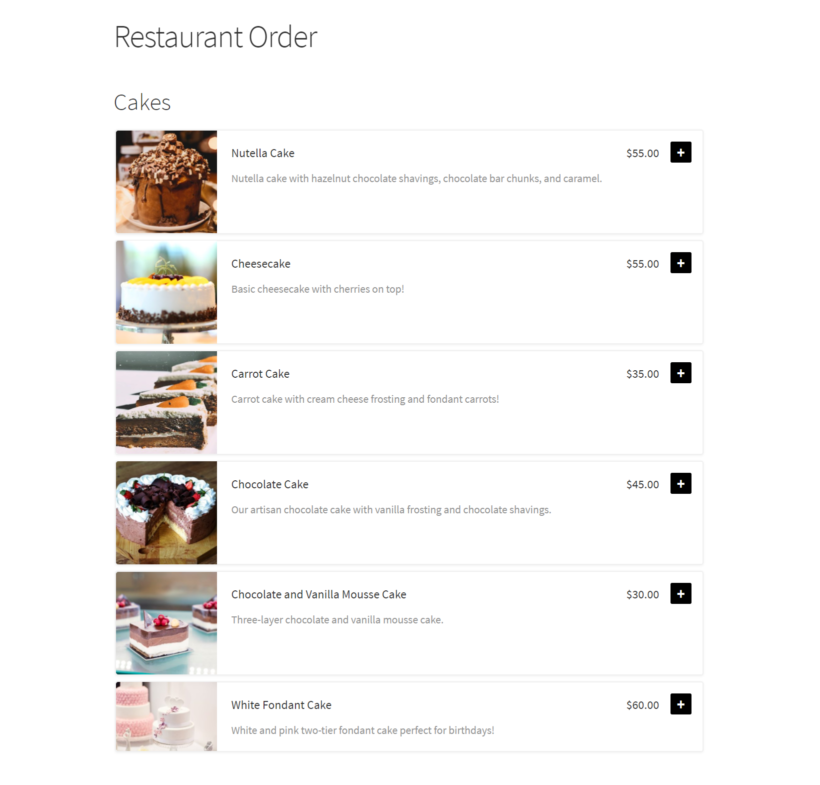
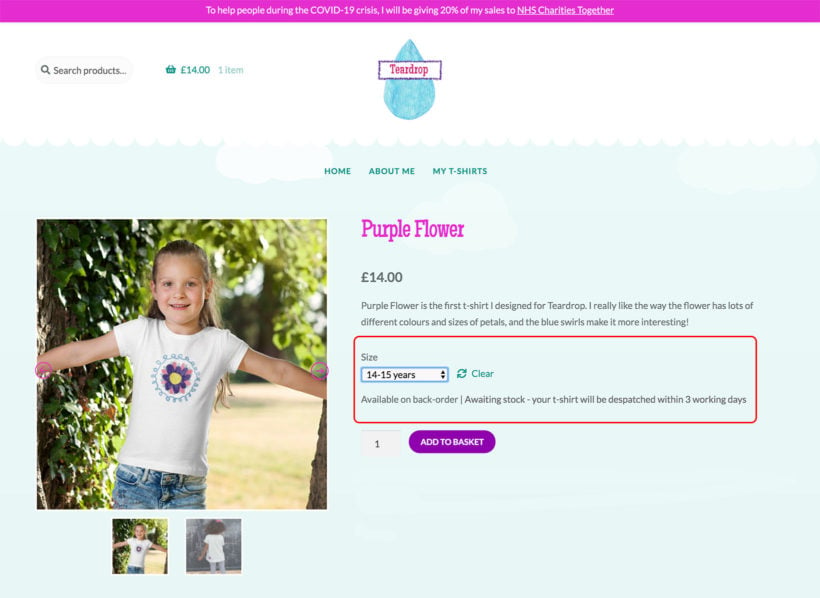
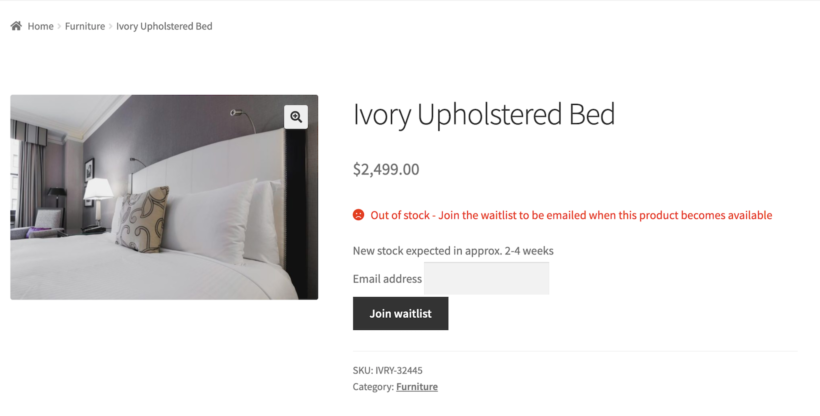
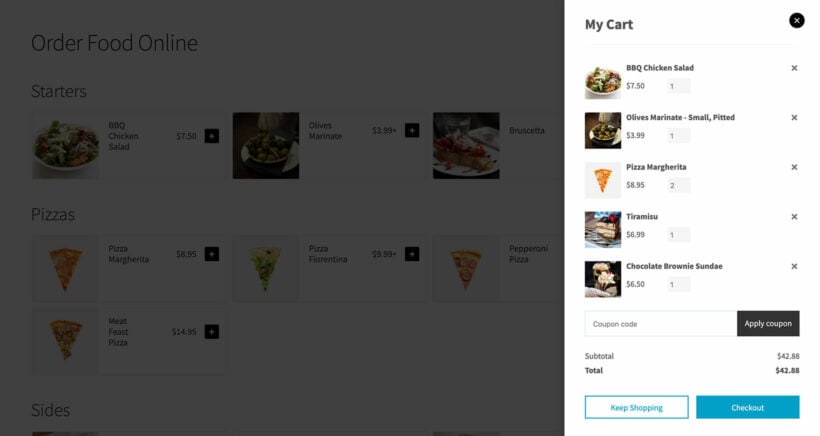
Based on your configuration settings, your food order form might look something like this:

WooCommerce food order form preview

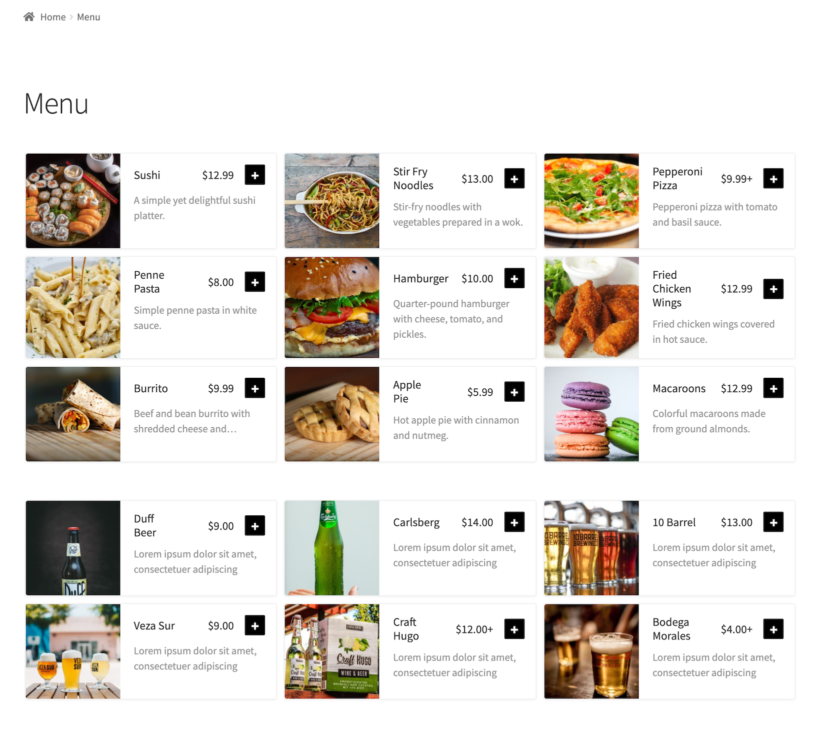
Customers can click the (+) icon to add food items to their shopping cart and proceed to checkout.

Step #3: Set up PayPal payments

Now that your restaurant food ordering form is set up, the final step is to start accepting payments for food orders via PayPal. For this, head over to WooCommerceSettingsRestaurant from the admin area.

Enable PayPal payment method

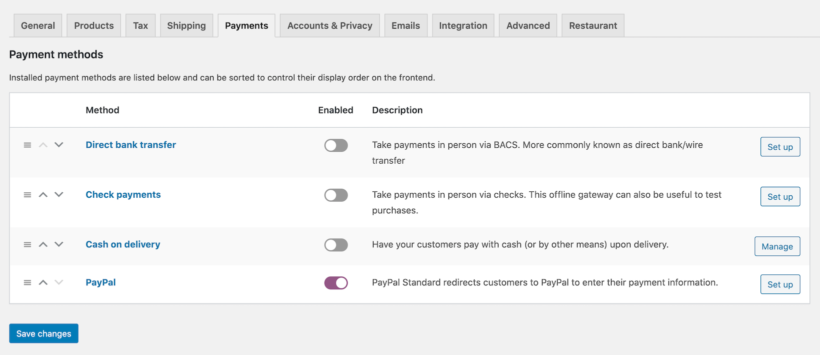
Next, enable the PayPal payment method option and click the Set up button to start setting it up. Enter your PayPal email address in the PayPal email field. You can also configure other settings on the same screen based on your preferences.

Click the Save changes button to proceed.

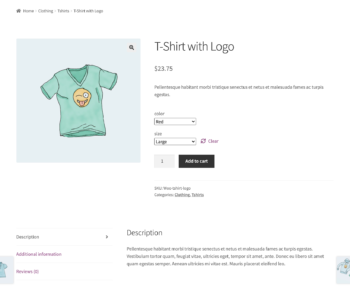
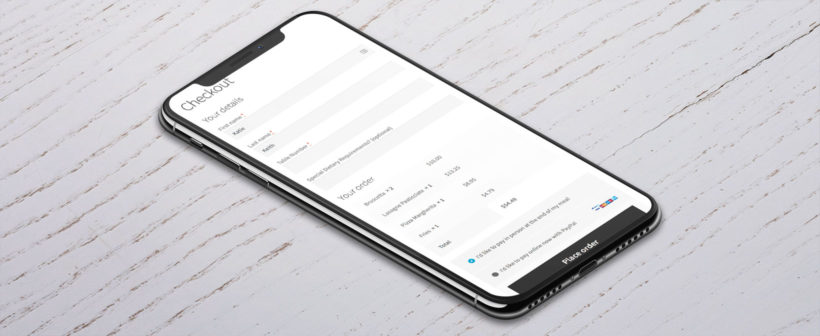
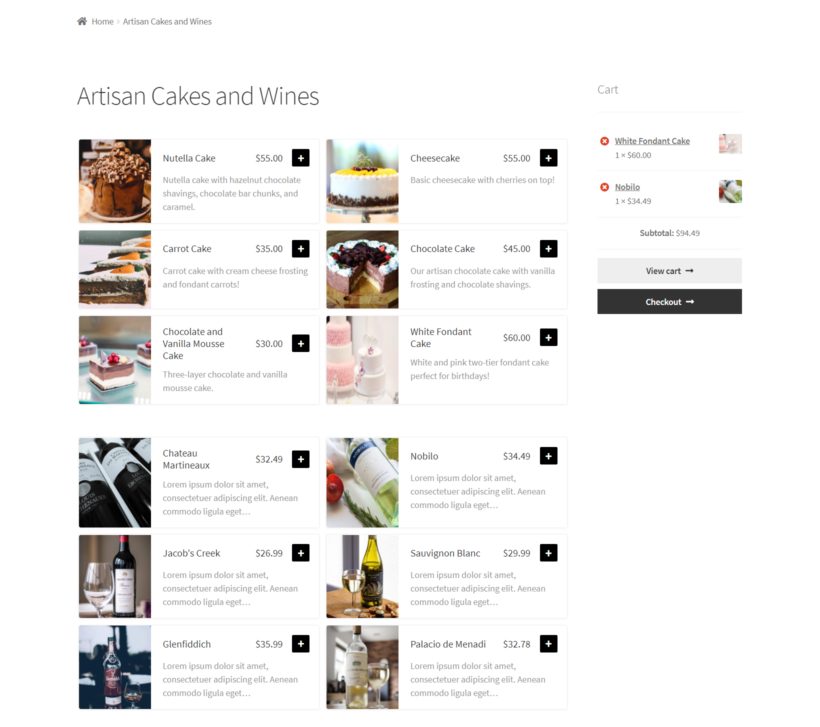
When customers proceed to checkout, they'll be able to make pay for food orders with PayPal:

Order food using PayPal

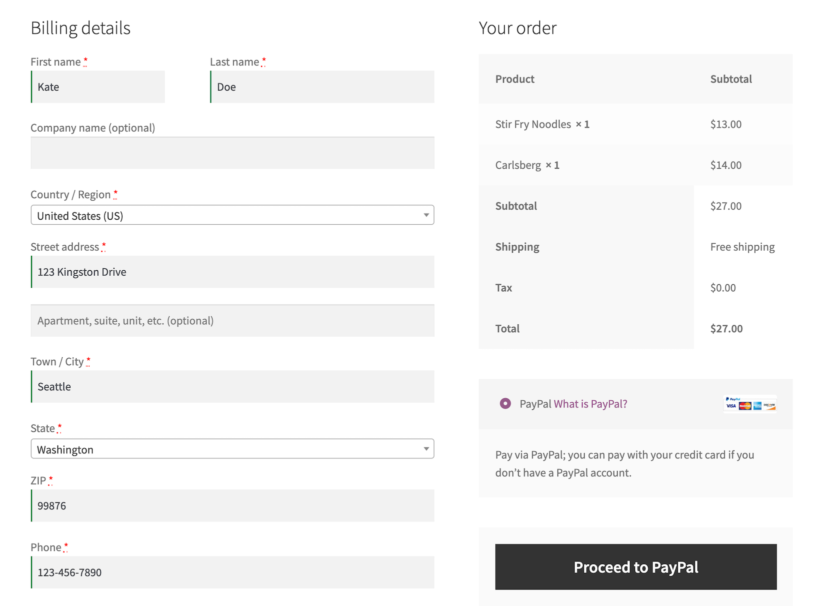
That's it! Now, you can let customers place food orders and accept payments through PayPal.

Adding extra features to your PayPal-powered food ordering system

The great thing about using WordPress and WooCommerce to set up your PayPal-powered food ordering system is that you can add extra features to it using plugins. For example, you can set up food delivery slots and printing solutions that print orders straight to your restaurant’s kitchen.

Popup cart and checkout

WooCommerce restaurant floating cart

The WooCommerce Restaurant Ordering plugin lets customers add their food items to the cart from one page. However, WooCommerce itself still takes customers through multiple pages in order to complete their order.

To speed up the cart and checkout, install WooCommerce Fast Cart. This adds an instant floating cart to the page as soon as the customer adds products to their cart. They can then review their selections, enter their details and pay from directly in the popup.

WooCommerce Fast Cart is fully compatible with the WooCommerce PayPal Checkout Payment Gateway. This lets you add PayPal Checkout buttons to the popup cart, making it even easier for customers to 'Buy Now' and place a PayPal food order.
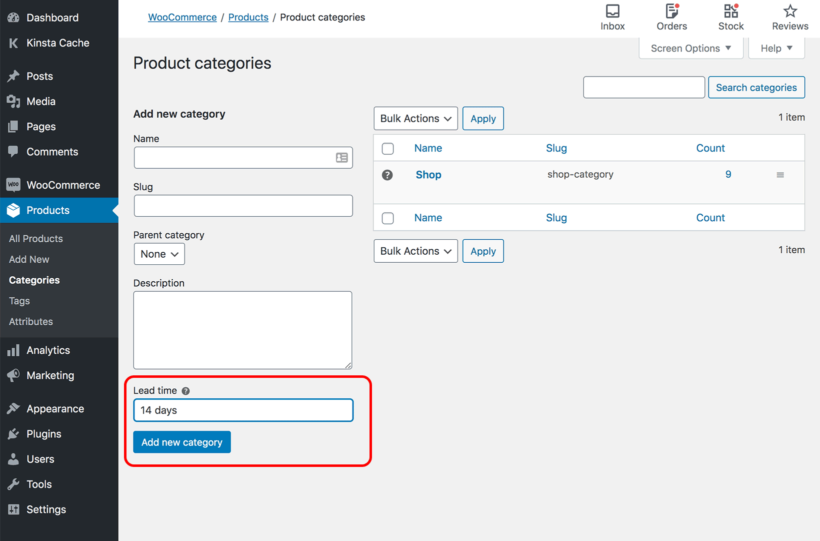
Delivery time slots

The WooCommerce Delivery Slots plugin lets customers choose a delivery time slot for their food delivery orders similar to Eat24 Food Delivery. This makes it easy to manage food orders, especially on high-traffic days.

For example, the WooCommerce delivery slots plugin gives you the option to restrict the number of food order bookings in each time slot. In addition to this, you can set how far in advance customers should place their food orders before their delivery or takeout time slot. You can also decide how many food orders to accept within each food delivery time slot so that the kitchen doesn’t exceed capacity.

The plugin also lets customers book a delivery time slot before they add food items to their cart in order to avoid disappointment at the checkout page. This is especially useful for local restaurants that want to let customers order online and offer food delivery services.

Print orders to the kitchen

There are a variety of WordPress plugins available that let you send new food orders straight to the kitchen and print them for staff. This is possible with the WooCommerce Automatic Order Printing plugin.

Want to set up online ordering for your restaurant with PayPal payments in 30 minutes?

This plug-and-play solution was specially designed to help stop restaurants from going out of business during the Coronavirus pandemic. PayPal food orders are now essential as part of the ongoing order management of any restaurant.

You can use the WooCommerce Restaurant Ordering plugin to set up your online food ordering system and accept payments via PayPal, credit card, or debit card just like Grubhub or Dominos. No technical knowledge is required:

  • Plug-&-play setup for the plugin.
  • FREE tutorial showing you every step and every click you need to do (absolutely no way to get it wrong).
  • Technical support is available if you need any help
  • 30-day money-back guarantee. Love it or get a full refund, 0 risks.

Get the WooCommerce Restaurant Ordering plugin here and start getting orders TODAY!

WooCommerce hide price until login

By the end of this article, you’ll walk away knowing exactly how to use a WooCommerce hide price until login plugin. This allows everyone to browse your WooCommerce products, while only displaying prices and buy buttons to logged in users.

Some e-commerce store owners – particularly wholesale-only shops – must display prices only on their public-facing websites. In other words, they hide prices until login so that only logged-in users or wholesalers can see the product's prices and make purchases.

By default, WooCommerce doesn't offer the option to display prices exclusively to logged-in users, which means you need to enable the WooCommerce show price after login functionality to achieve this.

If you’re in a similar situation, then there’s no need to worry! The good news is that there’s an easy solution to hide prices until login. In this tutorial, we’ll explain how to set up a WooCommerce hide price until login plugin - WooCommerce Wholesale Pro - in a few simple steps.

And the best part? We’ll show you step-by-step how to use WooCommerce to hide prices until login. It’s super quick and easy and there’s absolutely no technical knowledge required to follow this tutorial. This means that you can easily use the WooCommerce hide price if not logged in feature to conceal prices from users who are not logged in on your own WooCommerce shop or a wholesale store.

Why hide price until login?

There are many different types of stores that want to let everyone browse their online store and view their product catalog while hiding prices. Many times, these online store owners want to show prices, product options, and purchasing options to logged-in users only. To ensure that only registered users can view product prices and access the add to cart feature, it's crucial to implement the login to see add to cart and prices in WooCommerce functionality, which will hide prices and 'add to cart' buttons for guest users.

Use Cases for a WooCommerce Hide Price Until Login Plugin

  • Wholesale stores that don’t sell directly to the general public and only want to show prices to wholesale customers. A WooCommerce hide price until login plugin enabled everyone to browse your inventory, while only allowing pre-approved wholesale users to register, see prices or purchases.
  • Manufacturers publish details of their products on their websites but only allow approved resellers to purchase from them.
  • WooCommerce members-only stores where people have to join a club or buy a membership before making a purchase. Letting prospective customers browse products without prices encourages them to create an account. This allows store owners to build an email list and retarget customers more effectively. In addition, it allows them to let visitors browse their products and increases their store’s online visibility.

Displaying your products publicly, while hiding prices and buy buttons from logged out users, is the perfect solution. You get the SEO benefits of having this important information available to all, and the business benefits of only allowing pre-approved customers to see prices or purchases.

Even though WooCommerce Wholesale Pro is primarily aimed at wholesale stores, it can be an ideal solution for any online store that wants to utilize the WooCommerce show price after login feature to hide prices and disable purchasing options for logged-out users and guests.

How to use WooCommerce Wholesale Pro to hide prices until login

With the WooCommerce Wholesale Pro plugin, you can easily hide prices until login for your store’s visitors and customers. You can either hide prices completely or display alternate content in their place. For example, you could add a 'Login to view prices and place an order message, linking to your login page.

For this tutorial, we’ll assume you already have the WooCommerce plugin set up on your WordPress website and some products added to your store.

Step #1: Get the WooCommerce Wholesale Pro plugin

The first step is to get the WooCommerce Wholesale Pro plugin and install and activate it on your WordPress website. You’ll receive the plugin files along with a license key. Copy this to your clipboard.

WooCommerce Wholesale Pro license key

Log into your WordPress dashboard and head over to WooCommerce → Settings Wholesale General. Paste the license key in the License key field and click the Save changes button.

Step #2: Configure the plugin’s settings

From the same screen (i.e. WooCommerce → Settings Wholesale General), tick the checkbox next to the Hide prices until login option as shown in the screenshot below:

Hide price until login

This will automatically hide product prices and any information in the add to cart area (including the add to cart button, variations, product add-ons, and booking calendars).

More specifically:

  • Logged out users (non-logged-in users) will be able to browse products and view product pages as usual. However, if a user is not logged in and has not used the login to see add to cart and prices in WooCommerce feature, they will not have access to price information or the add to cart option. This also applies to other user roles such as Subscribers. Put simply; they will only be allowed to browse the store in catalog mode.
  • Logged in users with a non-wholesale role (e.g. Customers) will see the normal price for each product.
  • Logged in users with a wholesale role will see the correct wholesale price for their role.

Add alternate content for when prices are hidden

When you enable the WooCommerce 'Hide price until login' option, an 'Alternate content' field will appear underneath. You can use this to add a message which will appear for guest users when prices are hidden.

The alternative content will display as plain text by default. However, you can customize this field by incorporating shortcodes and other formatting options, which can be especially useful when implementing the WooCommerce show price after login feature. For example, in the screenshot below, we put the message in a box to make it more prominent.

WooCommerce hide price until login alternate content
Optionally display alternate content on the single product page

Next, we’ll show you how to create WooCommerce wholesale user roles with wholesale pricing. If you're only utilizing WooCommerce's hide price if not logged in feature to conceal prices from visitors and not creating a wholesale store, you can proceed to the following steps without any additional actions.

Step #3: Add wholesale user roles and prices (optional)

Go to WooCommerce → Settings Wholesale Roles from the WordPress admin panel and click the Add new role button. You can either add a global percentage discount to the default wholesale role, or create extra roles - each with their own discounts.

Add new wholesale user

If you want all new wholesale registrations to be assigned this user role automatically, tick the checkbox next to the Default role option. In addition, if you want to set exact wholesale WooCommerce prices for specific products instead of offering a percentage discount, tick the checkbox next to the Product specific pricing option.

Click the Save changes button to proceed.

You can create as many wholesale user roles as possible by following the steps outlined above.

Create user roles

For example, if you want to create a members-only WooCommerce store, you would simply create user roles for the different memberships you offer. You might have user roles for Bronze Members, Silver Members, and Gold Members.

Preview

Let’s take a look at what the online store will look like to guest users, logged in customers, and logged in wholesale users on the front end:

And here’s what the single product page will look like:

It hides prices until login for visitors and guests. On the WooCommerce main shop page, guest users will only be able to see some product detail, including the product image, ratings, sales banners, and a Read More button redirecting them to the single product page. And, on the single product page, you’ll notice that both the product’s price and add to cart options are hidden.

In order to view product prices and purchasing options, customers will have to log into their accounts.

When a user with the Customer user role logs into their account, they’ll see regular product prices (i.e. without discounts). In addition to this, they’ll also see the product prices, purchasing options (including variations), and the add to cart button on the single product pages.

When wholesale user logs into their user account, they’ll be able to see the product prices with the percentage discount applied to it (or the exact wholesale price you’ve set for the individual product). They’ll see the same wholesale rates on the single product page along with product purchasing options.

This way, they can add products to their shopping cart and proceed to the checkout page. All of this is possible without messing around with HTML/CSS code or adding code to the functions.php file via FTP.

How to hide prices for specific product categories for logged-out users

If you want to hide the price of certain product categories only for users who are not logged in, follow these steps:

  1. Navigate to the Products → Categories section and select the category you wish to edit.
  2. Look for the 'Hide price until login' option, which offers three settings:
    • Use the global or parent category setting (the default) - this means the global setting (as described earlier) will be applied.
    • Hide prices from logged-out users - this means users who are not logged in will never see the price of products in this category, regardless of the global setting.
    • Show prices to logged-out users - this means users who are not logged in will always see the price of products in this category, regardless of the global setting.
  3. To control what shows up in place of the price for all hidden price categories, use the global 'Alternate content' field. Note that subcategories will inherit the parent category's setting unless you specifically hide the price for the subcategory.

In cases where a product belongs to multiple categories with different WooCommerce hide until price if not lo settings, WooCommerce Wholesale Pro will prioritize the most secure approach and hide the price from users who are not logged in.

List products without prices in quick order forms

If you have implemented the WooCommerce different price for logged in users feature to hide prices from non-registered guests and visitors, it's likely that your customers are already familiar with your products and services. As a result, they need a quicker way to select multiple products, choose variations, and add to the cart.

You can do this by using WooCommerce Wholesale Pro with the WooCommerce Product Table plugin, which comes bundled with it. It displays any or all of your products in a quick order form layout like this:

wholesale ecommerce layout

You can choose whether to enable the order form layout for guests and/or logged in wholesale users. It's an excellent way to speed up shopping, and therefore to increase your sales and conversions.

WooCommerce hide price until login

The WooCommerce Wholesale Pro plugin lets you hide the price on log out so that only customers who are logged in can see product prices and purchasing options. Wholesale users will be able to see wholesale prices in the wholesale store. As well as single product pages whereas users with the Customer user role will see regular prices. They can then add products to their cart and proceed to the checkout page.

By offering exclusive pricing for logged-in users, you can incentivize guest users to sign up and become members. This will expand your email list and bolster your online store's visibility in the process with the WooCommerce different price for logged in users feature. Try it out for yourself!

You get a:

  • Plug-and-play setup for the plugin.
  • In-depth documentation (absolutely no way to get it wrong).
  • Technical support is available if you need any help.
  • 30-day money-back guarantee. Love it or get a full refund, 0 risks!

Get the WooCommerce Wholesale Pro plugin today to hide prices until login!

By the time you’re done reading this article, you’ll know exactly how to print a WooCommerce product list with whatever product information you’d like.

Having a printed list of your WooCommerce products – on paper or PDF – makes it easy to manage inventory, especially for brick and mortar stores. For example, you can cross off items you’ve already ordered from suppliers, add notes, and share it with your team.

However, WooCommerce doesn’t offer features out of the box that let you print WooCommerce product lists. Additionally, WooCommerce makes it difficult to print a list of products because the products are split across multiple pages with large images and very little product information. Most of the product information is only available on single product pages.

Browser print option

If you’re looking for a way to print your list of WooCommerce products then don’t worry! This in-depth guide will teach you how to print a WooCommerce product list in a few simple steps:

And the best part? We’ll show you step-by-step how you can print your WooCommerce product list. It’s quick and easy and there’s no technical knowledge required to follow this tutorial. You can set everything up and print your list of WooCommerce Products in under 10 minutes!

Why you might want to print a list of WooCommerce products?

As a WooCommerce store owner, there are plenty of scenarios where you might need to print a list of WooCommerce products.

For example, if you’re running a brick and mortar store, your customers might ask for a print out of your product catalog. The easy way to do this is by printing it out directly from your website, either on paper or as a PDF that you can email to them.

You can give them a print out of your entire product PDF catalog or the product category they’re interested in, e.g. Shoes and Sandals. This is much easier than printing out several product pages!

Similarly, when you print your WooCommerce product list, it’s much easier to add notes to it and share it with your team. For example, you might need to take stock of your inventory and see which products you need to place orders for. Or, you might need to have a print of your WooCommerce products along with their QR codes. Maybe your sales staff need a printed order form for manual orders.

It’s also important to print a WooCommerce product list that’s easy to read. In other words, you don’t want to simply export your products as a CSV and then print that.

How to print a WooCommerce product list

The WooCommerce Product Table plugin makes it incredibly easy for online store owners to print a WooCommerce product list. We’ll assume you already have the WooCommerce plugin installed on your WordPress site and some products added to it.

Here, we’ll walk you through a step-by-step tutorial explaining how to set everything up.

Step #1: Get the WooCommerce Product Table plugin

The first thing you need to do is purchase the WooCommerce Product Table plugin and install it on your WordPress website. You’ll receive a license key in the confirmation email along with the plugin files.

WooCommerce Product Table license key

Log in to the WordPress admin panel and navigate to WooCommerceSettingsProductsProduct tables. Enter the license key into the License key field to activate it.

Click the Save changes button at the bottom of the screen to continue.

Step #2: Decide what product information to display

From the same screen, scroll down till you reach the Table content section. Add the product information you’d like to display in your product list in the Columns option. Since this will be a printout, you won’t need the add to cart buttons column or any other checkout options.

WooCommerce Product Table table content settings

For example, if you want to display the product image, SKU, name, product description (or short description), stock, and price, you’d add image,SKU,name,description,stock,price to the Columns option.

If you decide to include the product image in your print out, you can set the image dimensions using the Image size option. Since this will be a print of your WooCommerce product list, you can leave the Image lightbox and Shortcodes checkboxes unticked.

Click the Save changes button to continue.

Step #3: Customize the WooCommerce product list

The WooCommerce Product Table plugin lets you decide how many products to display on your list. You can use the Rows per page setting to configure the number of products that are displayed on each page.

WooCommerce Product Table rows per page

By default, the WooCommerce Product Table plugin adds a variety of table elements to the front-end. This includes a search box, filters, and page length.

While this is incredibly useful for site visitors, you probably don’t need any of these features when you’re printing your WooCommerce product list.

The good news is that you can easily hide the page elements you don’t need from the plugin settings page.

WooCommerce Product Table table controls settings

Scroll down to the Table controls section and set the:

  • Product filters option to Disabled using the dropdown menu.
  • Page length option to Hidden using the dropdown menu.
  • Search box option to Hidden using the dropdown menu.
  • Product totals option to Hidden if you want to hide them. Else, you can set it to Above table or Below table if you want to display the product totals.
  • Pagination buttons option to Hidden using the dropdown menu.
  • Make sure the checkbox next to the Reset button option is unticked.

Click the Save changes button to continue.

Step #4: Add your WooCommerce product list to a page

Create a new WordPress page by heading over to PagesAdd New from the WordPress dashboard.

WooCommerce Product Table shortcode

Give your page a title and add the shortcode [product_table] to it in a Shortcode block. You can also add text above or below the table if you need to.

Click the Publish… button and preview the page on your site’s front-end. It should look something like this:

Print WooCommerce product list preview

Step #5: Print your WooCommerce product list

The easiest way to print your WooCommerce product list is by using the Control + P option that most web browsers (like Google Chrome) support.

Browser print option

Simply click the Print button to print out the WooCommerce product list.

You can also use the Print, PDF, Email by PrintFriendly WordPress plugin that adds buttons allowing users to print any page in a print-friendly layout, save it as a WooCommerce PDF, or send a link via email.

WooCommerce product table plugin with print and save to PDF

You can configure the plugin’s settings in different ways based on your personal preferences. For example, you can choose from a range of pre-designed buttons or upload your own.

PrintFriendly customization options

There are also some basic styling features available such as text size for your print and PDF layouts. Additionally, you can further style it using CSS.

The WooCommerce Product Table plugin lets you print WooCommerce products lists in a way that’s easy for humans to read.

In addition to this, it lets you choose which information you’d like to showcase in the product list and lets you sort the WooCommerce store product list by SKU, product name, or any other parameter prior to printing. You can also choose to print a list of specific e-commerce products by using the WooCommerce Product Table plugin’s built-in filters.

You get a:

  • Plug-and-play setup for the plugin.
  • In-depth documentation (absolutely no way to get it wrong).
  • Technical support is available if you need any help.
  • 30-day money-back guarantee. Love it or get a full refund, 0 risk!

Ready to print your WooCommerce product list? Get the WooCommerce Product Table plugin today!

Restaurant mobile ordering to table

The complete guide to dine-in restaurant ordering - let customers use their phones to order food straight from their table.

As restaurants adapt to the new requirements around social distancing, it's essential to minimize direct contact with customers. An increasingly common way is to allow customers to order food from their mobile phones from their table while they dine-in. This is safer and more convenient than taking orders in person.

This tutorial will teach you how to set up food ordering for dining-in at your restaurant. The system can be hosted on any WordPress website. You can use it to allow customers to order food for dinging in from the table and have their orders sent straight to the kitchen. Staff can also use it to take online POS orders on behalf of your customers.

What you need

WooCommerce restaurant order food to table

For this tutorial you will need:

  • A website powered by WordPress. If your restaurant already uses WordPress for your main website, then you can add the mobile food ordering system to your existing site.
  • The free WooCommerce plugin to add e-commerce features to your website. This includes the ability to add your food menu, and for customers to place their orders.
  • The WooCommerce Restaurant Ordering plugin. This plugin lists your food products on a page for customers to order from. It looks similar to your traditional printed menu, making it easy for customers to select their foods while they dine-in.
  • The Checkout Field Editor plugin. This allows you to simplify the WooCommerce checkout, removing irrelevant fields such as the food delivery address, and adding extra fields for table number and dietary requirements or allergies.

Before you start, make sure you have the WooCommerce, WooCommerce Restaurant Ordering, and Checkout Field Editor plugins installed and activated.

How it works

Once you've set up the food ordering system in this tutorial, customers can use their cellphones to order food from the table like this:

  1. Your customers arrive at the restaurant and sit at the table.
  2. One member of the party uses their phone or tablet to order food for the table. They do this by viewing the dining in food ordering page on your website. They select their food and drink from a quick one-page order form, and then proceed to the checkout.
  3. They enter some basic information on the checkout and choose whether to pay online or at the end of their meal. Finally, they enter any extra information such as their table number or allergies.
  4. The order is sent to the kitchen via email or you can add a plugin to automatically print to the kitchen.
  5. Once the food is ready, the waiting staff bring it to the table or leave it in a safe place for the customer to pick up.
  6. At the end of the meal, if the customer hasn't paid online then you can give them a bill in the usual way.

1. Add products to WooCommerce

The first step is to add each food item from your printed menu as a WooCommerce product. To do this, go to Products → Add New and add all the required information. This would typically include the product name, a short description, a price, and possibly an image.

If you offer a choice of options for particular items, you can add these as product variations or product add-ons:

  • Use variations for dishes that come with a fixed set of options, such as Small, Medium, Large.
  • Use the Product Options extension for dishes where the customer can select from a list of several options. This might include pizza toppings where the customer can add multiple options, each of which will add to the price.
WooCommerce Restaurant Ordering plugin integration
Customers can choose extra options from a lightbox

Structure your menu into categories

Go to Products → Categories and create the categories that you'd like to structure the mobile food order form into. This should generally be the same as the categories on your printed menu - e.g. Starters, Main Courses, Desserts, etc. Then add each food product to the correct category.

2. Create a one-page food order form

To create your order form page:

  • Go to Pages -> Add New in the WordPress admin dashboard. Give your page a title, then click Publish.
  • Next, go to WooCommerce → Settings → Restaurant. Under the Restaurant order page option, select the page you just created.
  • Under Categories, select the product categories to show on your restaurant order page.

restaurant ordering settings page

You can drag and drop the categories to change the order. The settings page also includes options to show or hide certain information in the menu, select the number of columns to display, etc.

  • Save the settings, then open your Restaurant Ordering page on your website to se if everything looks correct. It should look something like the following:
Compare WooCommerce Restaurant Ordering with WooCommerce Product Table
An example of a food order form

3. Customize the WooCommerce checkout

The WooCommerce checkout is generic and not designed specifically for taking food orders. To make it perfect for ordering restaurant food at the table, I recommend adding some extra fields and hiding others. You can easily do this with the Checkout Field Editor plugin.

Install the plugin and use it to hide any fields that aren't needed. I'd recommend hiding fields such as the customer address. Since customers are ordering from their cellphones, make the checkout as simple as possible.

You may also want to add some extra fields. The most important ones for ordering food to be delivered to the table are:

  • Table number or location (e.g. inside or outside).
  • Any dietary requirements or allergies.

WooCommerce mobile restaurant checkout

Payment methods

You also need to choose how customers who order food on cellphone will pay for their order. There are two main options:

  • Pay online when they place their orderYou can use any of the payment gateways supported by WooCommerce to let customers pay when they place their order. This is good for social distancing, while saving you time taking payment at the end of the meal. The easiest payment option to set up is PayPal - it's great for customers as there's less information to enter. For credit card payments, I recommend Stripe which supports all major credit cards, debit cards, Apple Pay, etc. Set up your payment gateway under WooCommerce → Settings → Payments.
  • Pay at the end of the mealYou can keep it simple and give customers a printed bill at the end of their meal. They can then pay using your restaurant's existing payment methods (e.g. cash or using your credit card machine). Alternatively, if you want the payment to go through to the website ordering system then you can use a card reader that links with the website. There are 2 main options for this:

Let your customers know

Finally, you need to communicate how to order food from the table to your customers.

There are various options here. One way is to print an instructions sheet and put it on each table, telling customers how to order. This should include the URL (web address) of the food ordering page, for example www.myrestaurant.com/dine-in.

QR code
An example QR code

You could also include a QR code which customers scan from their phone. The QR code links directly to your order page, so gives access without having to type in URLs.

You can easily generate a QR code using QR Code Monkey.

The easy way to take food and drink orders from the table

WooCommerce Restaurant Ordering cropped

As you can see, it's surprisingly easy to set up your own online food ordering system so that customers can use their cellphone to send food orders straight to the kitchen. It promotes social distancing by minimizing direct contact between waiting staff and hungry customers.

The WooCommerce Restaurant Ordering plugin is perfect for creating a one-page food order form.

  • Quick 10-minute setup
  • Flexible display options
  • Works on any mobile or tablet
  • 30-day money back guarantee

Sell food online from home

By the end of this article, you’ll walk away knowing exactly how to sell food online from home.

It’s no secret that the online food industry is booming. You might be thinking of starting your own food business to sell food online from home. For this, you’ll need a website that lets customers browse your menu and place their orders.

If you’re in a similar situation, then don’t worry! This in-depth guide will teach you how to sell food online from home in a few simple steps:

  • Set up your small startup food business website using WordPress and WooCommerce.
  • Use the WooCommerce Restaurant Ordering plugin to sell food online.
  • Offer your customers home delivery options.

And the best part? We’ll show you step-by-step how to sell food online from home. It’s incredibly quick and easy and there is absolutely no technical knowledge required to follow this tutorial. This means that you can set everything up and start selling food online from home today!

Introducing WooCommerce Restaurant Ordering

WooCommerce Restaurant Ordering is a WordPress plugin that makes it easy for small food businesses and mom and pop style shops to start selling food online from home. The plugin lets you create an intuitive, front-end food order system complete with a food order form. It’s the easiest way to start selling food online from home.

Products from two categories restaurant ordering

You can add simple food products or add variations and extra product options to your food ordering system. For example, if you sell pizzas, you might want to give customers the option to select the size or extra toppings. You can also add text boxes for dietary requirements or allergens, or for letting customers add notes like Hold the pickles!.

In addition to this, you can add a sidebar to your food ordering page that contains information about the customer’s cart. This is a great way to give patrons and customers a quick overview of their order before they proceed to the checkout page.

Selling food online from home

The WooCommerce Restaurant Ordering plugin is designed to help small food businesses deliver an exceptional user experience through their website and better manage customer orders in WooCommerce.

How to sell food online from home using WooCommerce Restaurant Ordering

Here, we’ll walk you through a step-by-step tutorial on how to sell food online from home. You might also like to sign up to our free online course, which has even more advice and tips:

Step #1: Set up WordPress and WooCommerce

If you’re just getting started then chances are you don’t already have a website set up. So, the first step is to choose a hosting provider for your food business website. Our best advice is to go with Kinsta, but you can use any hosting provider.

Next, you’ll need to install WordPress and WooCommerce (an e-commerce platform to set up your online store) on your website. If you choose to go with Kinsta, the team will install the WordPress content management system for you. However, if you’d like to take the DIY approach, we recommend checking out these helpful articles:

Once you’ve set up your basic WooCommerce-powered food business website, you can set up your basic food ordering website by installing a WordPress theme. And once your basic website is set up, come back to this tutorial for details on how to start selling food online from home.

Step #2: Add food items as WooCommerce products

Now that your WordPress site is set up, it’s time to add food items to it as WooCommerce products. To do this, head over to Products → All Products from the WordPress admin panel and click the Add New button.

Next, enter the following information for each food item you want to sell through your food business website:

Add food items as WooCommerce products
  • Name of the food item
  • A product image
  • Brief description
  • Product categories (e.g. desserts, cupcakes, snack bars, sweets)
  • Price

Click the Publish button to proceed. Add all of the food items to your food website in the same way. You can also add food variations and extra options.

Step #3: Get the WooCommerce Restaurant Ordering plugin

Get the WooCommerce Restaurant Ordering plugin and install and activate it on your WordPress website. You’ll receive the plugin’s license key in an order confirmation email.

WooCommerce Restaurant Ordering license key

From the WordPress dashboard, head over to WooCommerce Settings Restaurant and enter the license key in the License key field. Click the Save changes button at the bottom of the screen to continue.

Once you activate the license key, the WooCommerce Restaurant Ordering plugin automatically creates a Restaurant Order page for you. You can access this by going to Pages All Pages from the WordPress dashboard.

If you preview the page on the front-end of your website, it should look something like this:

One-page food order form

Next, we’ll show you how you can configure the plugin’s settings to customize the food ordering page.

Step #4: Configure the plugin’s settings

To configure the WooCommerce Restaurant Ordering plugin’s settings, head over to WooCommerce Settings Restaurant from the admin area.

Food order page

The Restaurant order page dropdown lets you choose the page to display the food order form on.

Food order page settings

You can leave it as is or select a new page if required. The WooCommerce Restaurant Ordering plugin adds the shortcode [restaurant_ordering] to whichever page you select.

Categories

By default, the food ordering plugin lists products from all of your product categories on the food ordering form. You can use the Categories option to add the product categories you’d like to include in your food order form.

You can organize different types of food under a separate category. If you have multiple product categories selected, you can drag and drop them to change the order in which they’re listed on the front-end.

The Order form options setting lets you select the information you’d like to display in your food order forms. You can choose to display:

  • Category titles
  • Category descriptions
  • Product images
  • Product descriptions
  • Buy button

Order form options

If you’re selling products from a single category (e.g. only Cakes), you can untick the checkbox next to the Show category titles and Show category descriptions option.

Food order form display options

However, if you’re selling products from multiple product categories, we recommend leaving all of the checkboxes ticked.

Number of columns

The Number of columns option lets you choose how many columns to display food items in on the front-end. This is particularly useful for online food businesses that sell a variety of food items.

Number of columns settings

It’s also a great way to enhance the look and feel of your food order form and make it more like a real-world menu.

Order method

We recommend going with the Quick order method option to let customers quickly add food items to their cart and place their order.

Order method settings

If you’re selling food items with variations or extra product options, the WooCommerce Restaurant Ordering plugin will automatically display a lightbox to let customers select options.

Lightbox options

Ideally, you want to display both the product image and full product description in the lightbox. We recommend leaving both checkboxes ticked.

Step #5: Preview the food ordering system

Once you’ve configured the WooCommerce Restaurant Ordering plugin’s settings, you can preview the food ordering system on the front-end. It should look something like this:

Food order form to sell food online from home

To further enhance the customer’s shopping experience, we’ve added the WooCommerce cart widget to the sidebar. This way, customers can preview their orders before proceeding to the checkout page.

Step #6: Set up home delivery options (optional)

The WooCommerce Restaurant Ordering plugin lets you list products in a quick, one-page food ordering form. The rest of the checkout process is provided by WooCommerce. This means that you can use WooCommerce’s built-in options to let customers order food for home delivery.

We recommend setting up WooCommerce delivery zones to offer food delivery options within a specific area only. This is much easier to manage (especially when you’re just getting started) than offering country-wide shipping options.

To take things further, you can set up a free delivery area and multiple paid delivery areas. All of this is possible with WooCommerce Shipping Zones.

Selling food gifts

Lots of small food businesses sell foods that are also perfect as gifts. Some examples of food gifts include chocolate brownies, food hampers, or gourmet marshmallows.

These are equally perfect for special occasions like Mother’s Day, Father’s Day, Valentine’s Day, and birthdays as well as for situations where you’re looking for a gift that isn’t too personal, for example, for a coworker.

To sell food gifts through your small food business website, you can use the WooCommerce Opening Hours & Chosen Times plugin to allow customers to choose an exact delivery date. This helps them rest assured that the food gift arrives at the exact right time!

You can also use the Checkout Field Editor plugin to add a Gift message field to the WooCommerce checkout. To take things further, you can create any additional fields such as a checkbox to let customers mark the order as a gift so that you don’t include any price information with their order.

Bonus tips

As a new food business owner, there are many things you’ll need to think about before you can start selling food from home.

For example, it’s a good idea to check out your local legislation (e.g. the FDA) and cottage food laws to see whether you need to apply for a business license, food licensing, or a food hygiene certificate. Food safety and kitchen inspection laws vary from state to state. You should be able to find out most of this information through Google.

In addition, we recommend checking out shipping rules (e.g. labeling requirements) for perishable items. For example, let’s say you’re based in New York, United States, and want to accept cross-border orders. You might want to check to see if you’re allowed to send gourmet marshmallows to your patrons and customers in Toronto, Canada.

Sell food online from home in less than 30 minutes!

Selling food online from your home kitchen or commercial kitchen is a great way to launch a small business and generate income through food sales. All you have to do is set up your small food business website, create a menu, and start accepting orders!

The WooCommerce Restaurant Ordering plugin can help you sell food online from home by creating a one-page food order form. You can then promote your food store on social media to spread the word. We encourage you to try it out for yourself!

You get a:

  • Plug-and-play setup for the plugin.
  • In-depth documentation (absolutely no way to get it wrong).
  • Technical support is available if you need any help.
  • 30-day money-back guarantee. Love it or get a full refund, 0 risk!

Get the WooCommerce Restaurant Ordering plugin today to start selling food online!

WooCommerce Restaurant Ordering, the ultimate food order system for WordPress, is now available. We’ve built it during the coronavirus lockdown to help restaurants make the switch to taking orders online. Keep reading to discover how the plugin can help your restaurant, and where to get it.

Across the world, the COVID-19 pandemic forced thousands of restaurants and food outlets to close their doors. Suddenly, they were only allowed to sell takeaway food or offer home delivery. Dining in and ordering at the table, bar or counter were no longer an option.

Since then, restaurants have been trying to adapt to a new way of life. To meet social distancing guidelines, tables must be spaced further apart, and fewer customers can receive table service. This has a big impact on restaurants’ profit margins, as it reduces capacity while running costs remain the same.

But the good news is that there is a way to stay profitable. The solution is to set up online ordering for your restaurant so that customers can order food remotely for home delivery and/or collection.

Why we built a WooCommerce restaurant plugin

WooCommerce Restaurant Ordering cropped

Ever since we launched our WooCommerce Product Table plugin in 2016, it has been hugely popular with restaurants wanting to sell food online. It lists restaurant foods in a space-saving table layout, with quick ‘add to cart’ boxes that are ideal for ordering food. However, we didn't design it specifically for selling food, and it has many features that restaurants don’t need.

We’ve looked at how restaurants use WooCommerce Product Table to sell food online, and have used this information to design the perfect WooCommerce restaurant plugin. The result is WooCommerce Restaurant Ordering, released today!

We designed WooCommerce Restaurant Ordering specifically for restaurants. It has all the features you need, with no unnecessary complexity. As a result, it loads ultra fast and is incredibly easy to set up.

WooCommerce restaurant plugin

As well as being the best WooCommerce restaurant plugin on the market, it's much better than any other way of selling food online:

  • Unlike building a bespoke system, it's quick to set up and you don't need to hire a developer.
  • Unlike using third party food ordering systems such as Deliveroo or Uber Eats, you keep 100% of your profits while owning your data and staying in control.

How it works

Before you install WooCommerce Restaurant Ordering, you should have a WordPress website with WooCommerce installed. Add the foods from your restaurant menu as products (either as simple products, or products with variations or add-on option fields). Structure your menu into product categories, e.g. Starters, Mains, and Desserts.

When you install the WooCommerce restaurant plugin, it automatically creates a 'Restaurant Ordering' page which lists all your foods, divided by category:

WooCommerce Restaurant Ordering WordPress plugin

You can either start taking restaurant orders online straight away, or you can customize your food order forms on the plugins settings page. For example, you can choose which food information to display, re-order the categories, and change the layout.

Add your opening hours so that customers can only order food while you're open.

The WooCommerce restaurant plugin also comes with a shortcode for listing foods in other locations on your website. This is useful if you want to list different categories on different pages or tabs.

What about delivery and collection?

As a WooCommerce restaurant plugin, WooCommerce Restaurant Ordering works with the delivery options that are built into WooCommerce itself. These make it easy to create delivery areas and add delivery and collection options, with or without costs.

The plugin is also designed to work with the WooCommerce Delivery Slots plugin. This is ideal if you want customers to be able to pick an exact time slot for home delivery or collection.

Start taking food orders online today!

We hope the new WooCommerce restaurant plugin helps restaurants and other food businesses to connect with their customers online.

  • Quick plug-and-play setup.
  • Full documentation, with guidance on every aspect of selling food online.
  • FREE video tutorial showing you every step (there's absolutely no way to get it wrong!).
  • Technical support is available if you need any help.
  • 30 day money back guarantee. Love it or get a full refund, zero risk.

We've just released version 1.4 of our WooCommerce Lead Time plugin. Thanks to your feedback, it includes a new feature to add lead times for entire WooCommerce categories.

WooCommerce Lead Time was first released in September 2019. It became very popular during the coronavirus lockdown because so many e-commerce websites experienced stock problems. WooCommerce Lead Time provided a flexible way to provide clear information about when products would be available again. This has helped customers to make an informed decision about whether to order, based on the waiting time. Since then, WooCommerce Lead Time has become the go-to solution for communicating waiting times to customers ALL the time - and not just in times of crisis.

WooCommerce show lead time for backorder products

An example of a lead time displayed on an out of stock product on backorder

Until now, you could set a global lead time to be displayed on all your products, and you could also set lead times for individual products and variations. However, to save time, lots of you have asked for a way to set WooCommerce category lead times too. We're pleased that this is now possible. 

Category lead times are useful because products from a particular category are often from the same supplier, and therefore have the same waiting time. If you set a WooCommerce category lead time then you can still override this for individual products that have a different lead time, if required.

How to set WooCommerce category lead times

WooCommerce category lead time plugin
  1. Go to Products → Categories.
  2. Add or Edit any category.
  3. Add the required lead time in the 'Lead time' field.

Where can I get the plugin?

If you're not already using WooCommerce Lead Time, get it today! It's the perfect way to display waiting times in your WooCommerce store.

Back in stock notification WooCommerce

If a product isn't in stock, then customers want to know the back in stock date. By the end of this article, you’ll walk away armed with the knowledge of how to set up back in stock notifications in WooCommerce and provide clear information to customers.

As an online store owner, it’s important to let your customers know when WooCommerce out of stock products will be available again, and give them an opportunity to buy from you when the product becomes available. If you don’t do this, customers will be more likely to buy from your competitors and you could miss out on sales.

For example, if you’re facing stock issues on some products due to the Coronavirus lockdown, you’ll want to let customers know when the new stock is expected to be available again.

Don’t worry, by the end of this FREE guide you’ll walk away knowing EXACTLY how to:

  • Enable backorders in WooCommerce so customers can still place orders.
  • Clearly display the WooCommerce back in stock date on product pages.
  • Allow customers to enter their email address and join a waitlist to be sent a notification email when the product is back in stock.
  • Take a hybrid approach which involves enabling backorders and setting up a waitlist.

And the best part? At the end of this article, we’ll show you how to automate the whole process so that customers can either (1) order out of stock products immediately after making an informed decision on whether to wait or (2) allow them to receive a product back in stock email when the product is available.

2 ways to deal with out of stock products

If you sell products through your e-commerce store, you’ll probably run into scenarios where some products are temporarily out of stock. The good news is that there are two ways to handle out of stock products in WooCommerce while delivering a good user experience:

  • Enable backordersYou can enable backorders on your WooCommerce store so that customers can still place orders for out of stock products. In addition, you can display the WooCommerce back in stock date when the product (for a simple product or variable product) directly on the single product page.
  • Join a WooCommerce waiting listAllow customers to enter their email addresses directly on the single product page to join a waitlist. This way, they can be notified when the product is back in stock.

Advice on setting up back in stock notifications in WooCommerce

Now, you might be wondering how you should deal with out of stock items. We explored two different implementations earlier and now we'll help you choose the best solution for your e-commerce store.

Enabling backorders in WooCommerce is generally best because the customer places the order and pays straight away. So, there’s no risk that you’ll lose the sale to a competitor. This also works for variable products i.e. WooCommerce product variations.

The second option – using an “email when back in stock” plugin – means that the customer doesn’t know how long they’ll be waiting. In this scenario, they could be more likely to buy elsewhere while they’re waiting to receive a stock alert i.e. a back in stock notification from your WooCommerce store.

That said, the 'joining a waitlist' option is best if you have major stock problems. For example, if you can’t display reliable information about when the product will be back in stock. In this sort of scenario, you’re better off taking the customer’s email address and hoping that it’s not too late to secure the sale when you do receive stock again.

How to set up back in stock notifications in WooCommerce (in 2 different ways)

Here, we’ll explain how you can set up back in stock notifications in WooCommerce in two different ways.

Method #1: Enable backorders

The easiest way to add more information to WooCommerce backorder notices on your online store is by using the WooCommerce Lead Time plugin. Its Notify customer option lets you display a backorder notice or WooCommerce back in stock date on the single product page as soon as a product goes out of stock. However, customers can still place their orders.

Here’s how you can set this up in WooCommerce:

  1. Get the WooCommerce Lead Time plugin and install and activate it to your WordPress site.
  2. Go to the product you’d like to enable backorders on and scroll down to the Product data section.
  3. Click on the Inventory tab.
    1. Set the product Stock status to On backorder using the dropdown.
    2. Use the Lead time option to let customers know when the product is expected to be back in stock. You can use this option to set a separate lead time message for specific products, for example by adding the WooCommerce back in stock date. There's no need to use a shortcode.
  4. Click the Publish button to continue.

The single product page should look something like this on the front-end:

WooCommerce Lead Time preview on the front-end

You can modify the lead time text that appears before the product-specific message for all of your products on the plugin settings page i.e. WooCommerceSettingsProducts → Lead time from the WordPress backend. All you have to do is enter the text you’d like to have displayed on the front-end in the Lead time prefix field.

WooCommerce Lead Time settings page

With backorders, customers can add the product to their cart and proceed to the checkout page - even if the product is out of stock. The clearly displayed WooCommerce back in stock date tells the customer what to expect, while still capturing the sale for you.

Method #2: Set up a waitlist

The WooCommerce Waiting List add-on lets you automatically notify customers when a product becomes available for purchase again. It replaces the add to cart button on single product pages and the shop page with a waiting list button.

All you have to do is install the WooCommerce Waitlist add-on on your WordPress website and activate it. It will automatically replace the add to cart buttons with Join waitlist buttons on the front-end for products that are out of stock.

Preview of WooCommerce Waitlist on the front-end

Customers can then enter their email address to be notified whenever the product is back in stock. On the backend, you can see the email addresses of everyone that has joined the waitlist for a product. To do this, head over to the Product data section and click on the Waitlists tab.

WooCommerce waiting list on the back-end

From here, you can send a product back in stock email notification (i.e. a stock alert) to all users on the waitlist to let them know the product is back in stock. You can also manually add or remove people from the waitlist. In addition to this, you can use the export waitlist option to get a CSV file of everyone on the email subscription list.

Can I use both solutions together?

Yes, both plugins work nicely together! So, you can use both the enable backorder and waitlist solution together on your WooCommerce store to handle out of stock products.

From a technical standpoint, you can enable the “email when back in stock” feature from the WooCommerce Waitlist plugin and display expected times for products to be back in stock using the WooCommerce Lead Time plugin.

The add to cart button is replaced with a Join waitlist button on the front-end and the lead time text appears after the Out of stock - Join the waitlist to be emailed when this product becomes available text that’s added by the WooCommerce Waitlist plugin.

Once you’re done setting this up, it’ll look something like this on the front-end:

Preview of lead time and waiting list on the front-end

Want to set up back in stock notifications in WooCommerce in less than 5 minutes?

As an online store owner, you should have a solution in case you run into an out of stock product scenario. The way we see it, there are two easy ways of handling this:

  • You can enable backorders in WooCommerce so customers can still place orders and you don’t miss out on their sale. When you do this, it's essential to use WooCommerce Lead Time to display a clear WooCommerce back in stock date.
  • Alternatively, you can give customers the option to enter their email address and join a waitlist to be sent a stock alert when the product is back in stock.

Whichever option you ultimately decide to go with will prevent you from losing sales due to stock issues. The best part is that there’s absolutely no technical knowledge required and you don’t have to mess around with custom PHP or HTML code on your store.

Instead, you get a:

  • Plug-and-play setup for the plugin.
  • In-depth documentation (absolutely no way to get it wrong).
  • Technical support is available if you need any help.
  • 30-day money-back guarantee. Love it or get a full refund, 0 risk!

Get the WooCommerce Lead Time plugin today to start getting orders today!

Bespoke Swim Spas lead time plugin case study

A lead time plugin is perfect for displaying the delivery timescales for products with longer waiting times. This way, you can let customers know how long they'll have to wait before the product will be shipped to them. I'll tell you how Bespoke Swim Spas do this and how you can do the same on your own WordPress WooCommerce website!

With a lead time plugin for WooCommerce, you can easily display the product lead times for simple and variable products. It's perfect for online stores that sell bespoke or custom products, furniture, or products that require assembly.

In this case study, we'll take a look at how Bespoke Swim Spas use our WooCommerce Lead Time plugin to display delivery timescales for products with longer waiting times. We'll also explain how you can do the same on your site!

A hot tub sales page with the lead time displayed above the purchase options

Bespoke Swim Spas is a family firm based in Staffordshire that's been importing and supplying swim spas and hot tubs to customers throughout the UK and in Europe since 2001.

Their online store showcases the various accessories, swim spas and hot tubs the company sells. Customers can browse their Shop page to find the product they'd like to order. They can then read product specifications, view a product gallery and place their order.

Let's take a closer look at the problem Bespoke Swim Spas faced and how the WooCommerce Lead Time plugin was the perfect solution for them.

The problem

Bespoke Swim Spas sell different types of products including swim spas and hot tubs in addition to relevant accessories for these main products. Their main product line consists of items that have a lead time of around 2 to 3 weeks. However, due to the global COVID-19 pandemic, the demand for swim spas and hot tubs went up and Bespoke Swim Spas found themselves inundated with orders.

People were looking for ways to make the lockdown more pleasurable and upcoming holidays more acceptable. In addition, since all swimming pools and spa resorts were closed, people were looking for a way to swim at home. Athletes, swimmers and disabled people who benefit from hydrotherapy sessions also needed to facilitate their activities at home.

As manufacturers struggled to keep up with customer demand, Bespoke Swim Spas quickly realized they needed a way to let customers know the expected delivery timescales for the products they were selling to enhance their shopping experience.

Sheila Lee Thompson of Bespoke Swim Spas said:

"I couldn't believe that it wasn't something already built into WooCommerce."

They needed a way to display lead times for products with longer waiting times. Above all, they needed a lead time plugin that would allow them to set a default lead time. They were also looking for a way to overwrite that for individual products on an as-needed basis. This is because the lead times for different products change regularly depending on availability and demand.

With a lead time plugin, they could easily let their customers know how long they'd have to wait before receiving the product. This way, their customers wouldn't have to call in to confirm lead times for the orders they placed.

The solution

Using Barn2's WooCommerce Lead Time plugin, Bespoke Swim Spas was able to display the product lead times on their single product pages for both simple products and variable products.

Bespoke Swim Spas use the WooCommerce Lead Time plugin to set a default lead time for their products. This is typically around 6 to 8 weeks at the moment.  The lead time appears under the product price and description. This lets customers know right away how long it will take for the product to arrive. In addition, it allows them to make an informed buying decision.

The WooCommerce Lead Time plugin lets you set a default lead time and then overwrite it for individual products. Bespoke Swim Spas was able to use it for their entire range of products.

This gives Bespoke Swim Spas the ability to add new products to their store without having to worry about manually displaying a lead time for each one using HTML code in their product pages.

Deposit payments for products with long lead times

If the customer will be waiting to receive their order, then they may not want to pay the full balance upfront. Bespoke Swim Spas help their customers by giving customers a choice of whether to pay in full or a deposit when they place the order. They do this using the Sumo Payment Plans plugin, which works beautifully with WooCommerce Lead Time.

Display delivery timescales for products with longer waiting times

Bespoke Swim Spas solved the challenge they were facing, and now display product lead times on their product pages using Barn2's WooCommerce Lead Time plugin.

Simple but effective
A simple plugin that just 'works' - I love the fact that you have the global option and can overwrite that for individual products as lead times alter (as they inevitably do). I couldn't believe that it wasn't something already built into WooCommerce, but hey-ho... :) Highly recommend this plugin and the friendly peeps at Barn2 Plugins (UK based too. So for me no waiting for different time zones to be on line, bonus!)

WooCommerce Lead Time makes it easy for store owners that sell products with longer waiting times to display a lead time for:

  • In stock products.
  • Out of stock products.
  • Backorder products.

Are you ready to display product lead times on your WooCommerce product pages? Get the WooCommerce Lead Time plugin today!