How to start selling customizable products on your WooCommerce store (2024)

Selling customizable products using WooCommerce can be a little intimidating at first because it’s not part of WooCommerce as it comes. But, it’s actually surprisingly easy if you have the right tools.
In this article, I’ll take you through a step-by-step tutorial to start selling customizable products on your WooCommerce store from start to finish. Whether or not product customization is new to you, this guide is perfect for you.
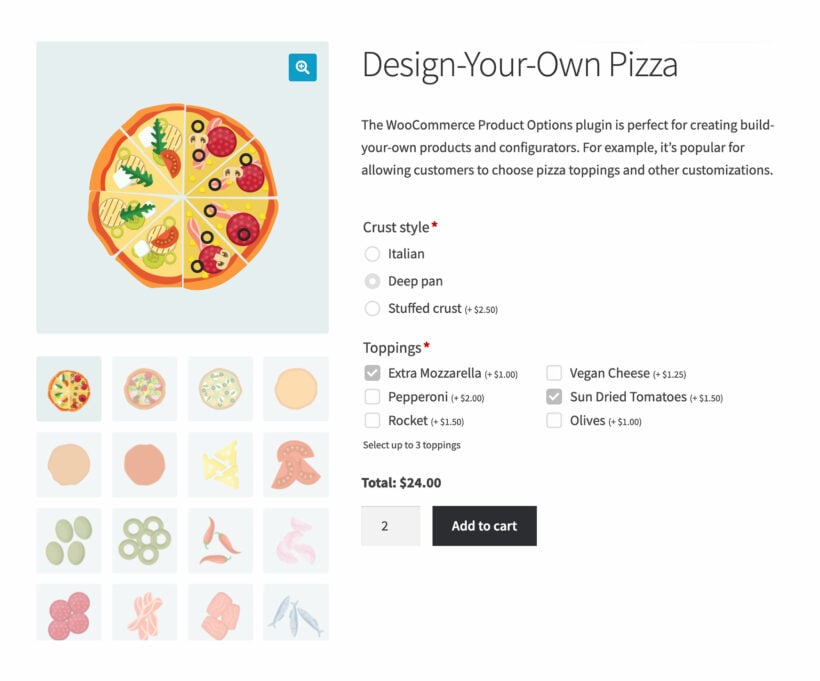
By the end of this article, you'll be able to create customizable WooCommerce products on your website like so:

We'll be using the Product Options plugin, which makes it super-simple to create customizable WooCommerce products.
You will be able to easily add useful custom options to products, such as checkboxes, color swatches, images, dropdowns, text inputs, etc. If that’s what you are looking for, keep reading to learn all about adding customizable products to your WooCommerce store.
What is a WooCommerce customizable products plugin?
A customizable products WooCommerce plugin allows store owners to sell customizable products to their customers effortlessly. This plugin executes this with the help of additional fields. Store owners can add as many fields as they want to create a personalized and complete custom shopping experience for customers.
For example, if you are taking online pizza orders on your pizzeria website, you can add custom fields such as crust, topping, sauces, etc.. This lets your customers choose their preferences for their pizza using a WooCommerce pizza builder.
Another example is websites delivering custom-built computers. With custom product customization fields, customers can select the type of processor, motherboard, or storage device they want and order the product by paying the updated final price. You can also use it to sell custom t-shirts, engraved jewelry, or anything where the customer needs to share details before checkout.
Now that we know the purpose and benefits of a WooCommerce product customizable plugin, let me introduce you to the best one.
WooCommerce Product Options - the best plugin for customizable products
The WooCommerce Product Options plugin lets you take full control over your WooCommerce products and add custom fields to let shoppers place custom product orders. As store owner, you can easily add custom fields to your products and allow customers to select the options they want before adding products to their cart.
WooCommerce Product Options is super easy to use as well. You do not need to create custom fields for every product in your store separately. Instead, you can create them once and assign them to entire product categories or individual products in your store.
You get multiple custom fields with WooCommerce Product Options:
- Checkboxes
- Radio buttons
- Text input fields
- File uploads
- Color swatches
- Dropdowns
- Image swatches
- Headings
- Paragraphs
- Customer defined price
Further, if you wish to charge customers for customizations, you also get the option to add variable option pricing. You can add a flat fee or quantity-based fee, increase or decrease the price by a predefined percentage, or let the customer choose the amount with customer-defined pricing.
This WooCommerce customizable products plugin is loaded with features that makes it worth going for.
Features: WooCommerce Product Options
- You can make some fields show/hide based on the inputs by the user with conditional logic.
- With the advanced rules, you can pre-select specific product options, make fields mandatory, or set minimum and maximum quantity rules for each addon.
- For upsells, you can assign a price to customizations such as flat fee, percentage-based, customer-defined, or character count.
- You can easily enable/disable custom fields for all products from the plugin settings page.
- By mixing and matching custom fields, you can offer fully personalized products for your customers.
- You can create unlimited option groups and allocate them to products without any hassle.
- For ease of processing, you can use the custom fields to collect all custom order-related information in one go.
That's why it's the best configurable products plugin on the market.
We now know how useful the WooCommerce Product Options plugin is for adding custom fields to products; let’s see how you can use it.
Tutorial: How to create customizable products in WooCommerce
In this section, I’ll show you a step-by-step guide on setting up and creating customizable WooCommerce products on your store.
Before you begin, make sure you have a fully set up WooCommerce store with products already added to it. In this tutorial, we’ll add WooCommerce customizable products to an existing online shop using the WooCommerce Product Options plugin.
Let’s start by installing WooCommerce Product Options - the best product configurator plugin.
Installing WooCommerce Product Options
For this step, you should have the plugin ready for installation. If you don't have it yet, then get it here.
- Log in to your WordPress website and go to Plugins → Add New.
- Select the Upload Plugin option and upload the plugin zip file.
- Install the plugin and once the installation is complete, click on the Activate button.
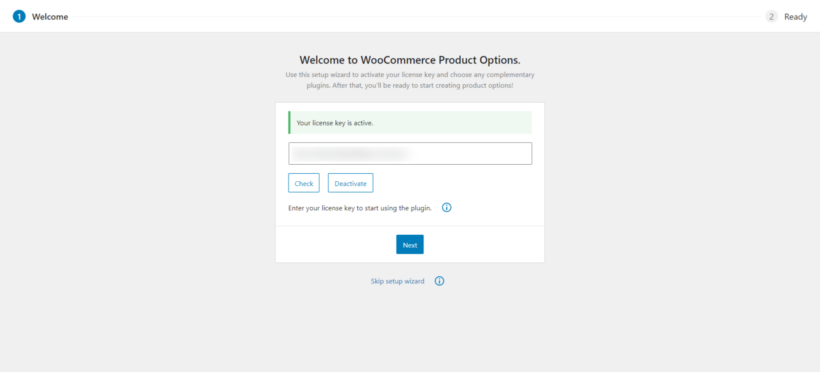
- Now you simply need to activate the plugin license by entering the license key in the setup wizard.
Now with the plugin ready to use, let’s see how you can create customizable WooCommerce products on your online store.
Setting up the plugin
For this tutorial, I will create a customizable cake with options to choose the flavor, shape, and text on the cake; I’ll also add an option for same-day delivery option for an increased price. Let’s see how you can add these options to your product.
I already have a cake product on my WooCommerce store. If you do not have products in your store yet, feel free to add them at this stage. Just remember you don’t need to add any variations to products; we’ll be doing that with the Product options plugin.
To add customization to your products, go to WP admin dashboard → Products → Product Options.
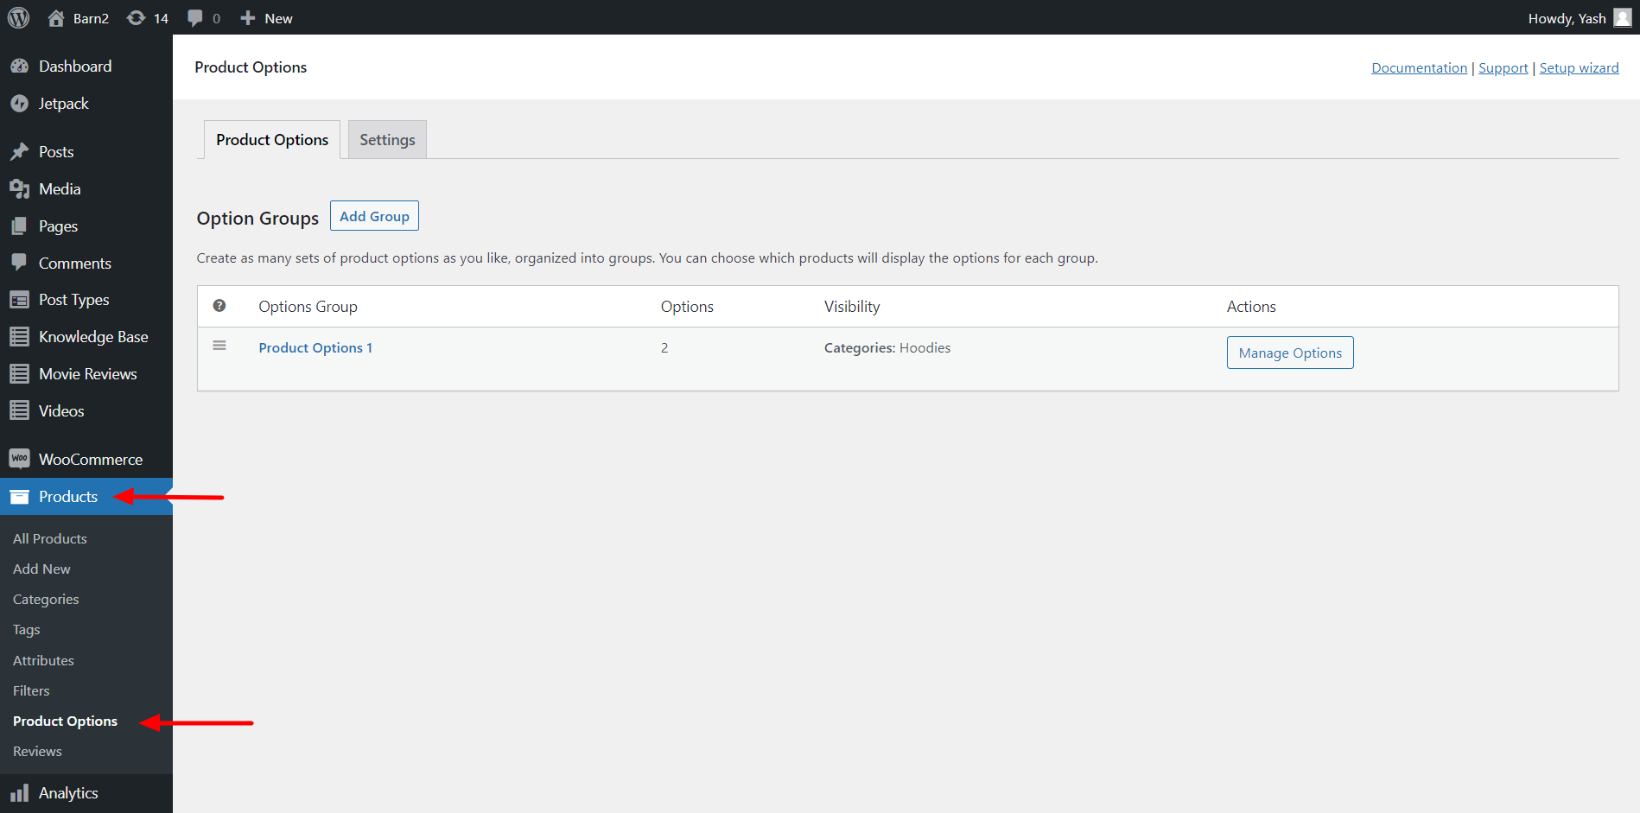
Click on Add New to create a new product options group. Here we’ll first create a new option group and add individual customization fields or product options to it.
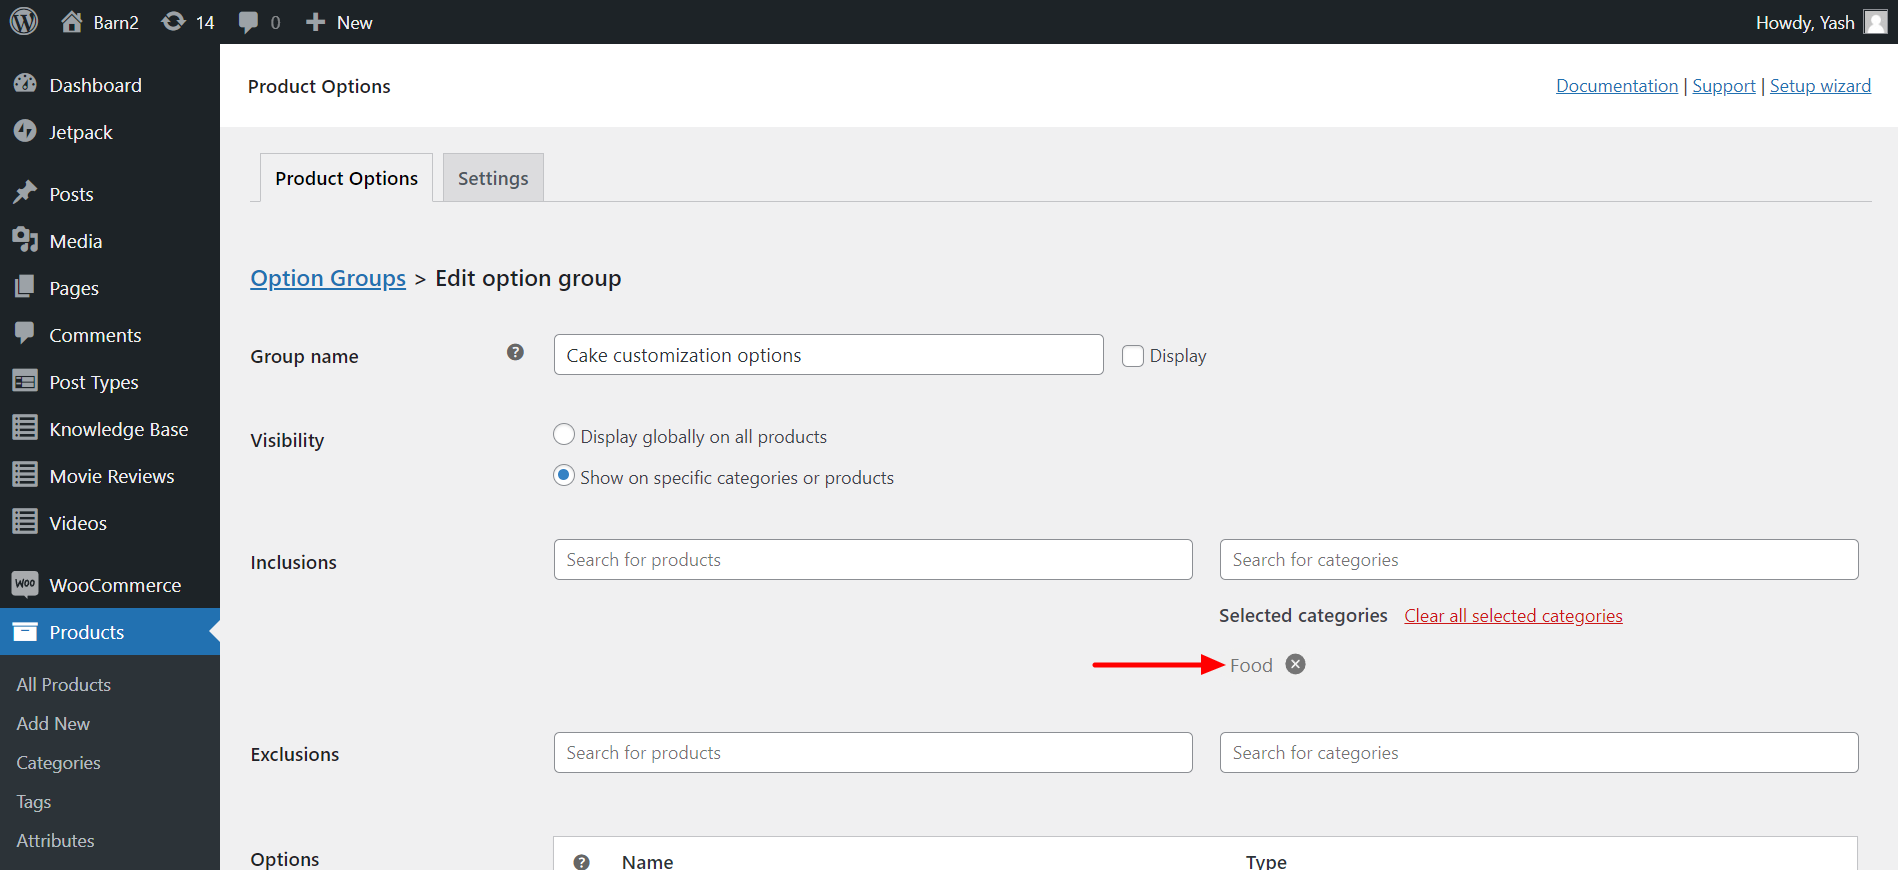
Firstly, give your group a proper name. You can also set it to display on your single product page.
In Inclusions and Exclusions, you can select which product or category you want to assign these customization options to. I’ll select the Food category in inclusions for my case, so all cake products will show these customization options.
Adding product customization options
Now let’s start adding our options. Here are the options I am going to add:
- Flavor: Dropdown option (vanilla, chocolate, lemon)
- Shape: Image buttons (round, square, heart, star)
- Text on Cake: Text input
- Same-day delivery: Checkbox
To add the first customization option, click on the Add option button.
Give your option a name and select the type of option you wish to add. Here, I am going with Dropdown select.
Enter the choices by adding the labels. If you want to assign an additional price to the options, you can do that too. If you want to add some text with the option, you can add it in the description box.
Lastly, if you want this field to be mandatory, you can check the required field.
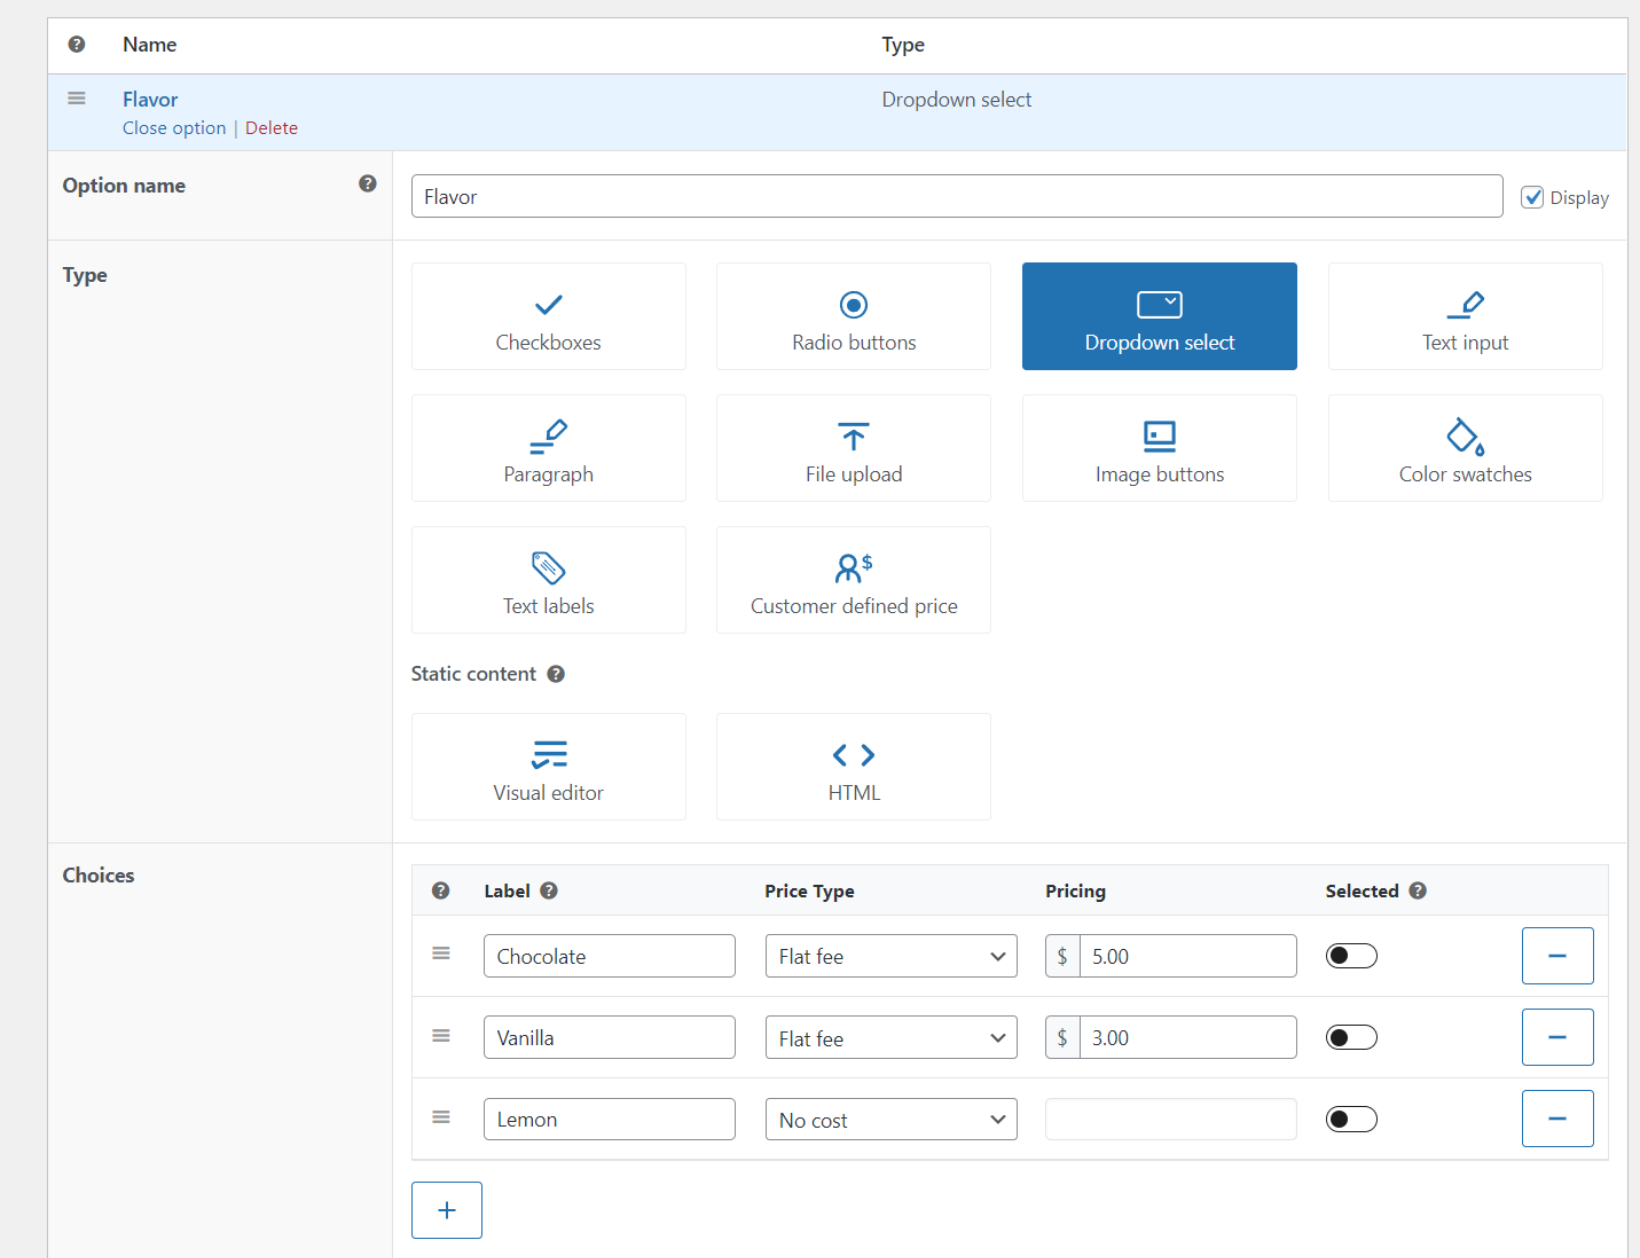
You also get an advanced option where you can add conditional logic to your fields and basically make them appear when a user selects a particular option in another field.
Once you are done, click on the Add option field.
For the cake shape field, I have selected the Image buttons. Here is what the settings look like:

Similarly, just by repeating the above steps, you can add as many options as you like.
Once you are done adding individual customization options, click on the Save button.
Now see what it looks like on your site
This is what my customizable birthday cake product looks like with the customization options:
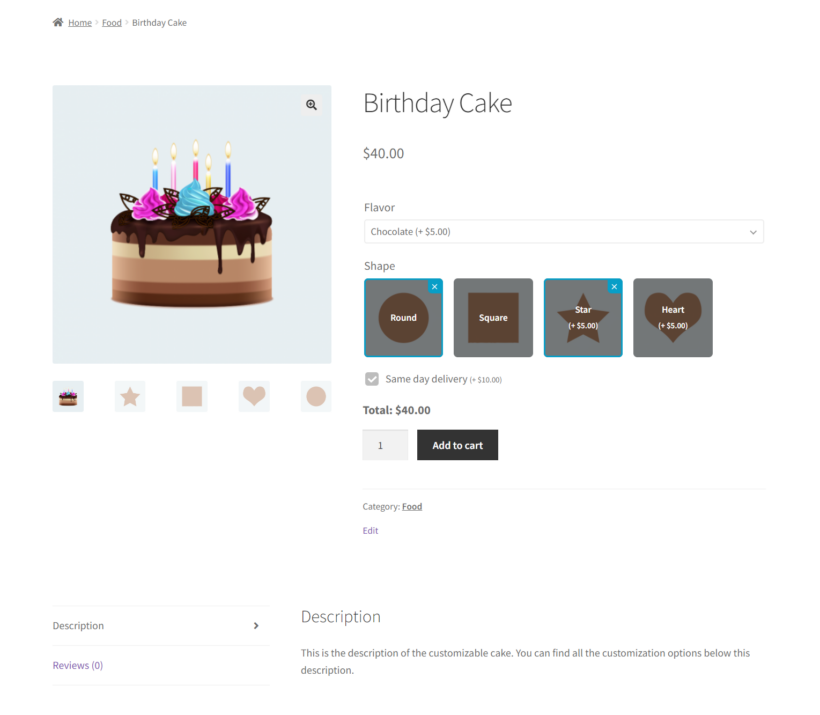
This was just an example to show you how extensively you can add customizable options to your products. With WooCommerce Product Options, you can take full control over product customization and create a more personalized shopping experience for customers.
If you want to show different customization options on different products, you can create a new option group for each one. Then, assign it to any product or category of your choice.
Displaying customizable products
All the products will be displayed with the customization options group you have created for them. Right now, they are only visible on the single product page. This is good if your customers are likely to buy a single product at a time and need lots of space for customization options.
However, this is not ideal for scenarios where customers will be buying several products at once. In that case, you need to let your customers choose product customization options from the shop page itself. This will allow your customers to browse through the products and easily add them to their carts without the need to jump between multiple pages.
For this, I recommend using these two plugins as they are perfect for the scenario and work seamlessly with WooCommerce Product Options.
WooCommerce Product Table
The WooCommerce Product Table plugin is designed to help store owners display their WooCommerce products in a grid format. It comes with useful features such as search, sort, and filter to help customers narrow their search and find the product they are looking for.
The default WooCommerce grid format is good if you only have a few products in your store. But, if you are selling loads of products in multiple categories, displaying them in a table can make the store’s navigation a cakewalk.
WooCommerce Product Options seamlessly integrates with the WooCommerce Product Table plugin. You can display your products in a table while giving your customers the option to choose their custom order from the buy column. This is what the product table looks like:
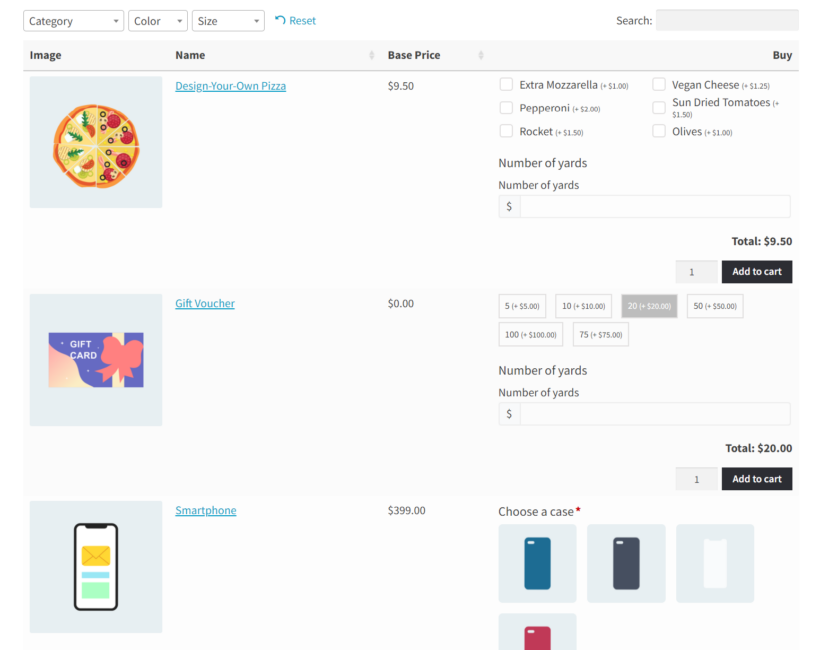
If you only have a few product options for a single product, displaying your products in a table can hugely improve your product page navigation.
If you want to see these two plugins working together in action, you can check out the demo or if you want the WooCommerce Product Table plugin, you can download the plugin here.
WooCommerce Quick View
The visual display (product image) is often as important for the products as the details. For those scenarios, displaying the products in tables can sometimes take away their visual appeal.
To display such products in full glory, I recommend using the WooCommerce Quick View plugin. WooCommerce Quick View displays a Quick view button on the products page and opens a quick view popup when the user clicks on it.
The user can then select the customization option they want for the product and add it to their cart. As soon as the product is added to the cart, the popup closes, and the customer can resume their shopping and follow the same steps to add multiple products to their cart. Here's what the quick view popup looks like:

This method is highly recommended if the visual aspect of the products is vital to assist the sales process. Users can easily keep adding custom products to their cart without leaving the products page.
If you want to see these two plugins working together in action, you can check out the demo, or if you want the plugin, you can download the plugin here.
Start selling customizable WooCommerce products today!
Offering product customization options is a great way to give a more personalized experience to customers. With WooCommerce Product Options, you can easily create customizable products and let your customers place custom orders. This way, you can receive all the custom order-related information at once. There's no need to contact the customer or ask for further instructions.
So, what are you waiting for? Let’s start adding customizable products to your WooCommerce store now! Feel free to ask any questions related to adding customizable WooCommerce products in the comment section below.
Did you know you can also use WooCommerce Product Options to sell event tickets? Check out this guide to see how you can do it!