Complete guide to WooCommerce shipping

Shipping is an essential part of most e-commerce businesses. The right shipping options can affect whether customers complete their purchase, or abandon their cart and shop elsewhere.
If you’re running a WooCommerce online store, then there are many shipping options available - right out of the box. You can configure WooCommerce shipping zones, shipping methods, shipping options, and shipping classes.
With this in mind, in this article, we’ll explain how you can configure WooCommerce shipping settings for your own online store. We’ll also introduce you to some advanced options that further improve the customer’s shopping experience.
You'll learn how to:
- Add WooCommerce shipping zones
- Set WooCommerce shipping methods to shipping zones
- Configure general WooCommerce shipping options
- Create WooCommerce shipping classes
- Leverage advanced WooCommerce shipping using plugins like Product Shipping and WooCommerce Lead Time
Let's get started!
What you need to know about WooCommerce shipping
WooCommerce is a powerful e-commerce plugin for WordPress that comes with several shipping options and settings out of the box. Before we jump into explaining how you can configure these settings and offer shipping through your online store, let's take a step back and see what each option means.
- Shipping zones are the geographical areas that carriers ship products to. Generally speaking, these range from Zone 1 to Zone 8 (for shipments in the United States) and can also be defined by a region (for example Northern Ireland). This allows carriers to measure distance in groupings of zip codes (rather than miles) from where the package will be shipped from.
- You need to assign shipping methods to each shipping zone you create. This lets customers know how you'll ship their order to them. Out of the box, WooCommerce lets you choose from one of three shipping methods i.e. flat rate, free shipping, local pickup.
- The shipping options settings page in WooCommerce lets you configure general shipping settings related to calculations and shipping destinations. From here, you can choose to show (or hide) the built-in shipping calculator or decide to hide shipping costs until customers enter their address.
- Online stores that sell products of various sizes (e.g. furniture stores that sell sofas, table lamps, ottomans, and carpets) might need to group similar-sized products together. This way, they can charge a higher shipping rate for larger products and a lower rate (or free shipping) for smaller products. WooCommerce's shipping classes options lets store owners create shipping classes and charge different rates for different shipping classes.
In addition to this, there's so much more you can do with WooCommerce to make it easier for customers to understand how you handle and charge for shipping. For example, you can use the WooCommerce Lead Time plugin to display an estimated shipping time for each product – more on this later.
You may also like our tried and tested shortlist of the best shipping plugins for WooCommerce.
WooCommerce shipping zones
Log into your WordPress website and navigate to WooCommerce → Settings → Shipping to get started.
The first screen you’ll see shows a quick overview of the WooCommerce shipping zones your online store ships to. The first thing you need to do is add a shipping zone. For those unfamiliar, a shipping zone is a geographical region where you ship. This could mean a continent (such as South America) or a specific country (for example, Brazil).
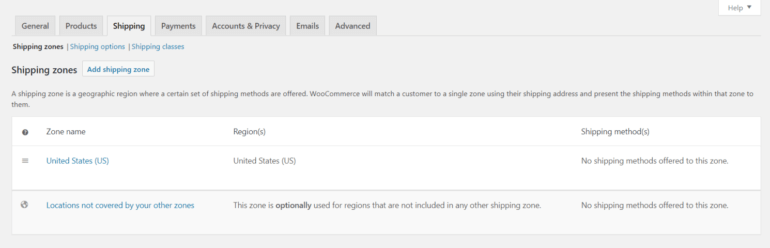
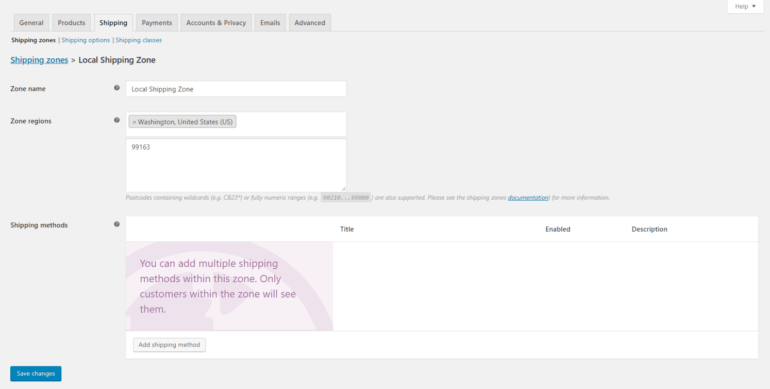
Click the Add shipping zone button to get started. Give the new zone a name and choose the regions that fall under this shipping zone. You’ll also be able to restrict the region to specific postal codes by clicking the Limit to specific ZIP/postcodes link, which is useful if you’re looking to offer local pickup or local delivery.
Further reading: Complete guide to WooCommerce shipping zones.
When you’re done, click the Save changes button to proceed.
WooCommerce shipping methods
Now that you’ve created a shipping zone, the next step is to add and configure the shipping methods. From the same screen (i.e. WooCommerce → Settings → Shipping → Shipping zones) click the Add shipping method button under the Shipping methods option to get started. You'll see a pop-up window with shipping methods to select from.
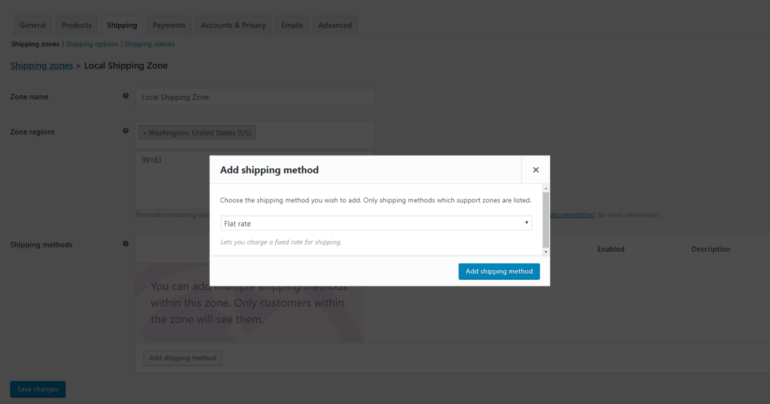
WooCommerce comes with three shipping methods out of the box. These are:
- Flat rateThis is a useful option for e-commerce sites that need to ship products to different shipping zones. For example, if you sell wholesale products through WooCommerce, you might need to charge customers in higher shipping zones more for getting their orders to them versus customers that are closer to your warehouse or fulfillment center.
- Free shippingIf you sell subscription boxes or mix and match products locally, you might want to offer free shipping. This shipping method is also suitable for online store owners that bake the cost of shipping into their products to entice customers with Free shipping! messages.
- Local pickupIf you're building a WooCommerce restaurant online ordering system, you might want to offer a local pickup option for people wishing to collect their meals from the restaurant.
Note: In some cases, you might need to offer a combination of shipping methods. For example, following our restaurant example, you might also set shipping zones to charge different delivery costs based on the customer's distance from the restaurant.
Once you've selected a shipping method, click the blue Add shipping method button to proceed.
You can add each shipping method more than once, which enables you to offer customers more options. The only problem is that your customers will be able to view all the shipping methods you create from their shopping cart. The cart contents will only affect the shipping prices that customers see. One way to refine this is by sorting through available shipping methods. You can do this by dragging and dropping the shipping methods into place. This way, you can decide the order in which customers see them.
Flat rate
The flat rate shipping method lets you charge a fixed shipping rate. Here are the available options to you for configuring its settings:
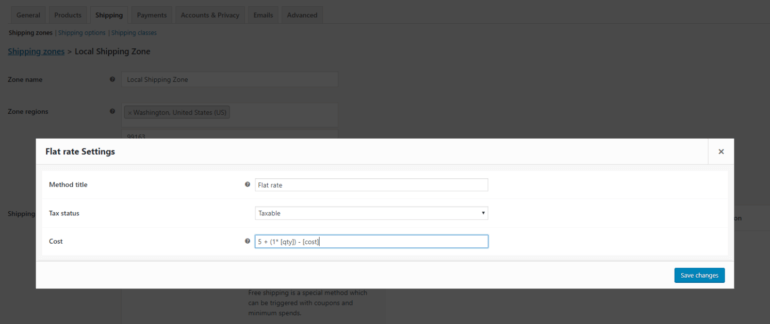
- Method title. Choose which payment method customers will see.
- Tax status. Choose if the shipping method is taxable or non-taxable.
- Cost. Fill in the cost of shipping the entire order. You can also use [qty] and [fee] parameters to charge custom shipping rates.
For example, you could add 5 + (1* [qty]) - [cost] which is $5 plus $1 for each product in the shopping cart. Or 10 + [fee percent = “5” min_fee = “2” max_fee = “5”] - [cost] which is $10 plus 5% of the total order, but no less than $2 and not greater than $5.
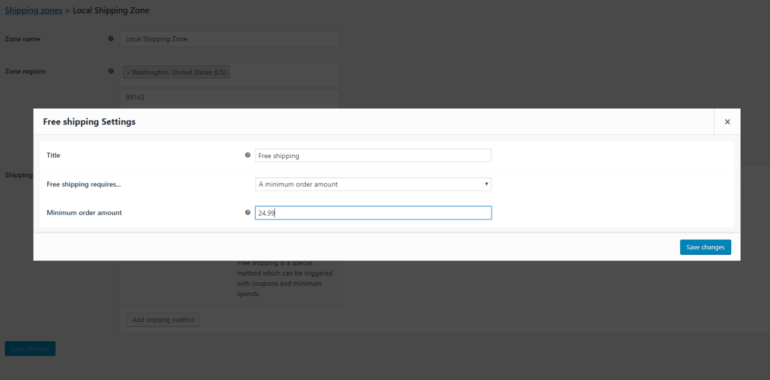
Free shipping
This is a special shipping method that can be triggered with coupons and minimum spend thresholds. By going into its settings, you can add in a custom title and set the free shipping condition. You can choose to set Free shipping requires... to:
- N/A. Use this if you’re looking to offer free shipping to all of your customers.
- A valid free shipping coupon. Create a coupon that enables customers to get free shipping. You can create coupons by navigating to WooCommerce → Coupons from the dashboard.
- A minimum order amount. Enter the number of money customers would have to spend to receive free shipping.
- A minimum order amount OR a coupon
- A minimum order amount AND a coupon
Bear in mind that customers can use coupons even if the minimum order for free shipping has been set.
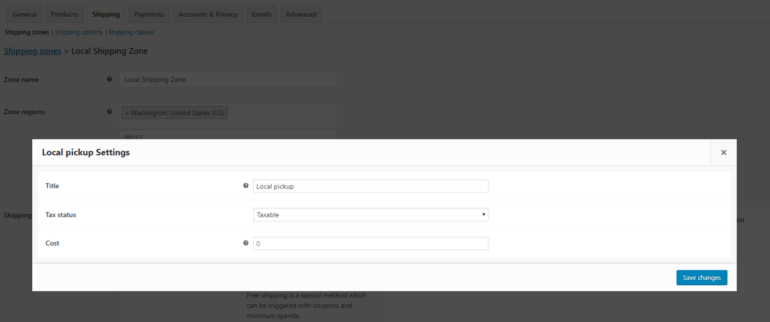
Local pickup
You can use this shipping method to let customers pick up orders themselves. You can add a custom title, set the tax status, and add in an optional additional cost for local pickup.
WooCommerce shipping options
From here you’ll be able to configure the general options related to shipping.
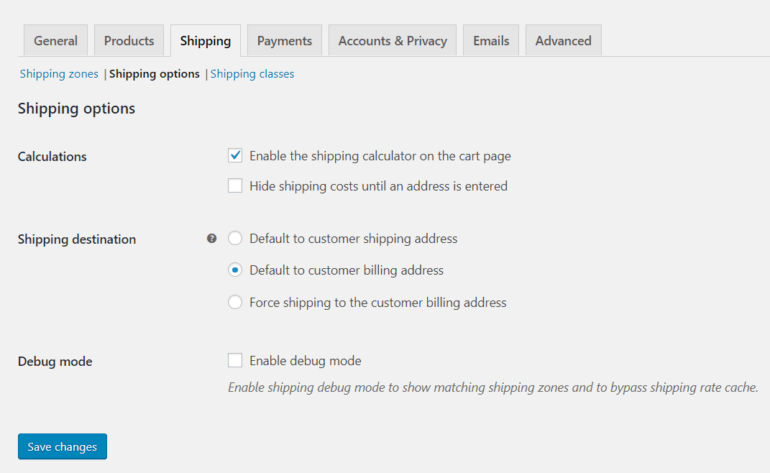
The main options you need to configure are:
- Enable the shipping calculator on the cart page Make sure this checkbox is ticked if you want to enable customers to calculate shipping costs based on shipping zones. (However, remember that customers actually need to see shipping costs before adding products to the cart. We'll talk about this in the next section.)
- Hide shipping costs until an address is entered Tick this option if you want customers to view the shipping cost only after the order summary is generated.
- Shipping destination Choose which address for the default shipping address. You can choose the customer's shipping address or the billing address as default. Alternatively, you can force all orders to ship to the customer's billing address.
Display shipping options on the product page
In the previous section, you learned how to enable a shipping calculator on the cart and/or checkout page. That's what you can do with WooCommerce as it comes. However, it doesn't actually reflect the needs of your customers, who need to know the shipping options before deciding whether to add products to their cart.
You can solve this problem by installing the WooCommerce Shipping Calculator plugin:
This useful plugin adds a shipping calculator to the location of your choice on the product page.
Having a shipping calculator on the WooCommerce product page is much better for user experience than hiding this information until customers get to the checkout. It completely eliminates the problem of customers abandoning their cart due to unexpected shipping costs. Customers can see the options where they need them and make an informed decision.
A product page shipping calculator also helps to avoid disappointment for customers in locations you don't ship to. That's because they can see that you don't ship to them before committing to buying the product.
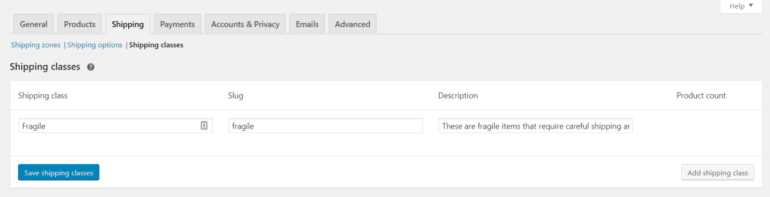
WooCommerce shipping classes
Shipping classes are especially useful for online store owners who sell products of various sizes. Shipping classes can be used to group similar types of products. In addition to this, you can also configure some shipping methods (such as flat rate shipping) to provide different rates to different shipping classes.
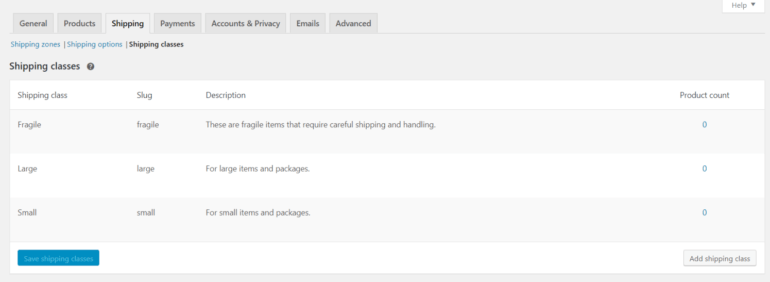
Click on the Add shipping class button to get started. Next, enter the Shipping class name, Slug, and Description.
Now that you’ve created the shipping classes, the next step is to assign shipping classes to products.
Assigning shipping classes to products
To assign shipping classes that you’ve created to products, navigate to Products → All Products and open the product you'd like to assign a shipping class to in the edit product screen. Next, scroll down to the Product data section and click on the Shipping tab.
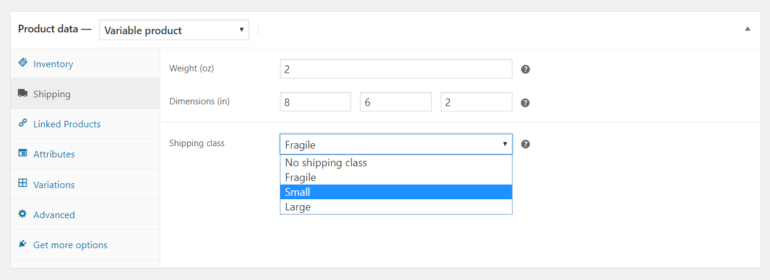
From here, you can set the Shipping class option to one of the shipping classes you created. Click the Update button to proceed.
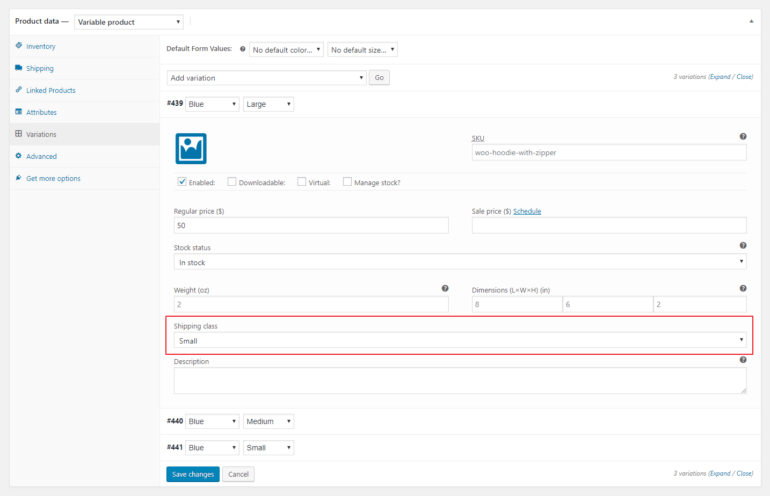
Note: If you sell variations of the same product, you'll be able to assign separate shipping classes to each variation. You can do this by heading over to Variations from the Product data section.
Assigning shipping classes to products in bulk
You can also set the shipping class for multiple products all at once.
Navigate to Products → All Products and select all of the products you'd like to assign to the same shipping class. From the Bulk Actions dropdown, choose Edit and click on the Apply button.
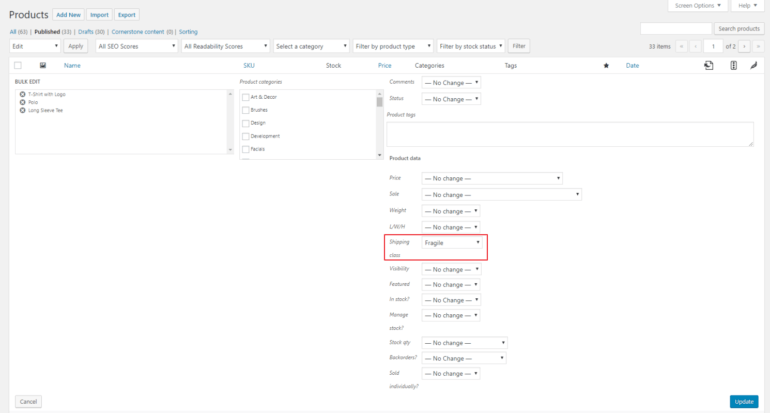
Set the Shipping class value (under Product data) to whichever shipping class you'd like to assign. Finally, click the Update button to proceed.
Setting shipping class costs for flat rate shipping
Once you've added some shipping classes, you'll see a Shipping class costs section under Flat rate settings. It should look something like this:
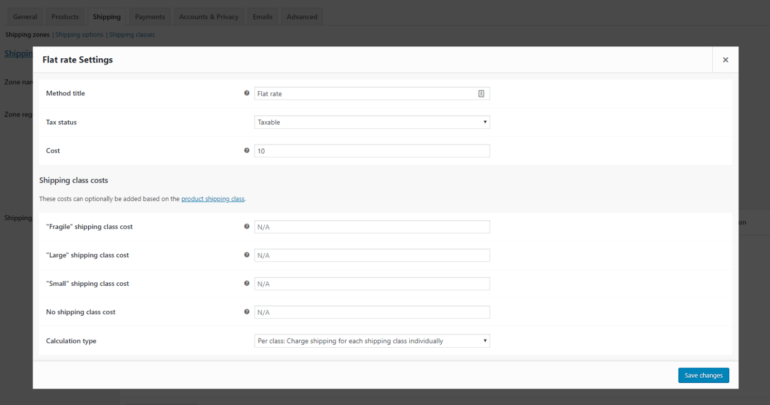
From here, you can configure:
- Shipping class costsThere is a separate field reserved to add in a shipping cost for each shipping class. You can enter an additional cost here for specific shipping classes.
- No shipping class costOnly use this in case you’re using Per class calculation (we’ll talk about that next).
- Calculation type When you’re calculating the shipping cost for shipping classes, you can go with one of two options:
- Per class. The cost of shipping will be the total costs for each shipping class added up.
- Per order. Of all the products in the shopping cart, the most expensive shipping class will be applied.
3 plugins for advanced WooCommerce shipping
There are several plugins and extensions out there that let you control your shipping options. Here, we'll dig deeper into three of the most popular (and most useful!) offerings.
WooCommerce Lead Time
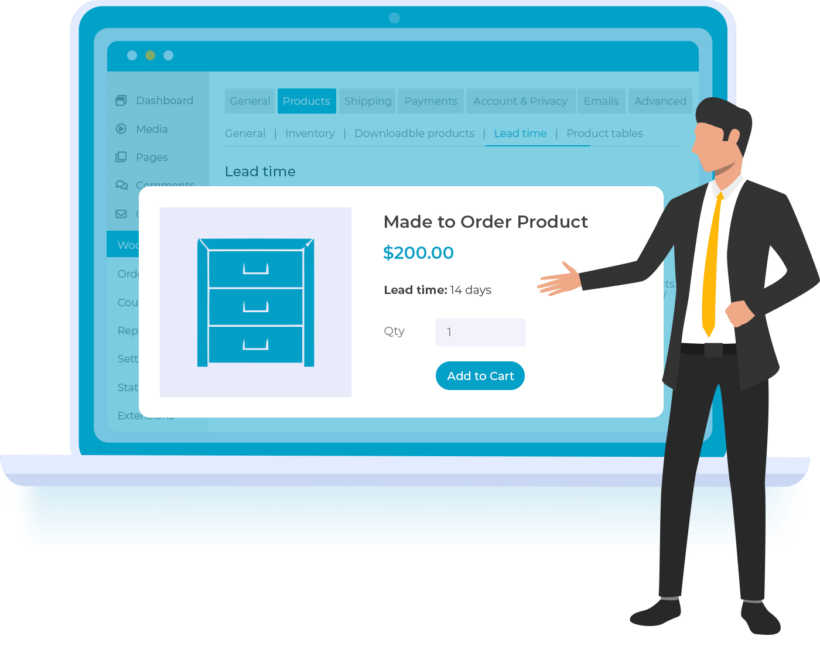
Out of the box, WooCommerce doesn't let you add an estimated shipping time for individual products. This is important as it lets customers know when they can expect to receive their order or when it will be available for purchasing.
Thankfully, with WooCommerce Lead Time, you can display the estimated number of days it will take to restock a product in your inventory. This allows customers to make an informed buying decision and can make a big difference to conversion rates.
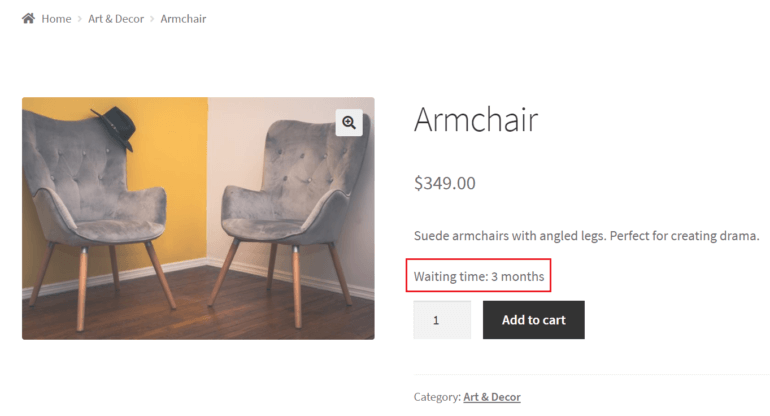
This is especially useful for online stores that:
- Sell made-to-order products or handmade goods
- Sell products that have long lead times or waiting times (like furniture)
- Don't always have all items in stock or for products that are out of stock
WooCommerce Shipping
WooCommerce Shipping (powered by Jetpack) is a free extension that lets you add discounted shipping rates and print shipping labels directly from the WordPress dashboard. You can use this extension to print discounted USPS shipping labels. If you need a way to access additional carriers (including DHL, UPS, FedEx, and USPS), consider using Shippo instead. This is the easiest (and most cost-effective) way to print labels.
Table rate shipping plugins
Many online stores sell products of variable sizes and weights. For this reason, flat rate shipping isn’t always the best possible solution for them. They need a different (more advanced) way to calculate shipping costs. This is where a Table Rate Product Shipping plugin comes in. This WordPress plugin by YITH offers a convenient way for store owners to create and set rules for calculating advanced shipping costs.
Rules can be set based on:
- Weight
- Number of items
- Number of items by class
- Price
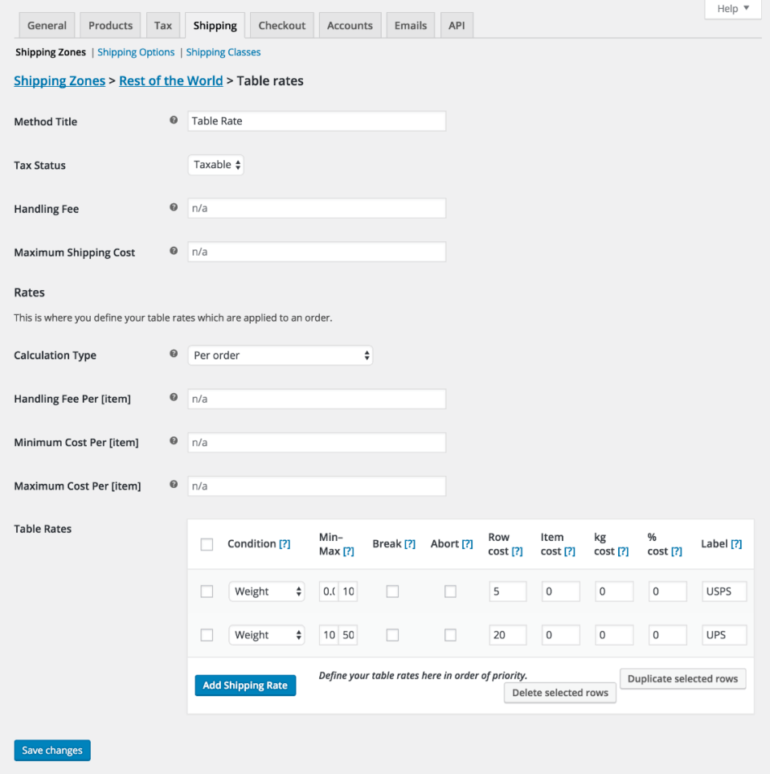
This gives store owners the flexibility to create rules like:
- If the weight of all the products adds up to be anywhere between 1 lbs and 5 lbs, $15 will be added to the shipping cost.
- If the order contains more than 5 products, add $10 to the total shipping cost.
Conclusion
Setting up WooCommerce shipping for your e-commerce website is a great way to enhance your offering while remaining profitable. All you have to do is configure options for shipping zones, set shipping methods and classes, and assign products to the right classes.
Once you've set up the default WooCommerce shipping options, you can install the best plugins to supercharge shipping in your store:
- WooCommerce Shipping Calculator lets customers see shipping costs before adding products to their cart.
- The WooCommerce Lead Time plugin clearly displays product waiting times on product pages.
- Product Shipping gives you more control over adding advanced shipping costs.
Do you have any questions on how to set up WooCommerce shipping for your online store? We're happy to help, so let us know in the comments section below!
4 Comments
I cannot add any shipping zones or change any shipping methods. I am running latest version on WooC. My postage is set at 2.99 and I need to amend this and have more zones. Hope you can help. It's driving me mad. Thanks
Hi Richard,
Thank you for your comment. It would be best if you can get in touch with WooCommerce to assist you with your concern. You can look at their support forum or their website's contact page to guide you to the right direction to solve your issue. If you have any questions or concerns regarding our plugins, you can get in touch with our Support Center and we will assist you. Thank you.
Hey there. We're looking for Table Rate Shipping and Delivery cut off plugins. We're struggling to find the latter that works with Table Rate Shipping.
Do you have any recommendations?
Hi, Darren. You could look into using the WooCommerce Delivery Slots plugin by IconicWP, which you can also use with our WooCommerce Lead Time plugin. We have a detailed tutorial about how you can integrate the 2 plugins on your site: Offer WooCommerce delivery dates based on your product lead times. I suggest you also enquire with IconicWP support if their plugin works with the Table Rate Shipping plugin. Cheers.