Creating a WordPress document library: A step-by-step guide

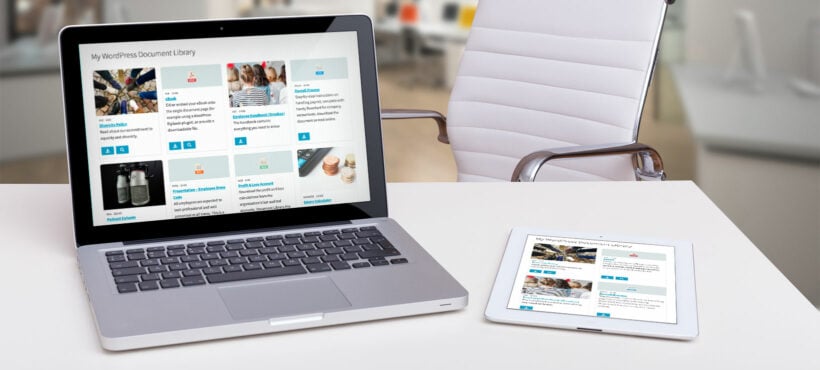
A WordPress document library plugin presents your documents and other resources in an easy-to-find format. It allows you to keep things organized, share files, and create a resource hub or a publications database.
It's surprisingly hard to find a good WordPress document library plugin. There are lots of file management and media library plugins available, but very few create a searchable front-end WordPress document library. The ones that do exist have poor ratings, missing features, and a lot of negative feedback.
That's why we built Document Library Pro. We consulted thousands of WordPress users to find out exactly what they want. We used the results to design the best WordPress document library plugin on the market.
In this tutorial, I'll explain how to create a document library in WordPress from start to finish. It's really easy and you don't need any technical knowledge.
Later, I'll also share some tips on how to make your document library website (or just parts of it) private and hidden from public view; how to allow your users to submit documents; and more.
WordPress document library: Step-by-step video tutorial
First, watch Sam explain how to create a document library with WordPress and build your own along with him. Alternatively, keep reading for full written instructions:
The best WordPress document library plugin
The Document Library Pro WordPress plugin has everything you need to add and display documents:
- Quickly add documents to WordPress - Either manually, using drag and drop to add multiple files to the WP Media Library, or as a bulk CSV upload.
- Store extra data about each document - Make the WordPress document library more accessible by adding extra information such as a title, excerpt, full description, and image. Other data is calculated automatically, such as the file size, file type, date, and last modified date!
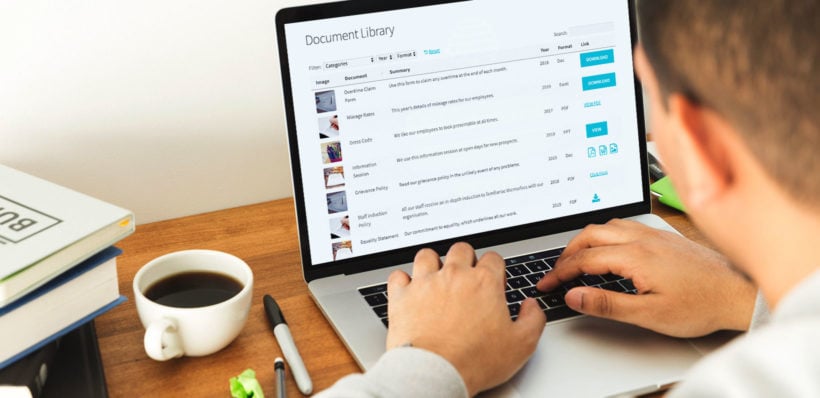
- Instantly list documents in a searchable, sortable table with filters - or alternatively in a tiled grid layout.
- Supports any file type - The WordPress document library plugin supports literally any file type that can be stored in the WordPress Media Library. If the documents are hosted externally then you can link them to any third-party website like Dropbox, Office 365, or YouTube.
- Embed documents, audio, and video - Instead of (or as well as) download links, you can display documents directly on your website. You can even add embedded music and video players which people can play on the main WordPress document library page!
- Flexible download links - Choose whether to show download buttons, text links, or file type icons on your main document library page. Also, choose whether to provide instant downloads or a separate page for each document.
- Document version control - The built-in document library version control allows you to keep track of past and current versions of each file. You can easily view previous changes, rename versions, and roll back to a previous version. This adds greater accountability to your WordPress document library, helping to prevent mistakes.
How it works
To use the WordPress document library plugin, you simply add your documents to the WP admin. The plugin takes care of the rest and automatically displays them in a searchable WordPress document library in the front end. You can choose which columns of information to include, whether to structure the documents into folders based on their category and much more.
People can easily find the documents they're looking for and either read them online or download a file.
What sort of documents can I display?
The document library plugin can list any type of document on a WordPress website. This includes:
- Any document file typePDF, DOC, XLS, PPT, EPUB, Google Docs & Sheets, video, etc. This WordPress file manager plugin supports literally any file type.
- Corporate documentsContact lists, data sets, documentation, financial spreadsheets, forms, how-to guides, handbooks, instructions, legal documents, license agreements, lists, manuals, policies and procedures, reports, stationery, templates, terms and conditions, white papers, worksheets.
- Promotional documentsCase studies, flyers, leaflets, marketing materials, Keynote or PowerPoint presentations.
- Industry-specific documentsBlueprints, manuscripts and sheet music, maps, signage.
- Personal documentsDownloadable kids activities, leisure guides, nutrition guides, recipes, treasure hunts.
- WordPress audio or video galleryYou can display photos, music, and videos in a WordPress audio library or video gallery, creating any type of resource or document gallery!
Before we start, check out this review from a happy customer. Then we'll go through the steps of setting up the WordPress document library plugin from start to finish.
3 easy steps to create a WordPress document library
Like what you see? Great! Next, I'll show you how to create a WordPress document library for your document, publications, or any other type of resource.
There are 3 simple steps:
I'll also share some bonus tips on how to add extra features to your WordPress document library. This includes how to make parts or all of the WordPress document library private, document management advice, and embedding multimedia content such as flip books, audio, and video. You'll be amazed at everything you can do with your document libraries.
Step 1: Install the document library plugin
Installing the WordPress document library plugin only takes a few minutes:
- Get Document Library Pro and download the plugin files from the order confirmation page or email. You should also copy your license key.
- In the WordPress admin, go to Plugins → Add New and upload the plugin zip file that you just downloaded. Click 'Install' and then 'Activate'.
- Now go to Documents → Settings, paste your license key, and click 'Activate'.
- On the same page, disable any fields that you don't plan to use in the document library.
Configure your document library settings
Next, go to the 'Document libraries' tab and choose how you want your WordPress document library pages to look and behave. This will depend on your requirements, but I will talk you through the most important options.
You can read about them all in the WordPress document library plugin knowledge base. You can also override these options for each individual list of documents.
Recommended settings
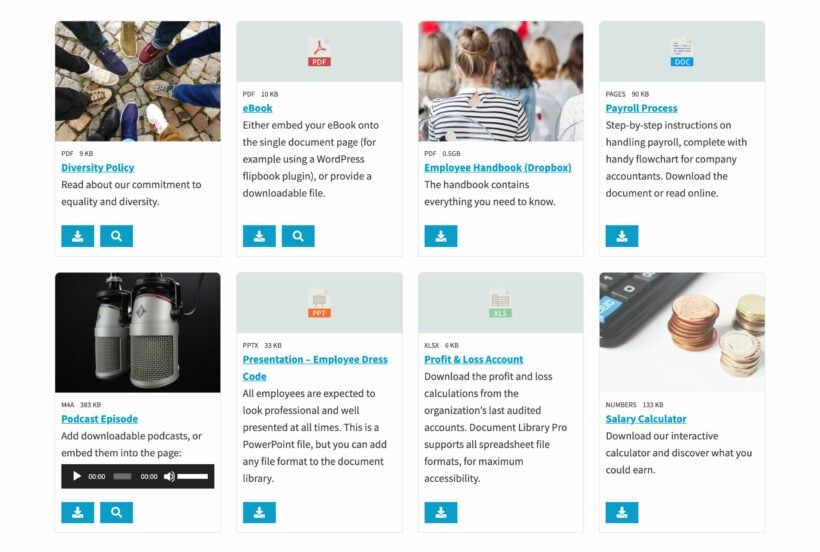
- Layout - Choose between a table or grid view. I recommend the table view if you have lots of documents and your users will want to be able to filter them as well as search. Use the grid view for smaller document libraries where you want to make each document more prominent.
- Folders - Tick this to automatically structure the document library into folders, instead of as a single list. There will be one folder for each document library category.
- Columns - Choose which columns to include in your document library. There's a huge range of possible columns to choose from, including the document name, description, file size, file type, published date, modified date, and download link. You can rename the columns.
- Link style - Decide whether the 'link' column displays a download button, text link, or file type icon.
- Link text - Change the word 'Download' to anything you like, such as 'View' or 'Read Online'.
- Clickable columns - These link to an individual page for each document. If you don't want a page for each document, then set this option to 'none'.
- Search filters - If you will have lots of documents in each table, then add filter dropdowns to help people find them more easily. You can have filters for your document categories, tags, or any custom taxonomy (see bonus tips).
- Design - Your document library will adapt to suit any WordPress theme theme. This means that it will look good straight out of the box. You can restyle it further using the design settings.
Step 2: Add documents
Once you've installed and configured the WordPress document library plugin, it's time to start adding documents!
What is a 'document'?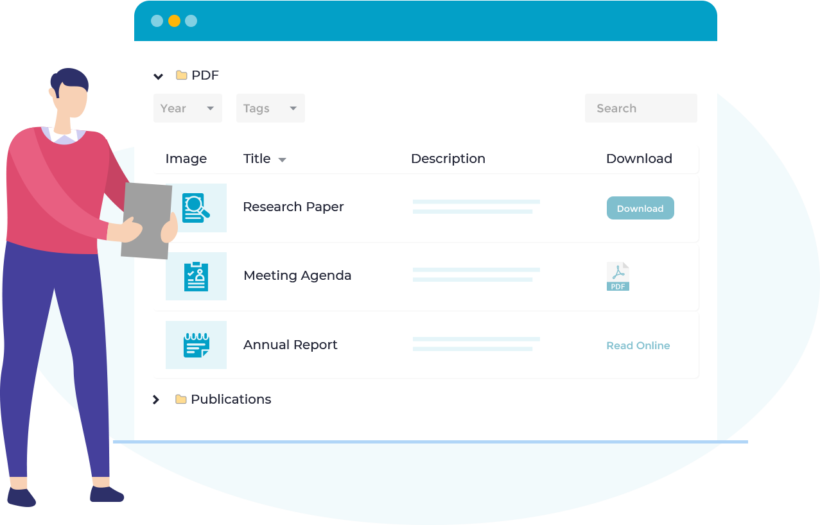
The Document Library Pro plugin is ultra-flexible and supports any type of 'document'. A document could be:
- A downloadable file that is stored in the WordPress Media Library - e.g. a PDF, image, or PowerPoint presentation.
- Any downloadable file that is stored on a third-party platform like Dropbox, Google Drive, Microsoft SharePoint, or Box.
- A resource that is available for people to read directly on your website, without having to download anything.
- Any resource that you embed directly into your website - e.g. a page-turning flip book or an embedded Google Drive document.
- A link to a web page, either on your own website or on a different website.
As you can see, that's a pretty wide definition of a 'document'! Whatever type of document or resource you want to display, you can do it with Document Library Pro. You simply add or upload the document along with any extra data that you want to display about it, and it is stored in a dedicated 'Documents' section of the WordPress admin.
This makes document organization really straightforward while keeping your documents separate from your other website content and Media Library files.
4 quick ways to add documents
Now we know what the WordPress document library plugin can display, you can choose the best way to add your documents. Each option is really easy and only takes a few minutes:
- Add documents manually - it's just like adding a page or post in WordPress!
- Select files already in the WP Media Library - are your documents already in WordPress? Add them to Document Library Pro in seconds.
- Drag and drop file upload - drag files straight into the document library.
- Bulk import documents from CSV - to import large numbers of documents to the library, add all the data to a CSV file, and upload it to WordPress.
With both methods, you can choose what information to display in the WordPress document library (summaries, file type, file size, category, etc.), and you can add links to download the document. Both methods support any file type, including uploaded PDFs, JPG, DOCx, etc.
Categorize your WordPress document library

Before you start adding documents, it's important to plan the structure of the document library. This is an important part of organizing your document library. It's easier to keep documents organized from the outset than the tidy them up later.
The WordPress document library plugin provides 2 ways to organize documents:
- Document categories - Create hierarchical categories and sub-categories, structured into unlimited levels.
- Document tags - Add tags or labels to each document. For example, you could use tags for the document year, publisher, topic, type, or something else. (If you want multiple types of labels, then you can do this by creating custom taxonomies to use as well as tags.)
Your document library can include category and tag columns. It can also include category and tag filters to help people to find documents more easily. You can even create multiple document lists, each containing a specific category or tag.
How to add documents manually
You can add documents one by one, in exactly the same way as you add pages and posts in WordPress:
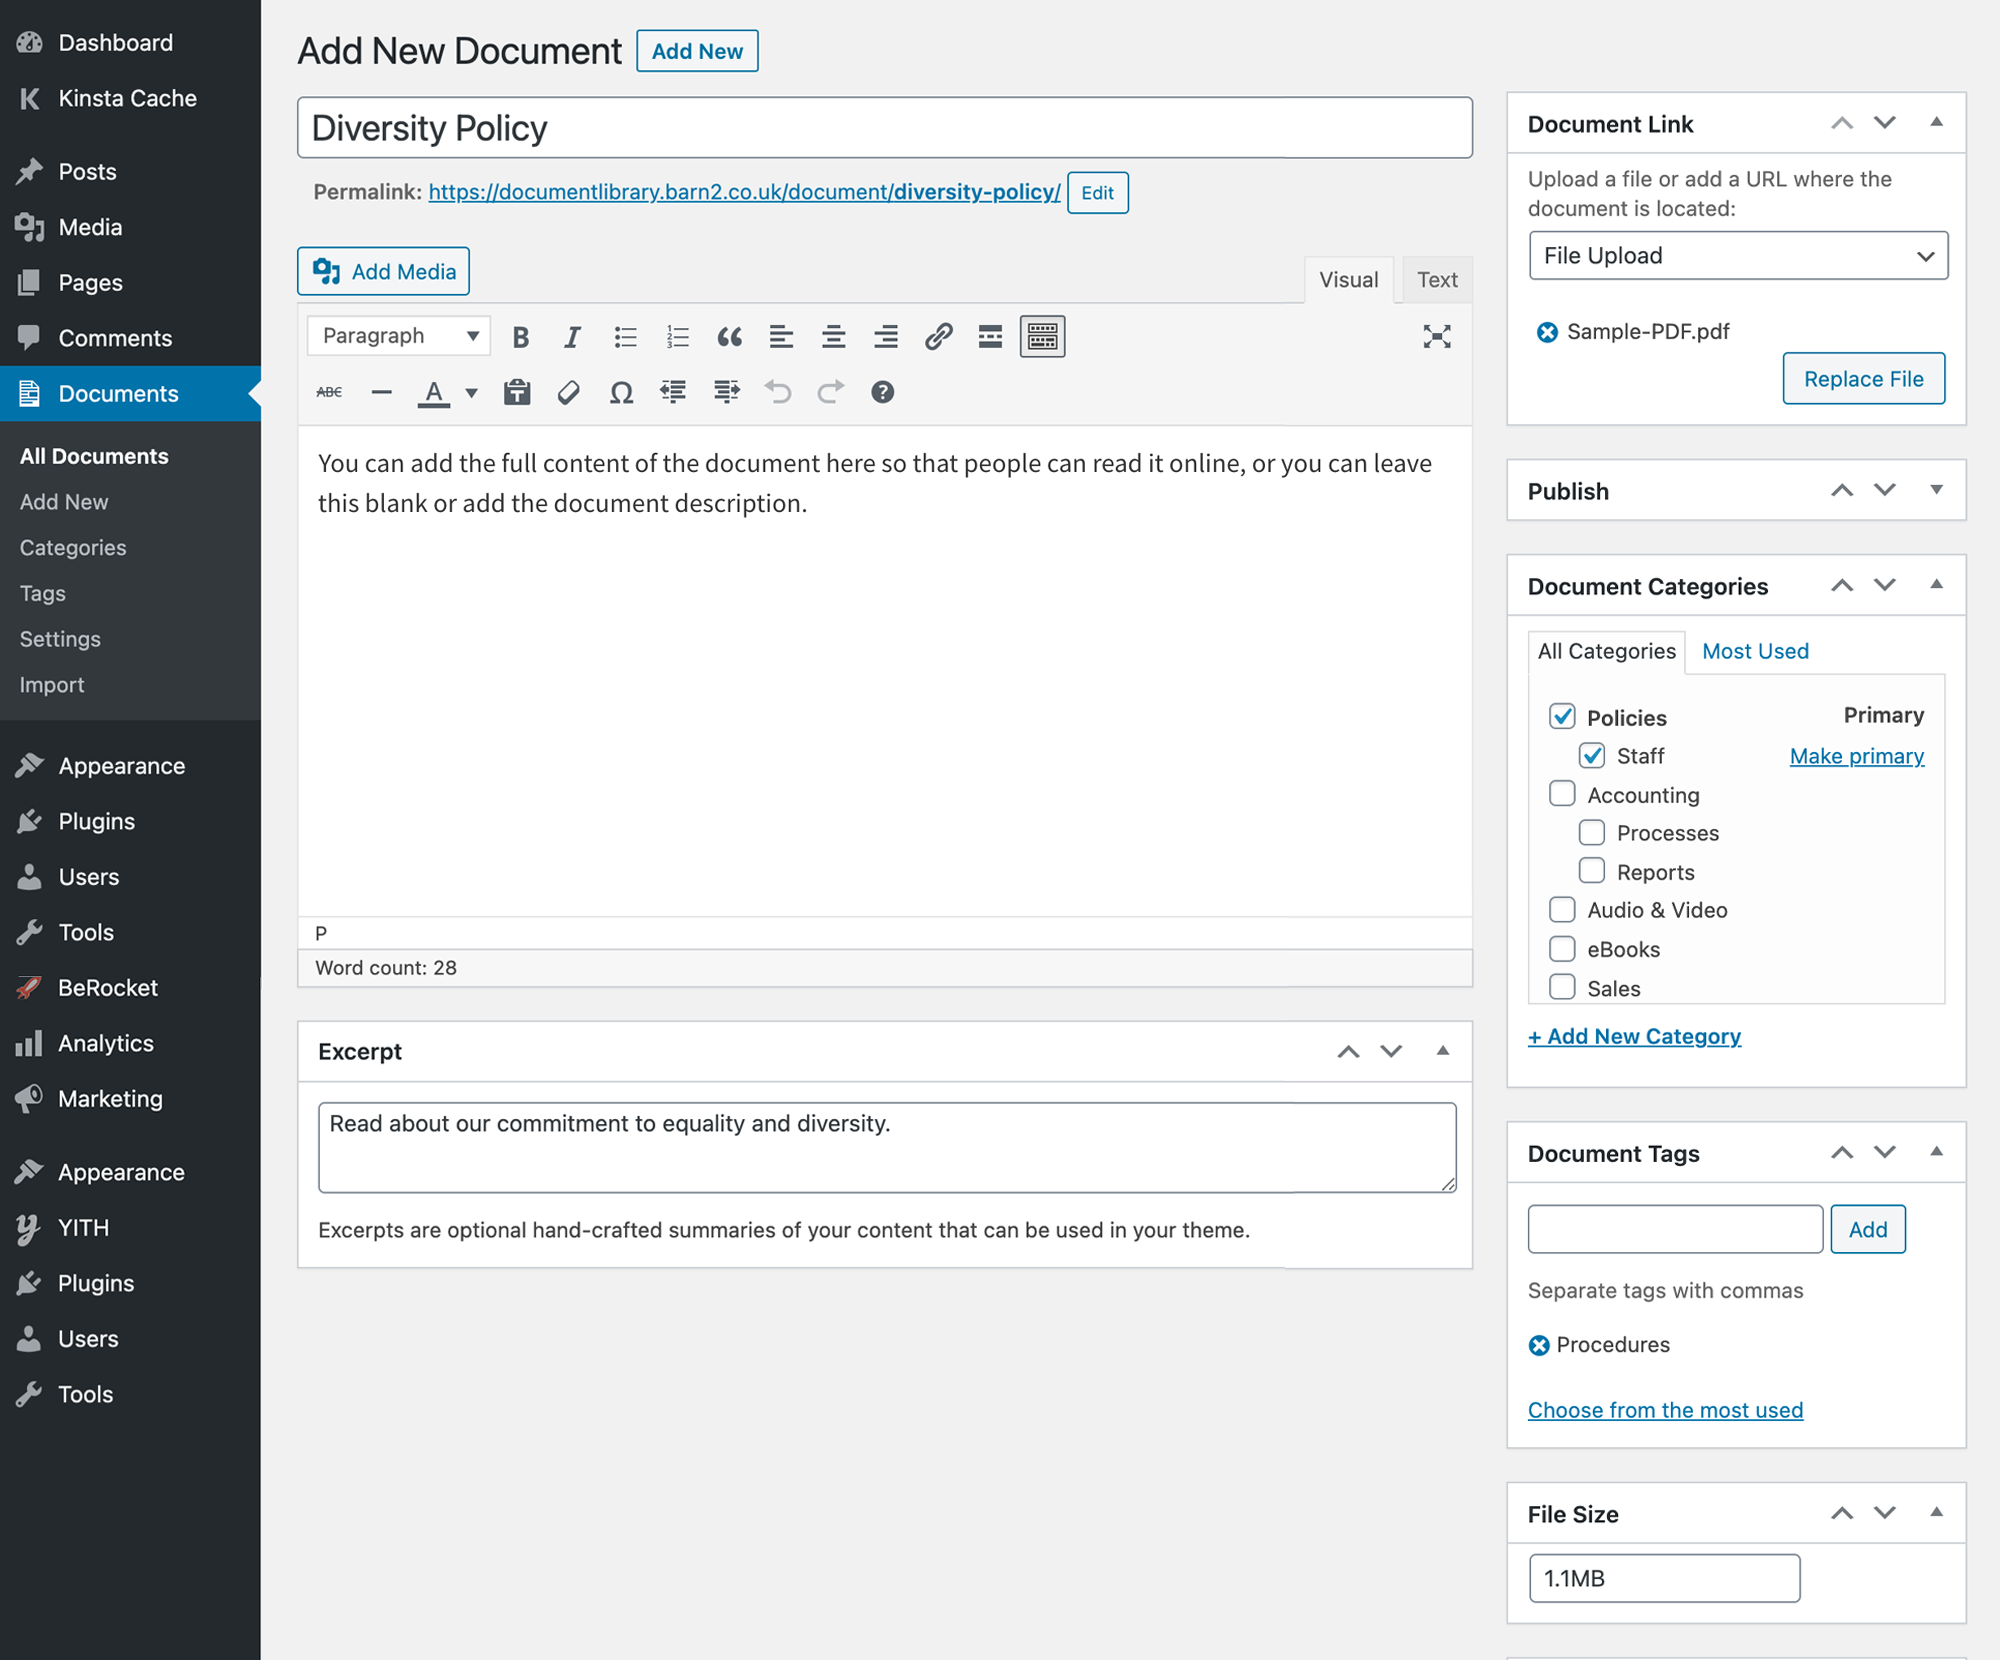
- Go to Documents → Add New.
- Add all the information that you want to display about the document, such as the name and description. Ignore the file size option if it's a downloadable document because this will be calculated automatically.
- For the main content, either add a description, leave this blank, or add the full document. This might be the full text of the document (you can add thumbnail images etc. as required), an audio or video player, a Google Doc embedded using a plugin such as Google Drive Embedder, or even a flip book plugin.
- Choose an option in the 'Document Link' section:
- File Upload - Upload any file type which users can download.
- Custom URL - Add the URL of where the document is located, e.g. a Dropbox or Office 365 link, or a third-party website.
- None - Choose this if you are embedding the document into the main content instead of as a clickable link.
- Click 'Publish' to instantly add the document to the library.
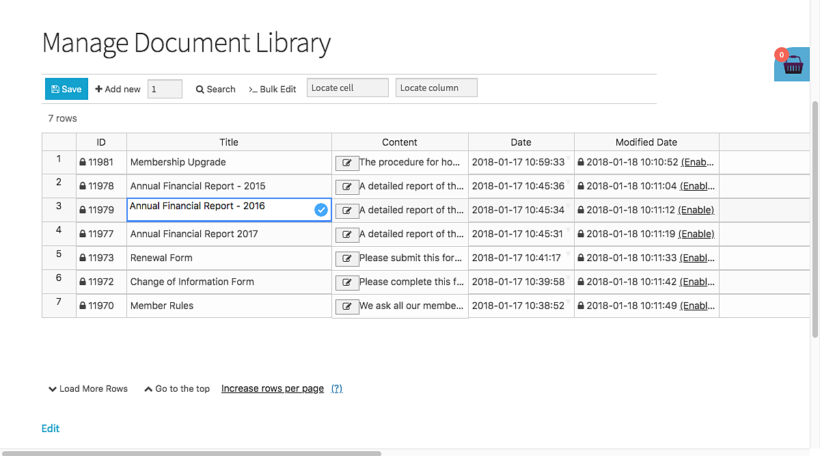
How to add Media Library files to the document library
Lots of people install Document Library Pro after using a different plugin. If your document library files are already in the WordPress Media Library then you can easily convert them into documents:
- Go to the 'Media' section in the WP admin.
- Make sure you're on list view rather than grid view (click the icons in the top left to switch).
- Tick the files that you're adding to the document library plugin.
- Use the bulk actions dropdown to select 'Add to document library'.
- Click the link that appears to view your documents. You might want to tweak some details like the name or add extra information about each document.
How to add documents using drag and drop
If you want to add lots of downloadable files to the document library, then the draft and drop uploader provides a useful shortcut:
- Go to Documents → Import.
- Drag and drop the files onto the page.
- Go to the 'Documents' section of the WordPress admin to view them and make any changes.
How to import documents from CSV
The WordPress document library plugin provides a fully automated way of importing documents in bulk:
- Use any spreadsheet program (e.g. Excel) to add all the information about your documents to a CSV file, including the URL of where it is currently located. For a useful starting point, download the sample CSV file from the document library plugin knowledge base.
- Go to Documents → Import.
- Follow the on-screen instructions to upload your CSV file. This includes a page where you choose which column from the CSV to map to each field in the document library.
Step 3: View documents on your WordPress website
Now it's time for the fun bit: seeing your WordPress document library for the first time.
When you installed the Document Library Pro plugin, it automatically created a main document library page for you. This page lists all your documents in a beautiful WordPress document directory on the front end of your website.
For step 3, you just need to make sure you're happy with everything and make any tweaks. You can also create more advanced structures and layouts if you want to:
- Go to the 'Pages' section of the WordPress admin.
- Find and view the page called 'Document Library'. Rename this to anything you like, such as 'Resource Directory'.
- You'll see all your documents listed - either as a single table or as a grid. They may be structured into folders. (This depends on whether you enabled the 'Folders' option on the document library plugin settings page.)

Keep tweaking until you're happy!
- When you've viewed the document library, go back to Settings → Documents in the WordPress admin. Tweak the settings until you're completely happy.
- Alternatively, you can create more advanced document libraries by using a shortcode. Use the shortcode options to list different documents on different parts of your WordPress site. You can also change other details such as the table columns and whether to display download buttons or file type icons. This is a great way to make your document library more varied, tailoring each table to the type of documents you're listing.
- If your document library contains links to a separate page for each document, then you should also check this and make any changes.
- Finally, go to Appearance → Menus and add a 'Document Library' link to your website navigation menu.
Now people can easily find your document library and find the documents they're interested in. Perfect!
Create a private WordPress document library
Now, I'll tell you how to create a private and hidden document library in WordPress. You can password protect your document library. You can also restrict it to specific groups of logged in users.
Option A - Password protected document library
You can hide your entire document library with the Password Protected Categories WordPress plugin. Alternatively, you can make certain documents private while leaving others public. You can even show different document preview to different people.
It works by password protecting one or more categories within your WordPress document library. Users must enter a correct password to unlock the category and view the private documents. Once they've unlocked a category, they can navigate within it. They won't need to re-enter the password for several days.
The benefit of this method is that you don't have to create a separate user account for everyone who accesses your document library. For example, let's say you're creating a private intranet for employees. There's no need for each person to have their own user account on your WordPress site. Instead, just give them a password. This unlocks the protected library without needing an individual login.
How to password protect the document library
- First, create the document library by following the instructions earlier in this tutorial.
- Next, get the Password Protected Categories plugin. Install it using the instructions in the Getting Started email.
- Go to Documents → Categories.
- Create 1 or more password protected categories for the WordPress document library. Some tips:
- If you want to create a completely private document library, create 1 password protected category. Put all your documents within it. If you want to add sub-categories, that's fine. Leave them set to 'Public' - they'll automatically be protected with the same password as the main document library category.
- If you just want to protect parts of your document library, that's fine too. Structure it into as many categories and sub-categories as you like. Some of these can be set to public and others password protected.
- Now go to the main Documents list in the WordPress admin and categorize your documents as needed. Documents in password protected categories will automatically be protected with the same password as the category.
- Finally, create a login page for your users by adding the shortcode
[category_login]to any page on your site. Or even better, add the shortcode to the top of your document library page. As soon as someone enters a correct password, the hidden documents will appear in the library!
Option B - Restrict your WordPress document library to specific users or roles
If you'd rather create a separate user account for each person who accesses your document library, then that's fine too. The Password Protected Categories plugin also lets you restrict document categories to specific user roles - or even individual logged in users.
Use this method if you:
- Want the most secure option.
- Are prepared to create a separate user account for each person who accesses the document library.
- Want to hide all your documents, just some of them, or show different documents to each user.
First, follow the above instructions to create a WordPress document library with Posts Table Pro. Once you're done, install Password Protected Categories and edit the document categories that you want to restrict. Choose the 'User' or 'Role' visibility options and choose who can see the documents.
Tips
- For more granular control, create multiple user roles and show different documents to different users. Your main document library page will automatically show the correct documents for each logged in user.
- If you don't already have a user-friendly login page, use a free front end login plugin such as Theme My Login or Profile Builder.
- Are you showing different documents to different people? If so, DO NOT tick the 'Caching' option on the document library plugin settings page. This will ensure that each user sees the correct documents rather than a cached version of the library.
Organized document library made easy
After your WordPress document library goes live, you can sit back and relax knowing that people can easily access your documents. However, at some point, you'll need to add more documents or edit existing ones. Luckily, the Document Library Pro plugin makes ongoing document management easy for you.
You can easily view all documents in the 'Documents' section of the WordPress admin. Use this to find and filter documents before making changes.
Top tips on managing your document library
- See downloadable files in the Media Library - You can also view the files which are attached to your documents. Just go to the 'Media' section of the WP admin and select 'Documents' from the 'All types' dropdown list.
- Updating documents - When you need to replace a file, you can simply upload documents to a new one directly on the 'Edit Document' page. Or to avoid duplication, install the free Enable Media Replace WordPress plugin. This lets you overwrite old versions when you upload a new one, without changing the URL.
- Display the version number and modified date - Your users might need to see which version of a document they're downloading. There are a few ways to do this:
- Add the current version number to the document name, and keep it up to date. This appears in the 'title' column of the WordPress document library.
- Display a 'date_modified' column in the document library WordPress. This will show the date when you last saved the document on the 'Edit Document' page.
- You can also add a version number column to the document library WordPress. If there are any standard fields that you're not using (e.g. the excerpt) then you can use this and rename it to 'Version Number'. Alternatively, create a custom field for this purpose and display it in the document library.
- Update your categories and tags - It's easy for a document library WordPress to get cluttered over time. Keep it organized by regularly updating the structure so that it reflects your current document database.
Can users edit documents from the front end?
If you want colleagues to be able to edit documents from the front end, then you can use Document Library Pro with the WP Sheet Editor plugin.
The WordPress document library plugin adds 'Edit' buttons above or below your document library, which only appear for certain user roles. Users can click these to open an editable spreadsheet-style table with all the document data.
Read our separate tutorial on how to set this up.
Bonus tips on perfecting your WordPress document library
By now, you've learned how to create a professional document library. You've also learned how to handle keep it organized over time.
Before we finish, I will share some tips on extra functionality for your WordPress document library. You'll learn how to add extra data about your documents, track downloads, and more.
Mix and match these bonus features. They're the perfect way to tailor the document directory to your exact requirements:
- Add extra fields to your documents
- Add front-end document submission
- Track the number of downloads
- Sell documents
Add extra fields to the WordPress document library
The WordPress document library plugin comes with all the standard fields you're likely to need. It even automatically generates extra fields such as the file size and file type.
If you want to display extra information about your documents then you can add extra fields to the document library. For example, you might want to show the publication date or publisher. Maybe you want to display a unique document reference code or version number.
You can store all this extra information in custom fields and taxonomies.
First, decide whether to store the extra data as a custom field or taxonomy:
- Custom fieldsUse these to store unique data about each item in your WordPress document library. For example, if you're using your document library to store internal publications, each one might have a unique document number. You would store the document numbers as a custom field.
- Custom taxonomiesTaxonomies are an opportunity to sort and organize data. Use these to store information that will apply to multiple documents in your library. For example, you might want people to be able to filter the document library to view documents from the year 2021. To do this, you would create a taxonomy called 'Year' and assign each document to the appropriate year.
The free Easy Post Types and Fields plugins let you add custom fields and taxonomies to the 'Documents' post type. These will appear on the 'Add/Edit Document' screen in WordPress, where you can add all the extra data for each document.
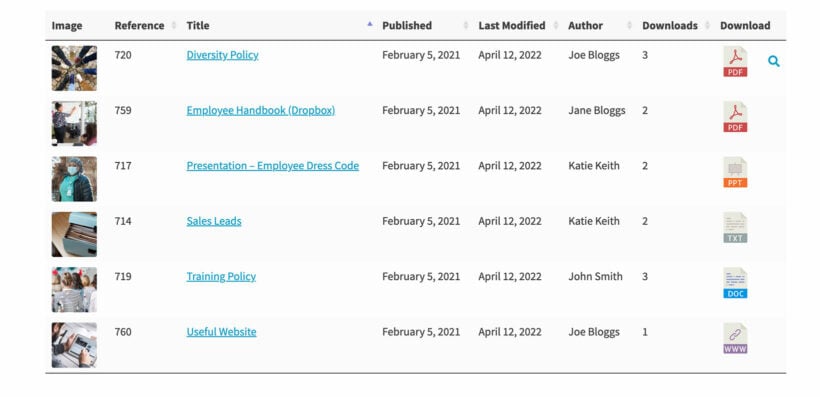
Display your extra document fields
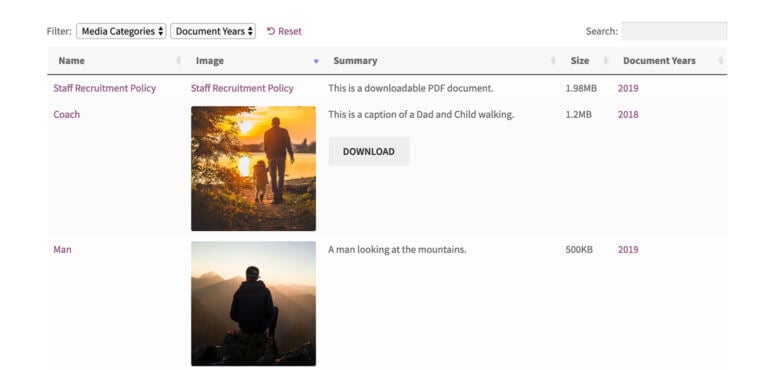
Once you've added your custom fields and taxonomies, you can start displaying them in your document library:
- Go to the WordPress document library plugin settings page (Document Library Pro → Settings).
- Extend the list of columns in the 'Columns' option to include your custom fields and taxonomies:
- Custom field column - add
cf:followed by the custom field name (e.g.cf:size) - Custom taxonomy column - add
tax:followed by the custom taxonomy slug (e.g.tax:year)
- Custom field column - add
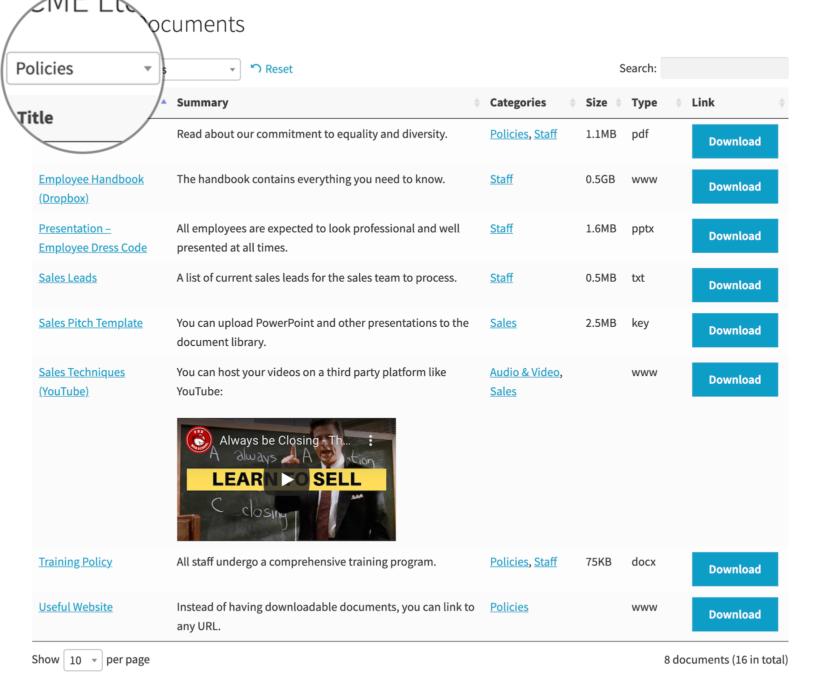
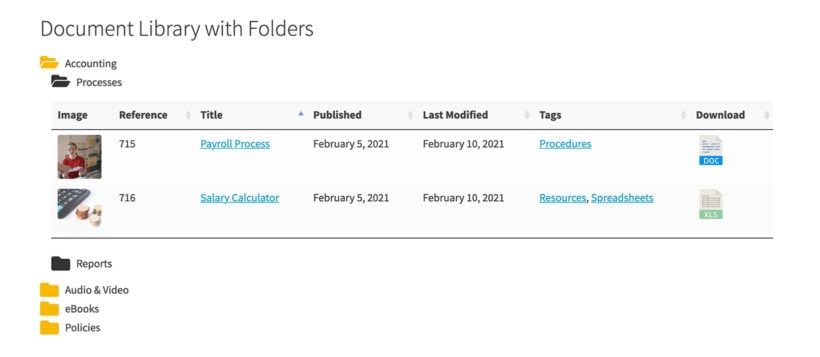
For example, your list of columns might be: title,excerpt,cf:size,tax:document_year
This will create a WP document library like the screenshot above.
Can users submit documents to the document library?
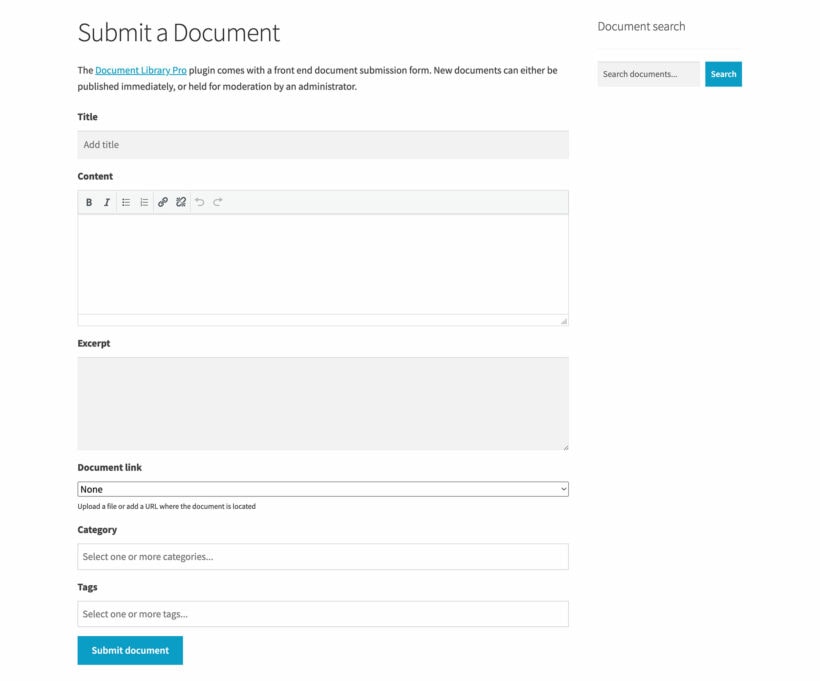
A lot of websites list documents that users have submitted themselves. For example, you might allow your users to submit resources which are then shared with the entire community. Or perhaps you want an easier way for employees to add documents to the library without accessing the WordPress admin.
The WordPress document library plugin comes with a front end document upload form. To use this, simply add [dlp_submission_form] anywhere on your site.
You can put the document upload form on a public or private page on your website. When new documents are submitted, you can either publish them immediately or hold them for moderation first.
Here's a video about how to add front end submission to your WordPress document library:
How to track document downloads
The Document Library Pro plugin has a Download Count column which you can include in the document library. This displays the number of times the document has been downloaded.
For more advanced tracking, you can also use Google Analytics to collect more advanced data about how people are using the WordPress document library. Moz have published an excellent tutorial on How to Track PDF Traffic and Links in Google Analytics. Use this as a starting point to track whichever types of links you're adding to your document library.
How to sell documents
So far, I've assumed that you want to provide free access to your WordPress document library. But what if you want to sell printed or digital documents online? Fortunately, you can do that too.
The easiest way to create an e-commerce document library is to use our other plugin WooCommerce Product Table, instead of Document Library Pro. The instructions for selling documents in this way are similar to the document library tutorial in the previous sections. The main differences are:
- Add each document as a WooCommerce product. This is instead of having a 'Documents' post type for storing documents or displaying files from the media library. In WooCommerce, choose the 'Downloadable' product type and upload the file that people will receive after purchasing the document. You can also add other information such as the price.
- WooCommerce Product Table has a different shortcode for listing your document products. You can read about all the options in this article.
Your WordPress document library will look similar to the other screenshots in this article. The difference is that they will actually be e-commerce products available for sale, with add-to-cart instead of download buttons.
Alternatively, you can use Posts Table Pro with other WordPress e-commerce plugins such as Easy Digital Downloads. Check out our separate tutorial on how to use Posts Table Pro to list products (including documents) with Easy Digital Downloads.
See a document library in action - RJ Lee Group publications library
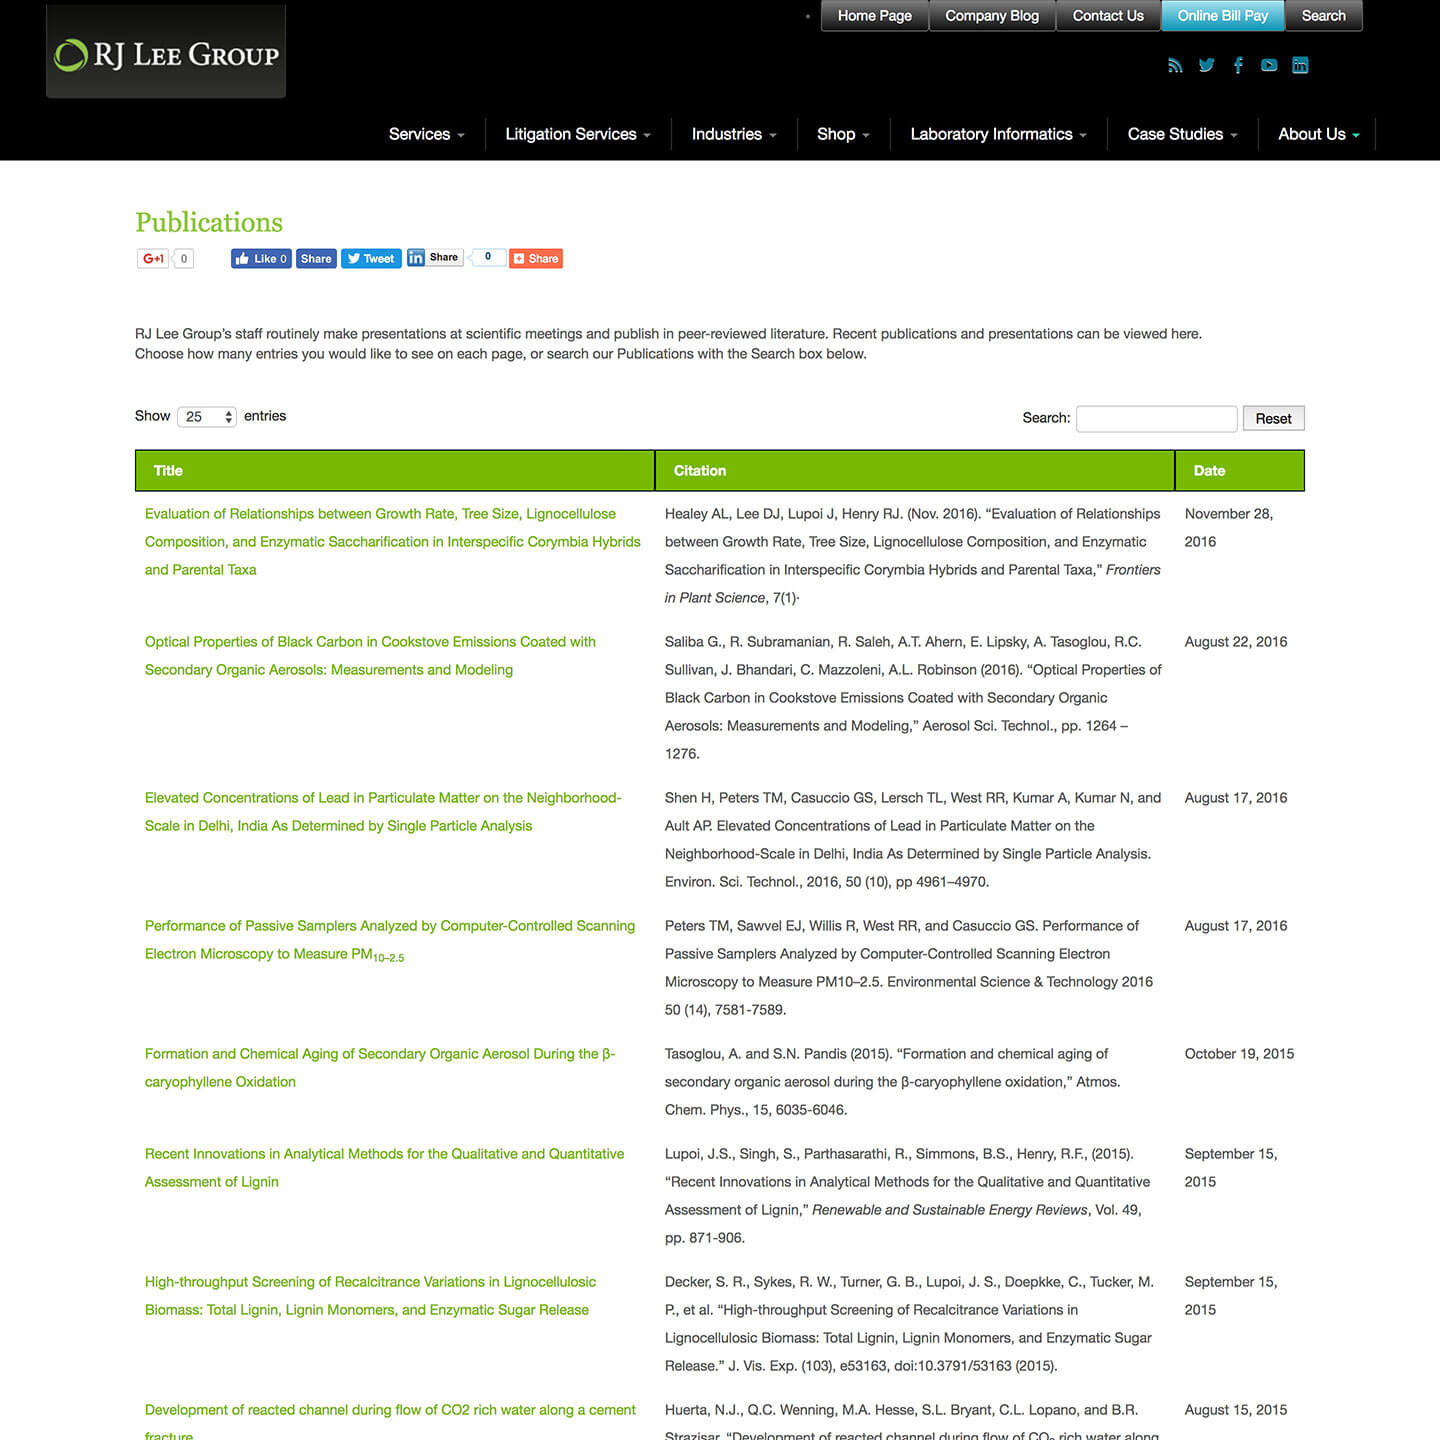
RJ Lee Group is an industrial forensics analytical laboratory and scientific consulting firm. Their staff makes regular presentations and the public in peer-reviewed journals, so they wanted a publications resource library on their website showcasing the firm's work.
With over 300 publications, they needed a user-friendly and easy-to-search library.
They used Document Library Pro to create a publications library listing their articles. The table displays 25 publications per page with pagination allowing users to view older documents. It includes columns for publication title, citation, and date.
You can sort the document library by clicking on any column. The AJAX-powered document search box above the library lets you further navigate the publications in the list.
You can also test drive a document library in action on the WordPress document library plugin demo.
It's time to set up the WordPress document library plugin
Now you know how to create a fully functional document library for your WordPress site!
Document Library Pro is the ultimate solution for adding a searchable library of any type of file or resource to WordPress. It comes with everything to streamline your document-handling process:
- 100% flexible.
- Quick 5-minute setup.
- Create unlimited document libraries.
- Ideal for non-technical website owners and developers.
- 30-day money-back guarantee - try it risk-free!
I hope you enjoy creating your document directory with the best WordPress document library plugin! Let me know how you get on in the comments below.
50 Comments
Hello, I am looking for a WordPress plugin that creates a viewing-only library (no downloading, no printing) of documents. Does your plugin provide a way of allowing users to view the full document only, and not be able to download or print? For instance to read a pdf or watch a video, but not be able to download it.
Thanks for your answer
Robin
Hi Robin, Thank you for your interest our plugin. The Document Library Pro doesn't have the option to make documents view-only but I'm glad that you mentioned it. While we don’t have any immediate plans to implement this, a few other people have previously requested this feature and we’re tracking the amount of demand to help us decide whether to prioritize it in the future. I have added your ‘vote’ to our feature request list, and we will let you know if we add this to a future version of the plugin.
In the meantime, you can host your documents externally in file sharing apps like Google Drive or Dropbox where you can prevent downloads/printing through the settings page and use the Document Library Pro to display them on your website. I hope this helps. We can talk more about it via our dedicated Support Center
I am trying to find a plugin that will allow registered users the ability to upload files (videos, documents, recipes, family trees, etc) to a third-party cloud service (OneDrive, Google cloud, dropbox, etc.) Will this plugin provide that ability?
Hi, Bradley! Thanks for your interest in our plugins. You can add a gravity form on your site where users can submit documents that they have already uploaded to a third-party cloud service. You can add an address/URL field in the form that is mapped to the Document Link - Custom URL field in our Document Library Plugin as described in our knowledgebase article: Add documents manually . You can also enable moderation for all submissions for review and approval of an admin. Lastly, if you'd like to control the visibility of the front-end Gravity Form to only registered users, you can use a plugin called Advanced Access Manager . Please let me know if you have any more questions. You can also enquire in more detail via our dedicated Support Cente